Building out a Pyxis
Some minor tips and tricks from my B-CAM (Blackmagic Design Pyxis) buildout - relatively more restrained than the A-CAM buildout.
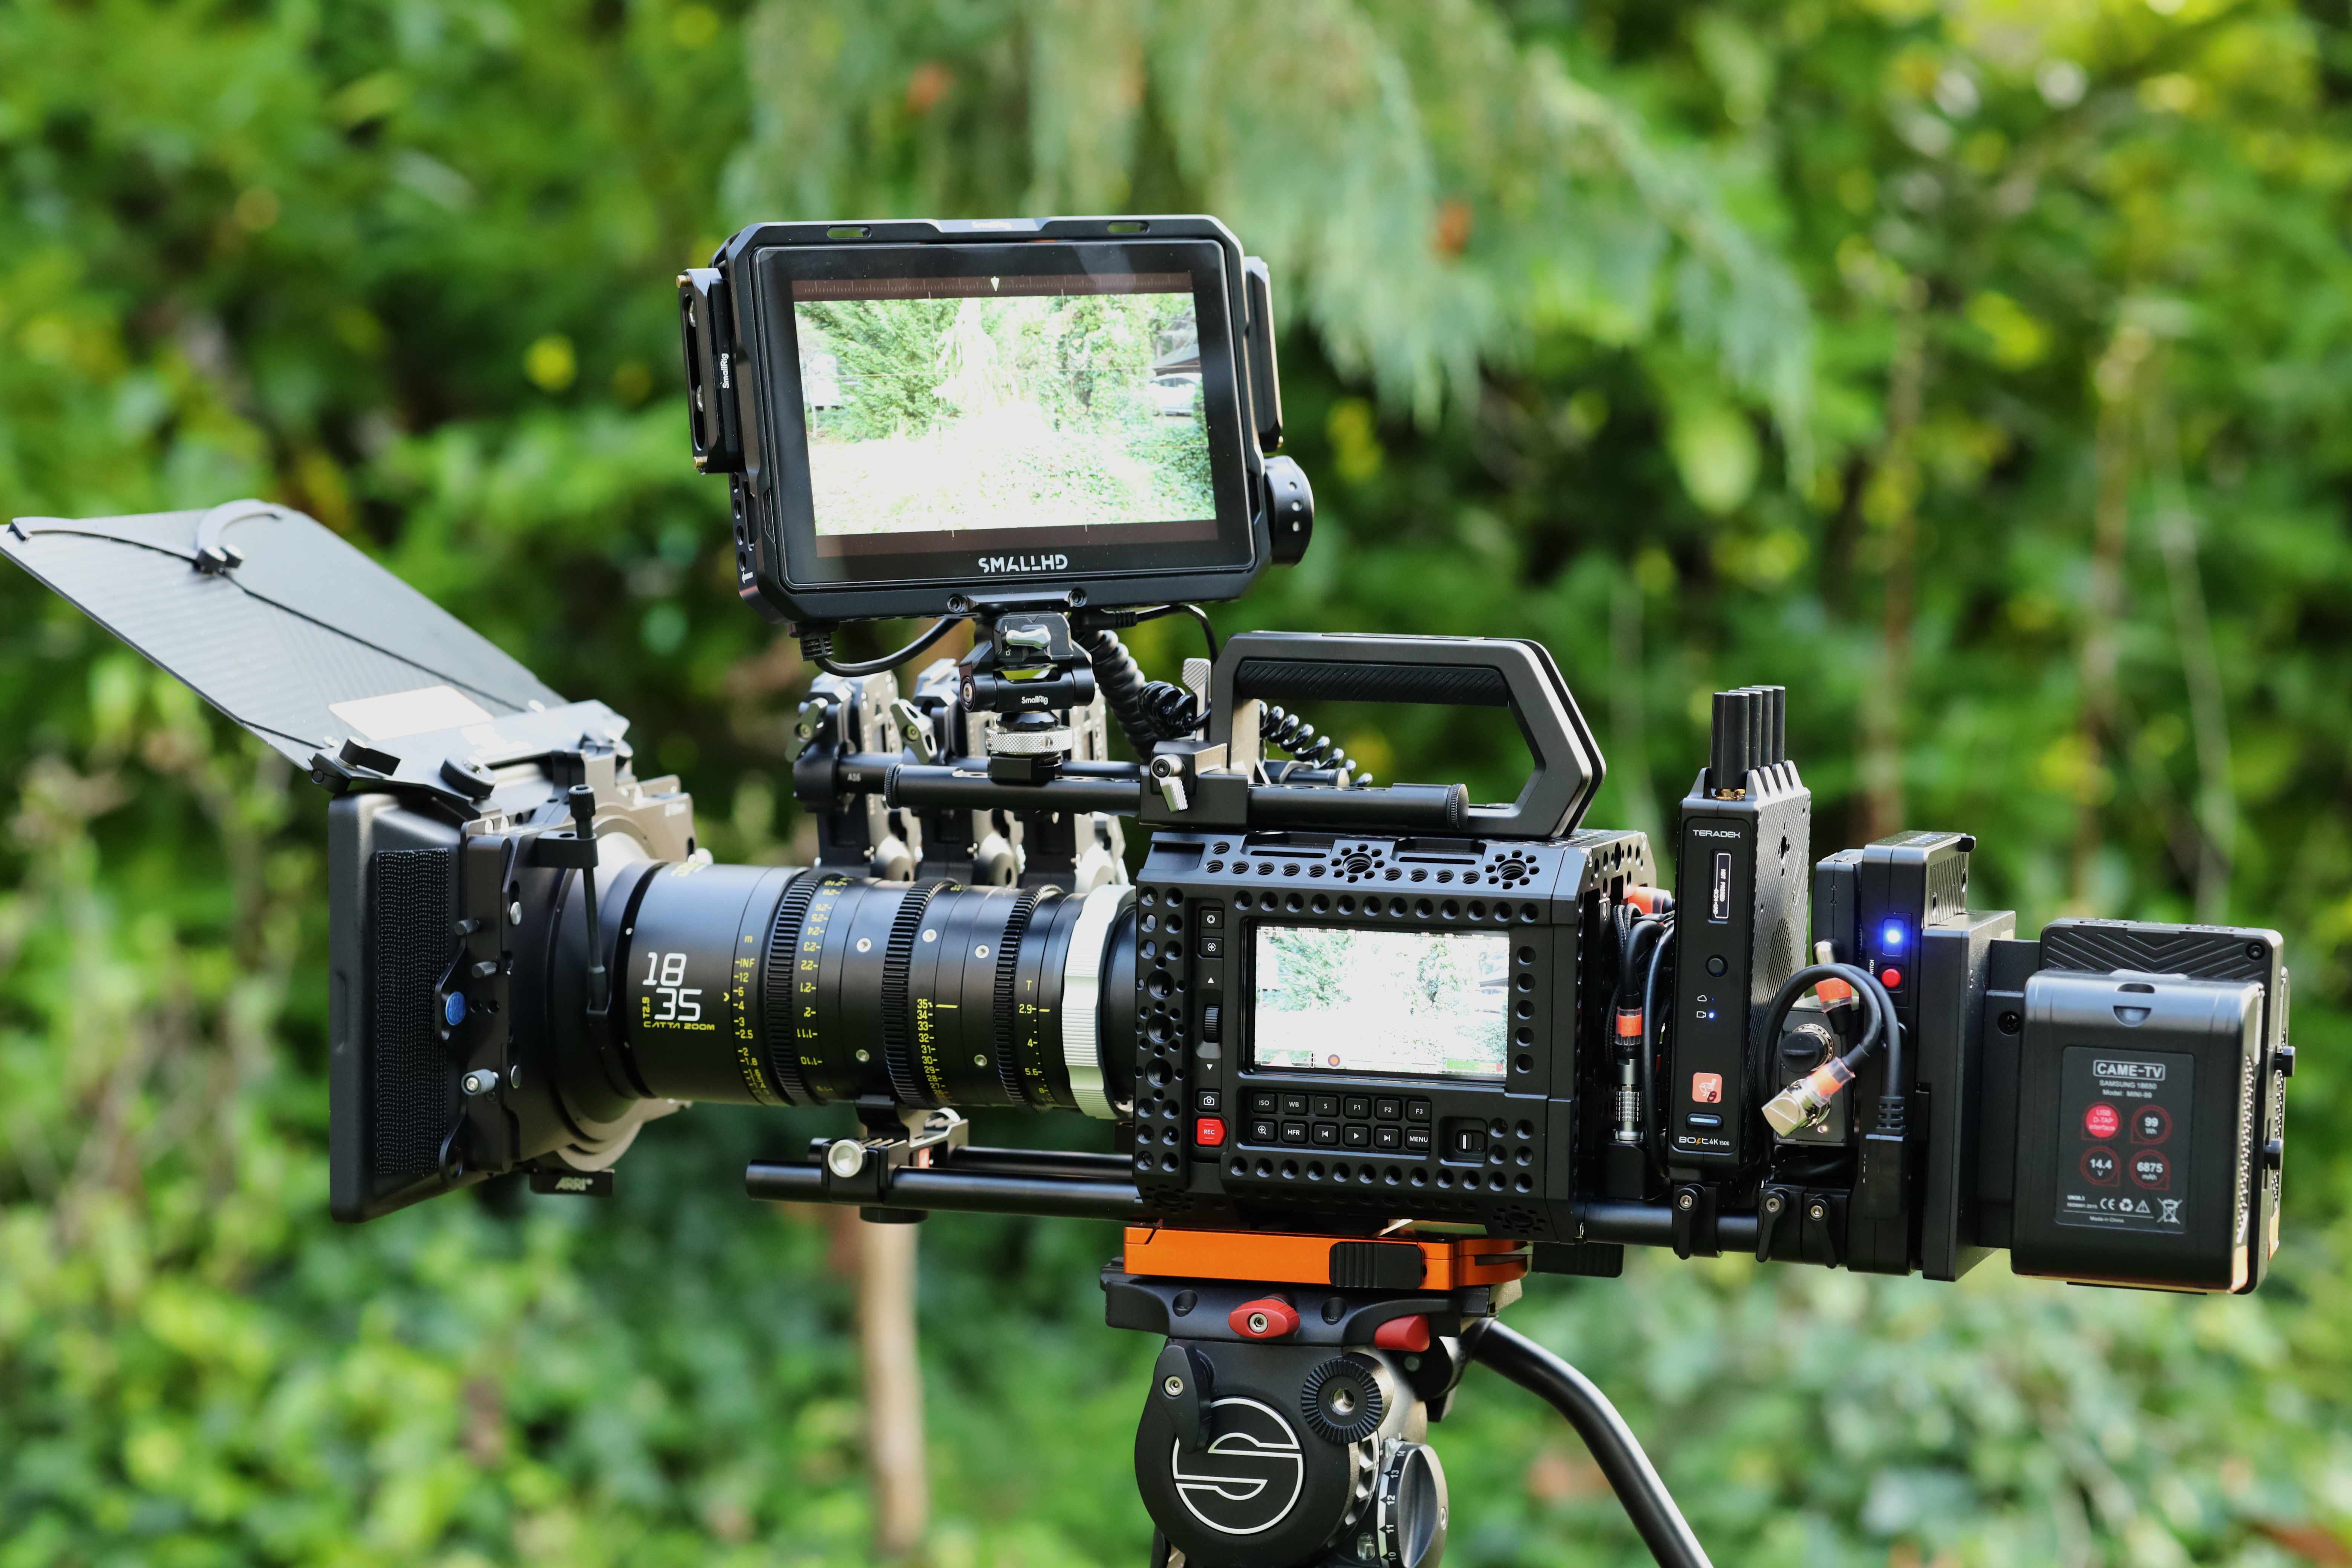

The Ursa Cine top handle is just fantastic and matches up with the Pyxis and its XCLS cage perfectly. I'm experimenting with a cheese rod so I can mount my monitor mount to it directly ("yo dawg" etc.).
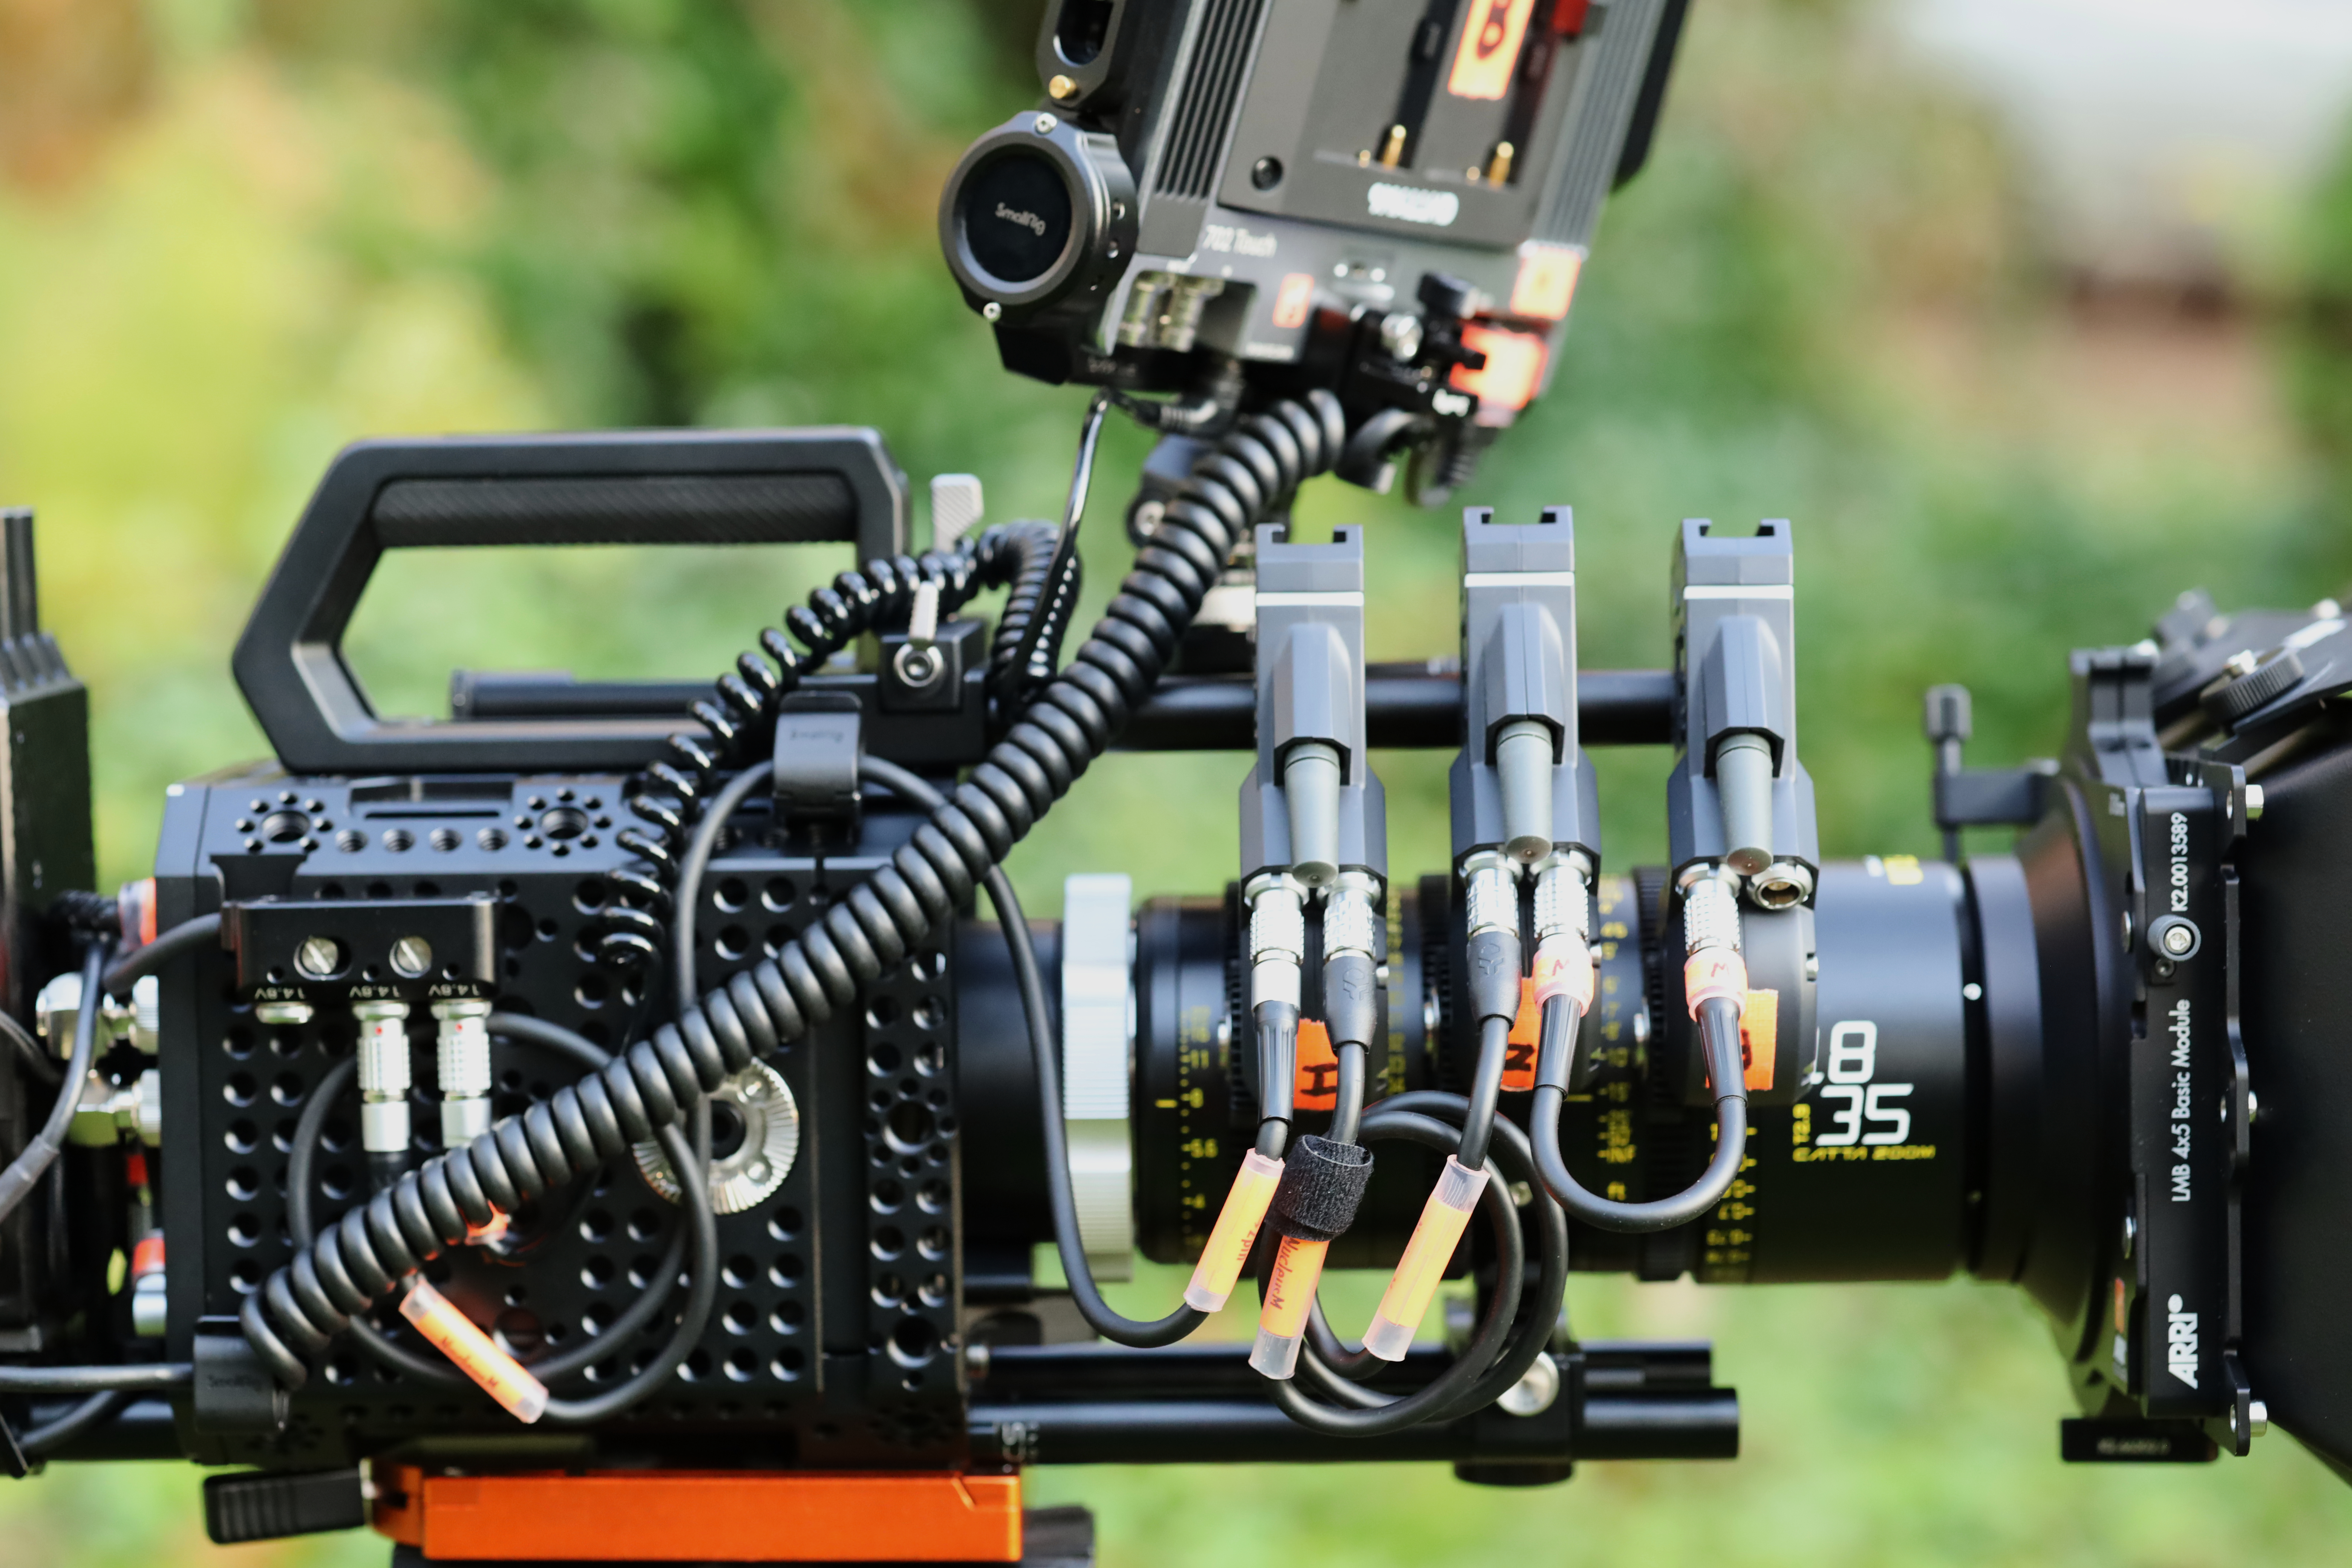
Top rods are a great place FIZ motors, keeping them out of the way of any lens supports on the bottom rails.
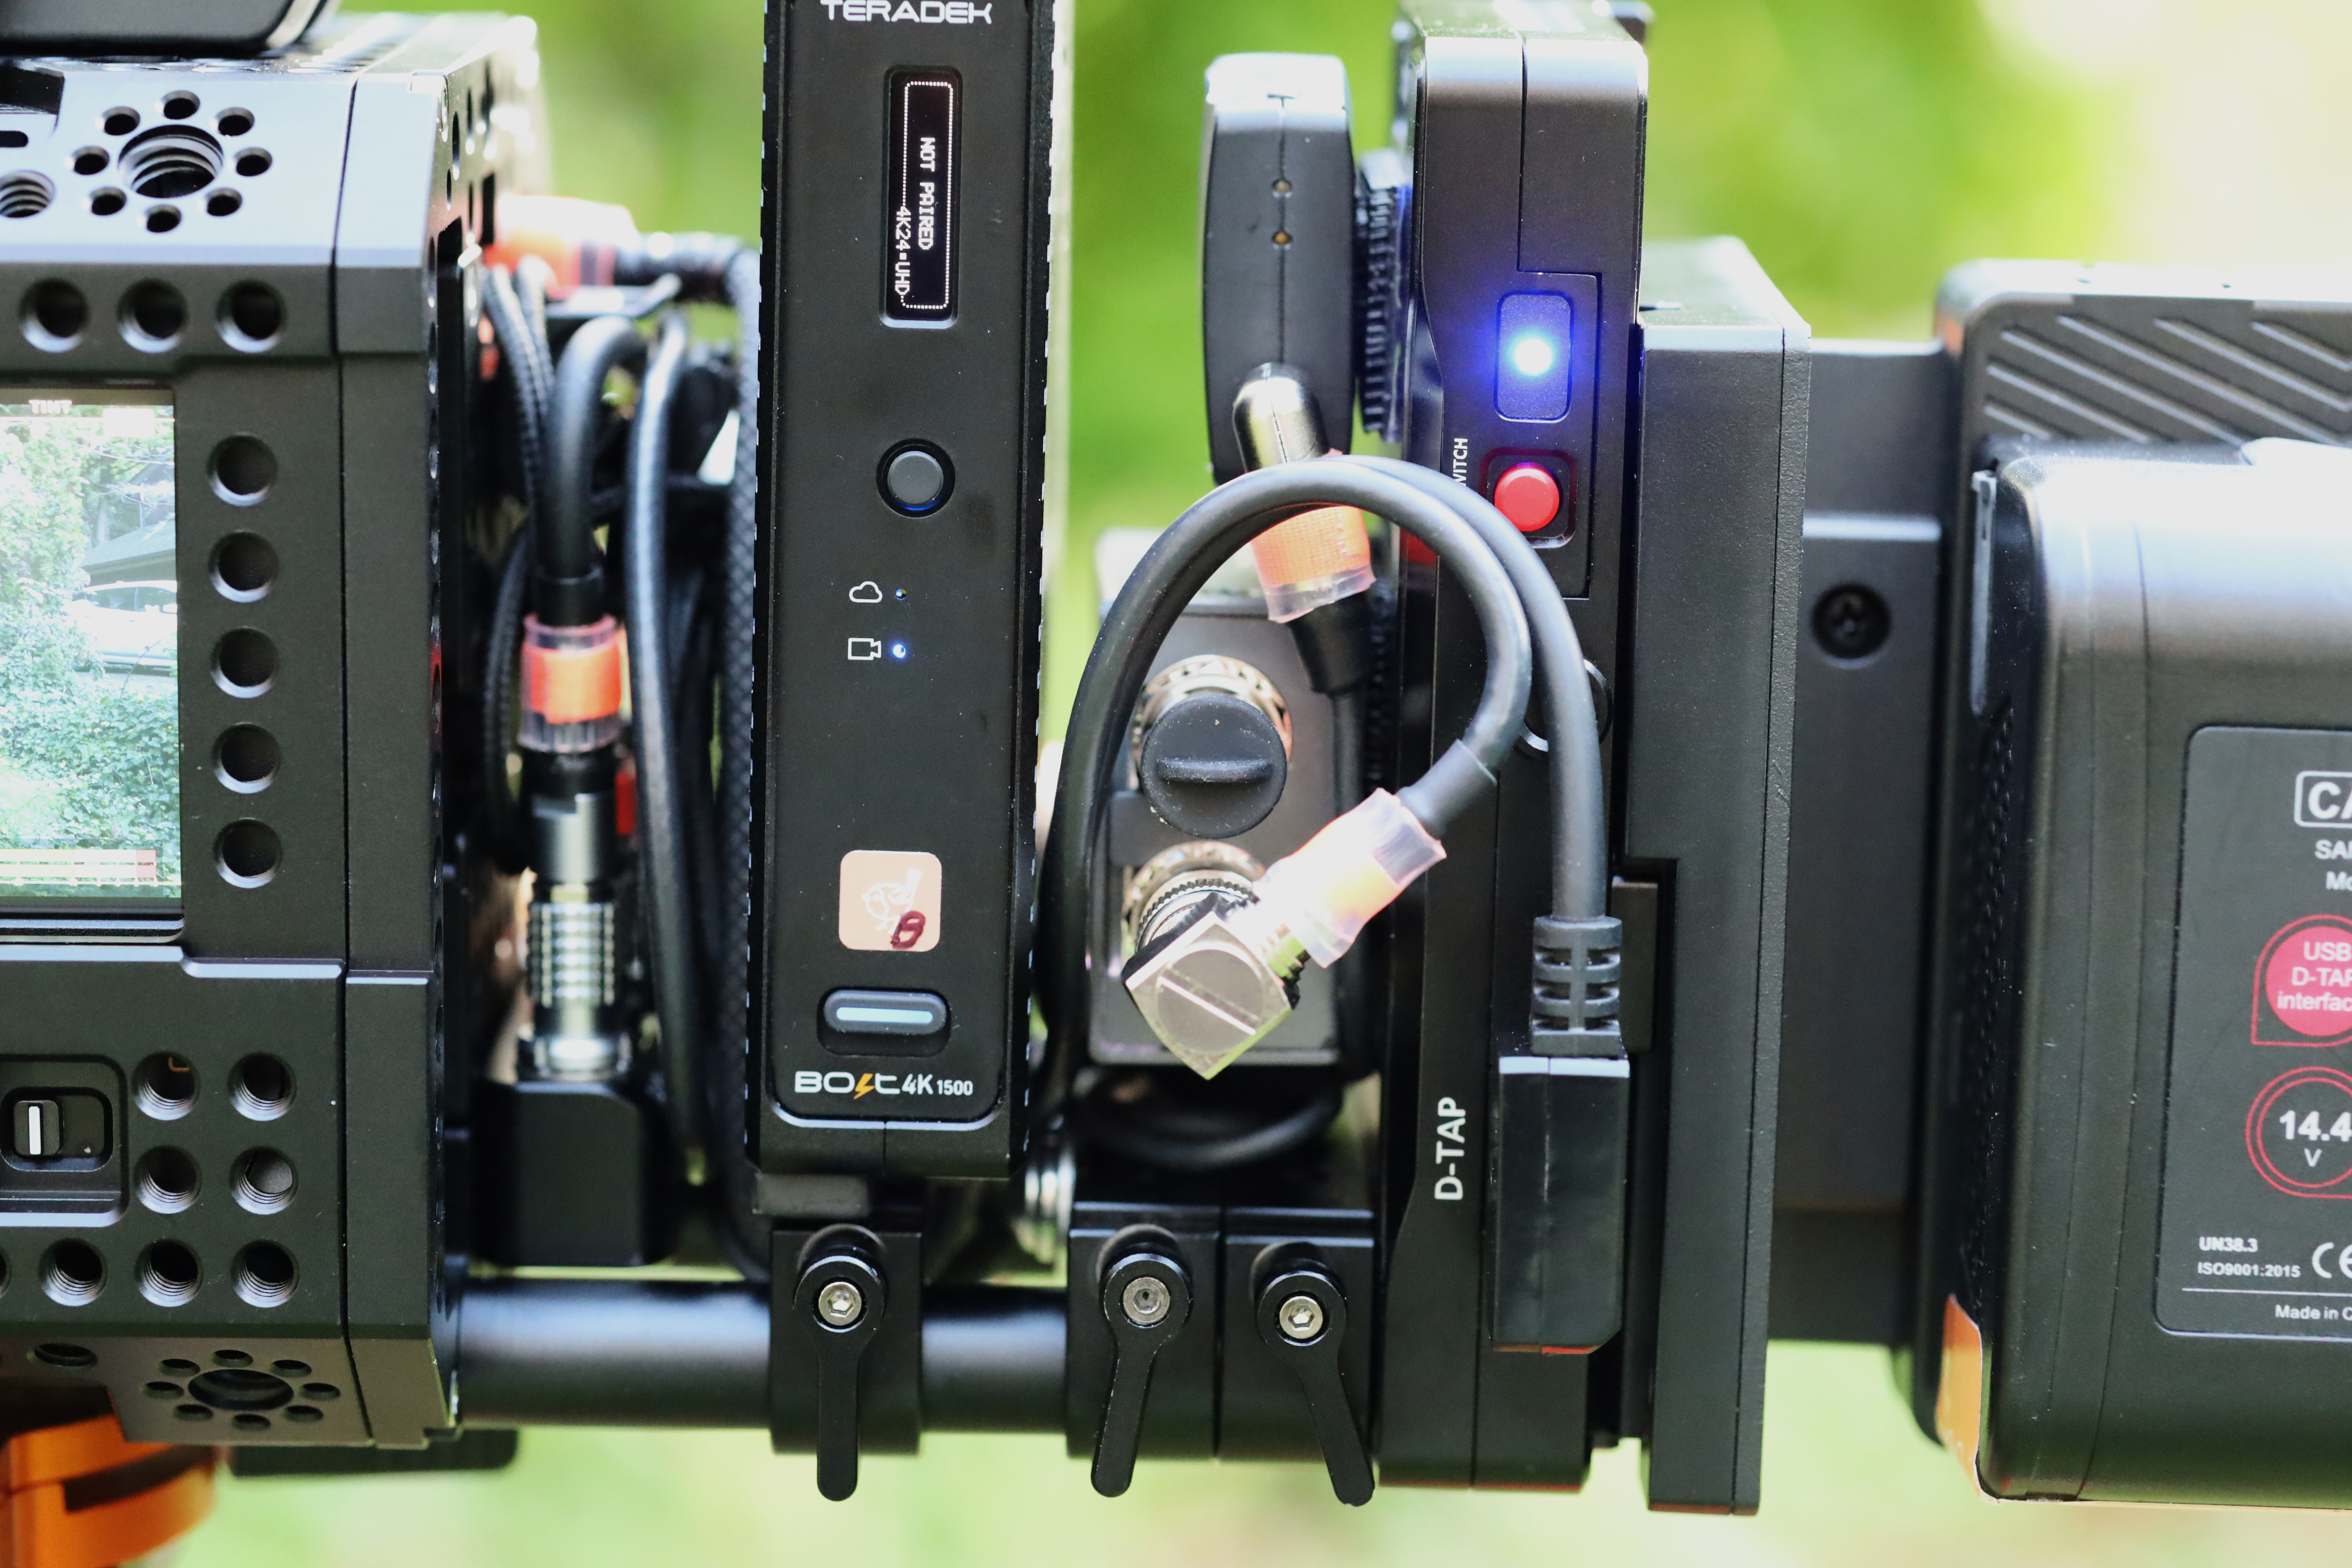
The gak in the back consists of:
- My custom five-way 2-pin Lemo power distribution, screwed into the back of the XLCS cage
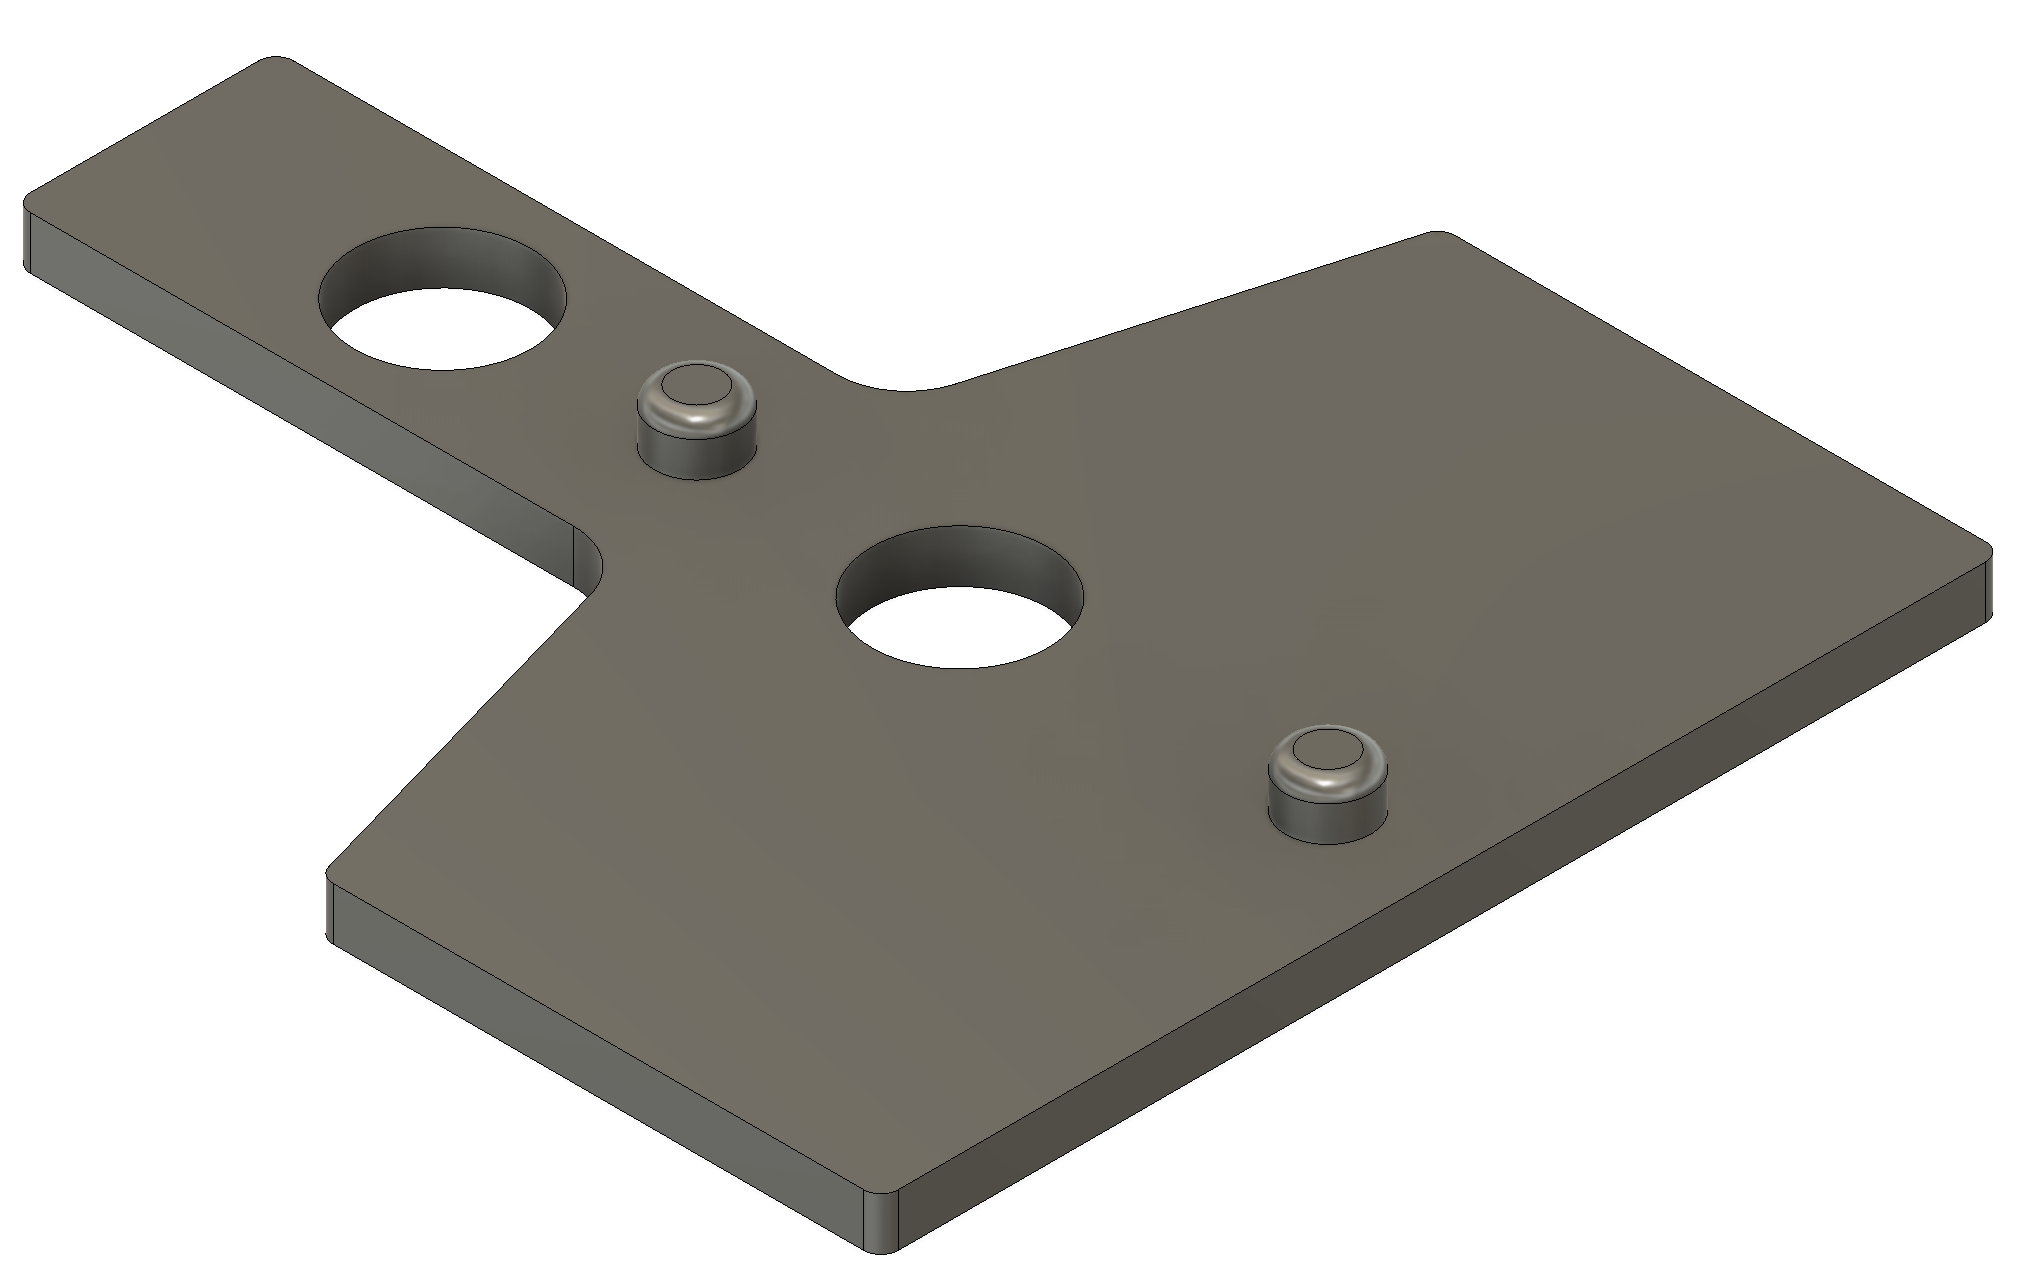
- A Teradek (this one with a custom aluminum plate I milled to adapt its whackadoo bottom hole pattern to a standard 15mm rail block)
- A Blackmagic 12G-SDI to 4K-HDMI converter (downstream of the Teradek, for the SmallHD 702 monitor, powered by the camera's rear USB)
- A Tentacle Sync timecode box
- A SmallRig V-mount battery plate (plus Shark Fin plus batteries)
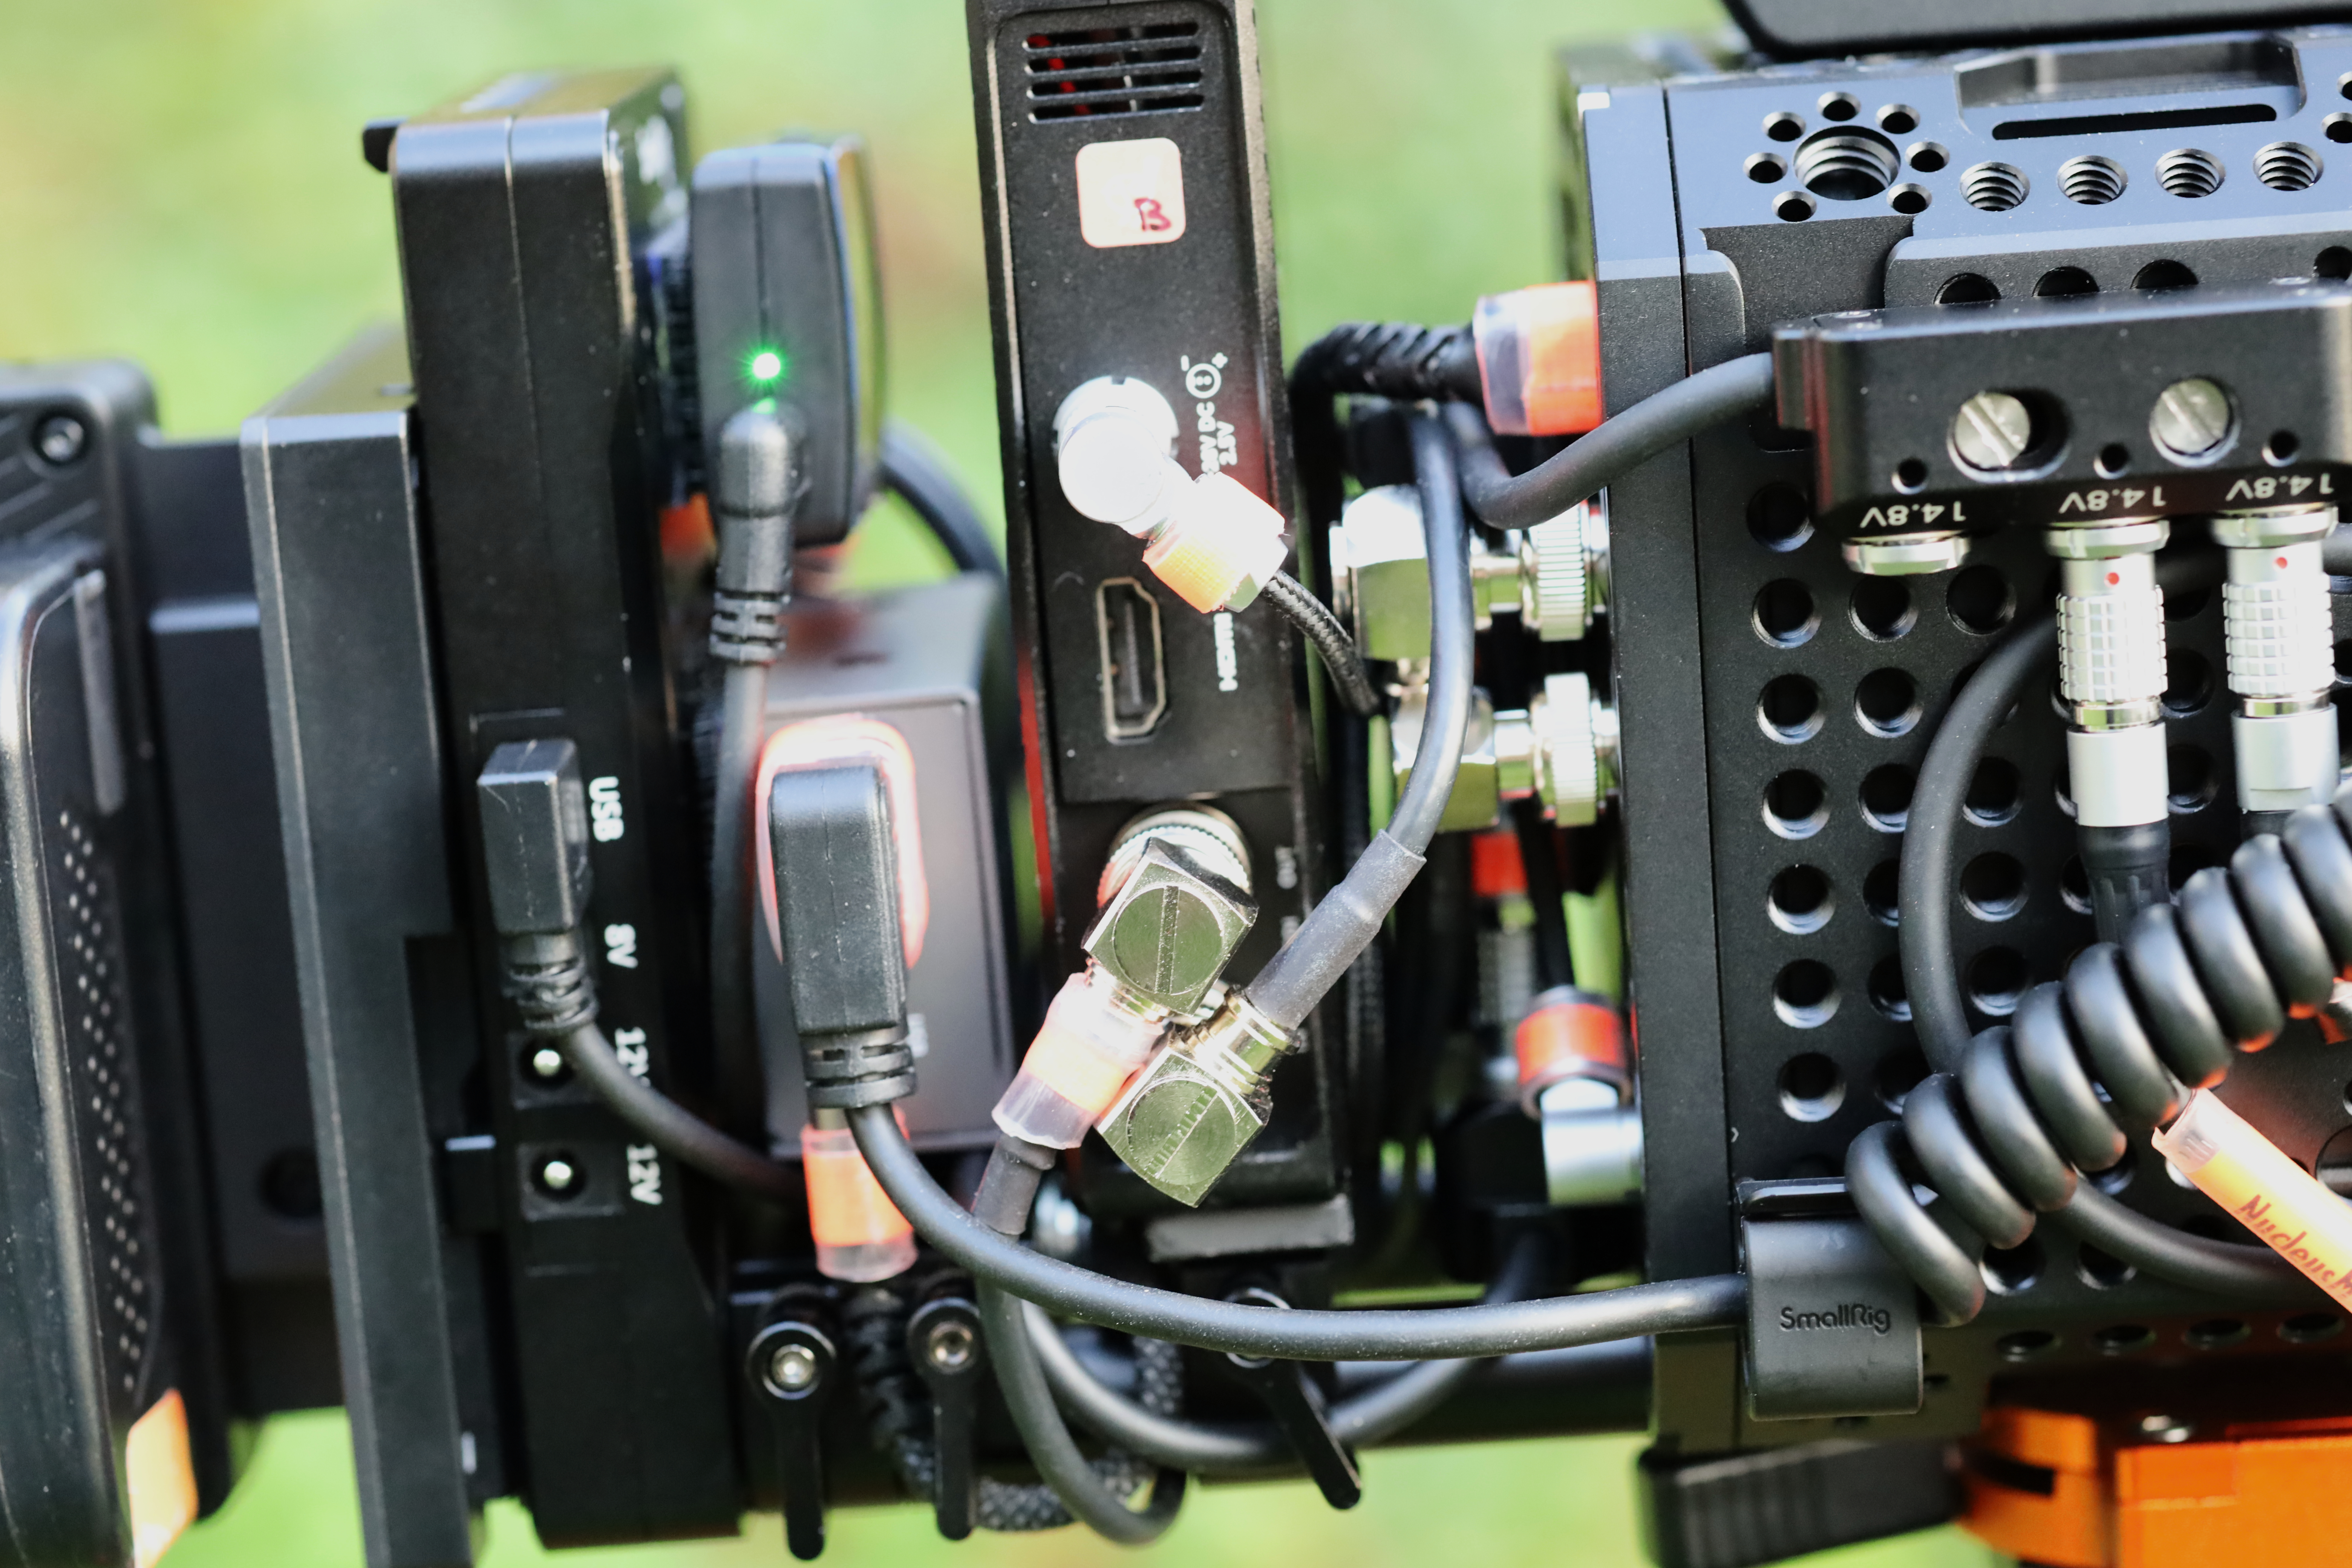
I routed an additional three-way 2-pin Lemo distributor from Alvin's Cables to the side, for the FIZ system and monitor.
However. Just when I thought I was done 3D-printing for the Ursa Cine, I discovered that the rods on the XLCS cage are set down so much that they interfere with my MiniQRB plate's mechanism.
I fixed this with a little 3mm spacer plate between the MiniQRB plate and the cage.
Feel free to grab the STL file or the original Fusion360 f3d and run your own. Note that I print these with black carbon fiber PETG and that holds up pretty well.