Building out an Ursa Cine
| « Building out a Pyxis | Welcome to Phinneywood » |
I ran into some issues and, uh, opportunities building out my new Blackmagic Ursa Cine A-CAM so here's some documentation on how I made it work for me.
Note: This is not a camera review. If you do want one, check out CineD's lab test, which can be cherry-picked as "better results (using RAW) than the ARRI Alexa Mini LF". Lovely.
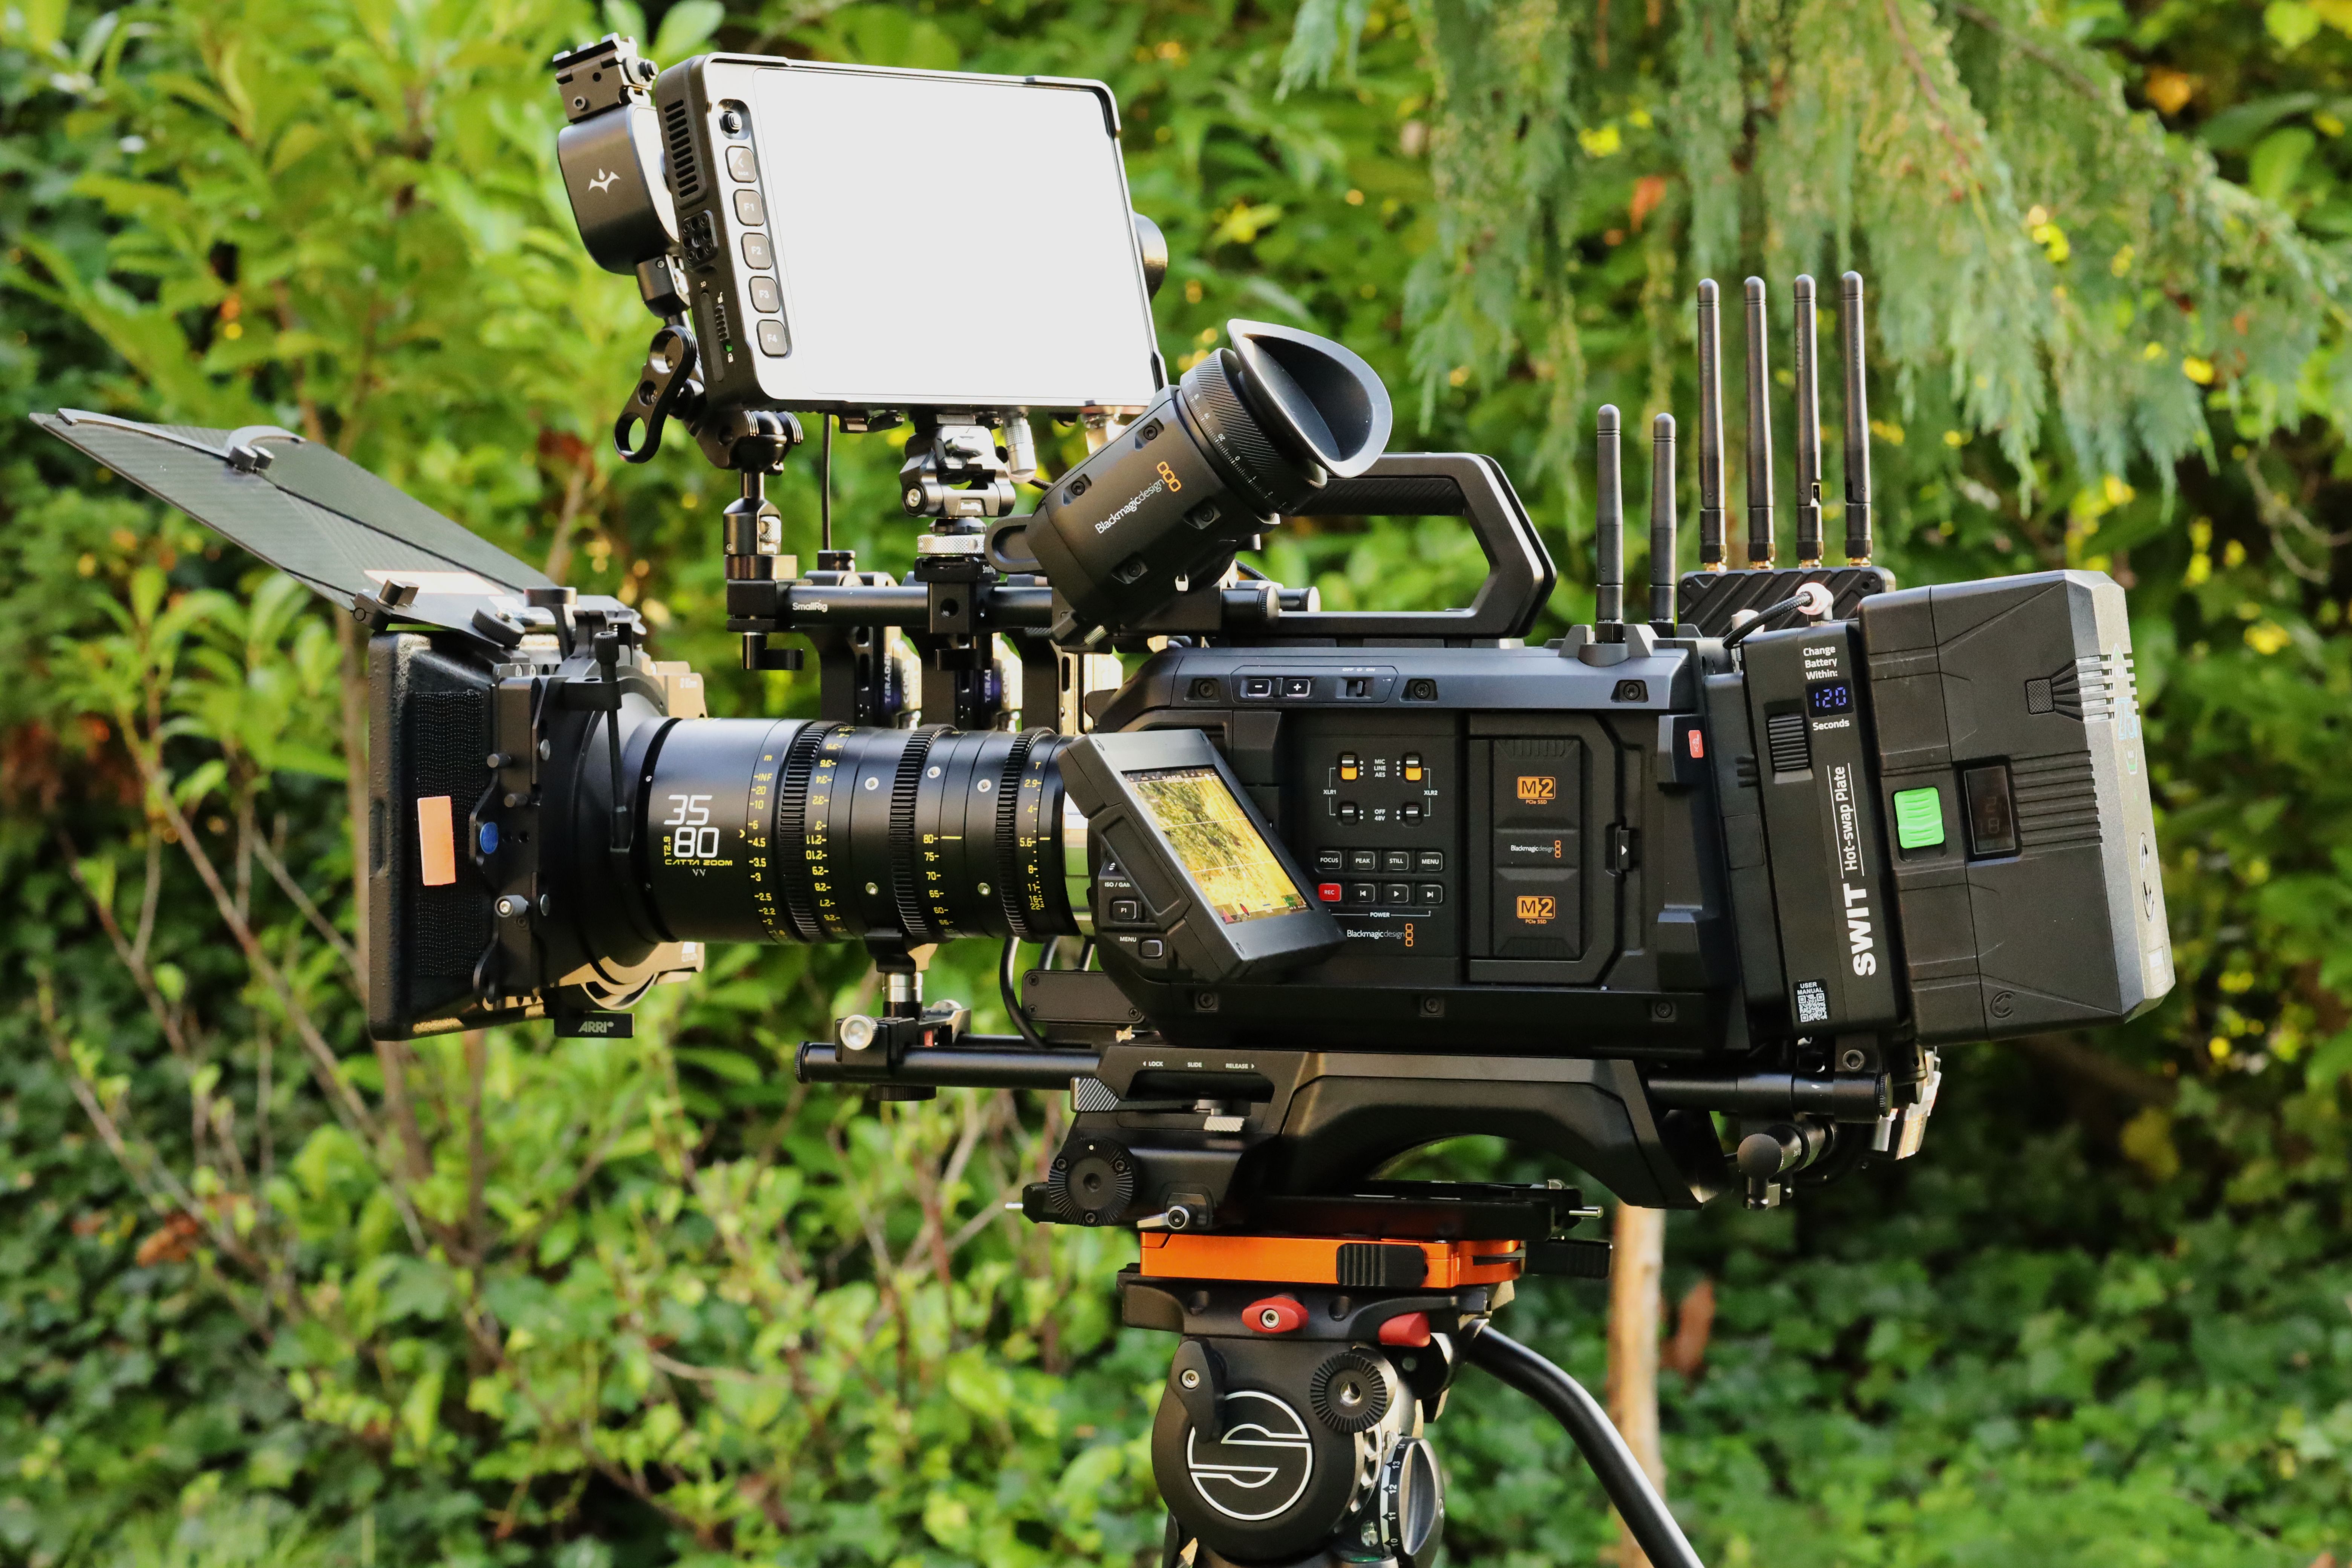
Three (and a half) screens on the operator side:
- The fold-out screen on the operator side: the most convenient way of interacting with the camera's UI. (And screen number 1.5: the small screen on the back of the fold-out.)
- The EVF: great for shoulder-mount use (both as a viewfinder and as a third point of contact). I can adjust it pretty well for the particular correction my right eye needs at this point in my life.
- The Ultra7: You can pry EL Zones from my cold dead hands so here goes a SmallHD monitor largely just for that. Also, if/when I'm solo-operating without a focus puller, this lets me see zoomed-in and full screen versions of the image at the same time.
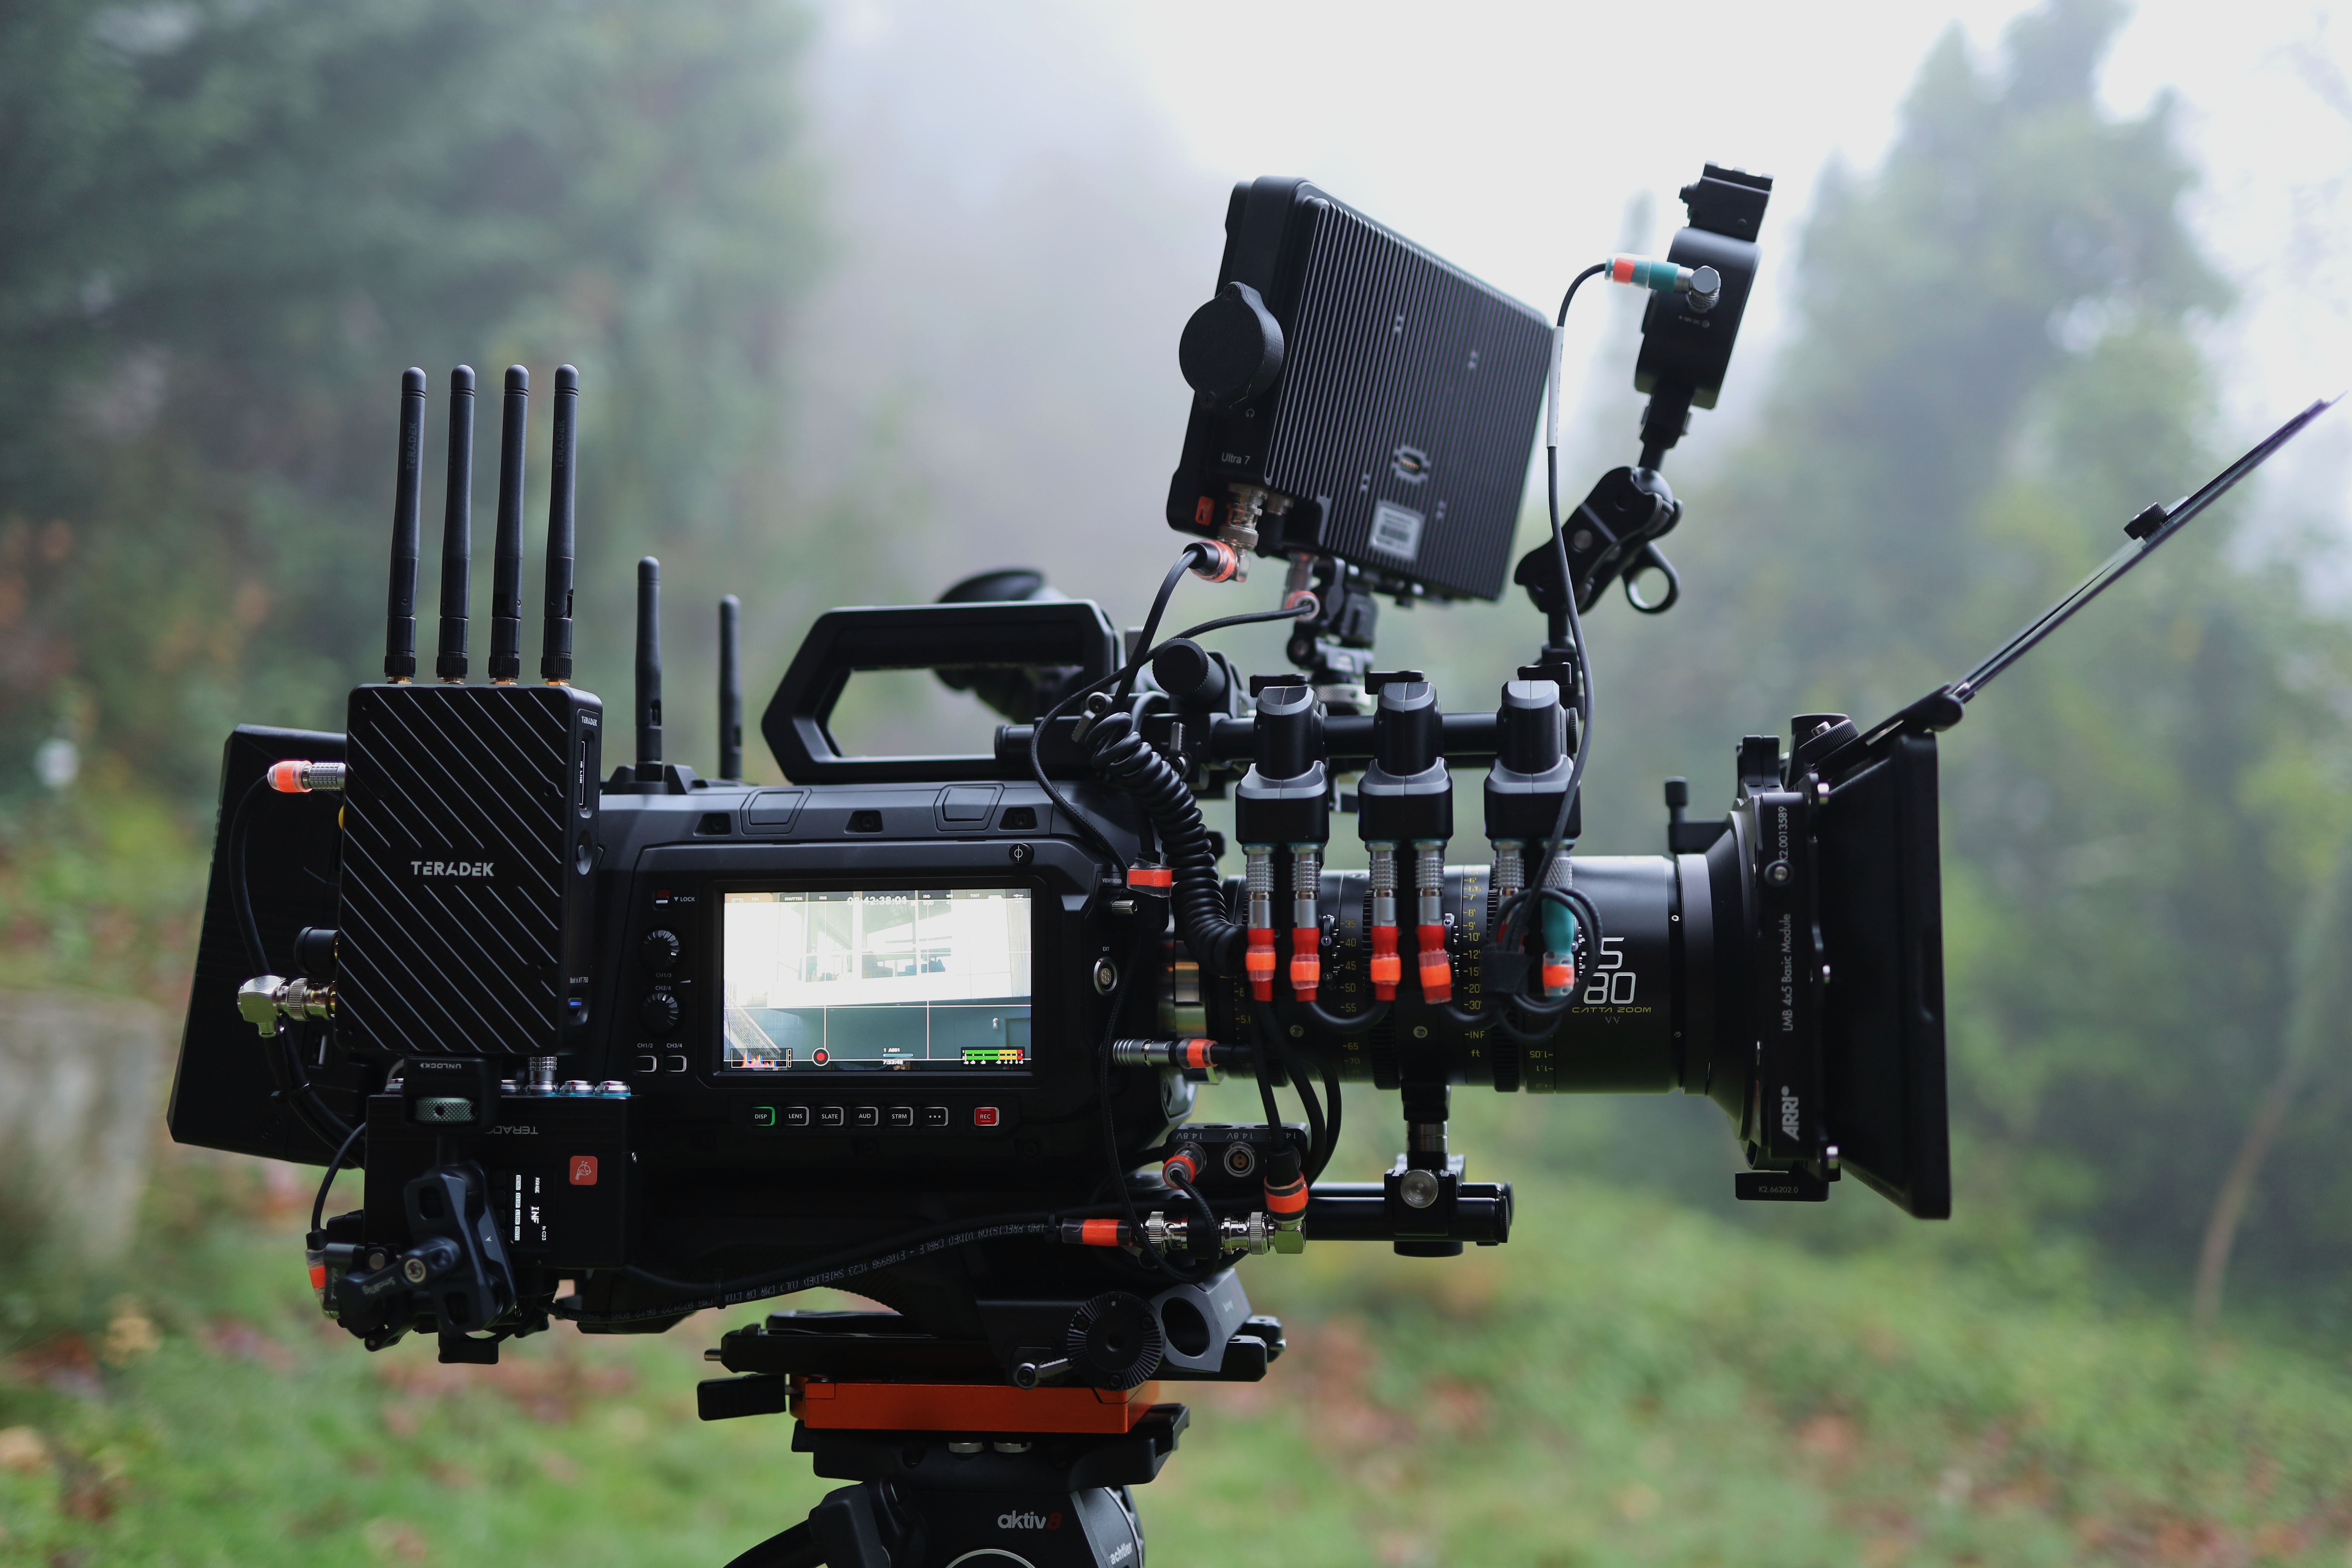
On the assistant side:
- The 1st AC screen, pretty much identical in function to the fold-out screen on the operator side.
Not only are the left- and right-side screens identical to one another, they're also the same as the Pyxis's screen as well as the Pyxis monitor. Clearly, Blackmagic went to Costco™ and bought a few too many screens.
Unrelated nit: yes, the range finder is somewhat blocked by the top flag on the matte box. It's easy to either remove the top flag or mount the range finder's magic arm on top of the matte box itself.
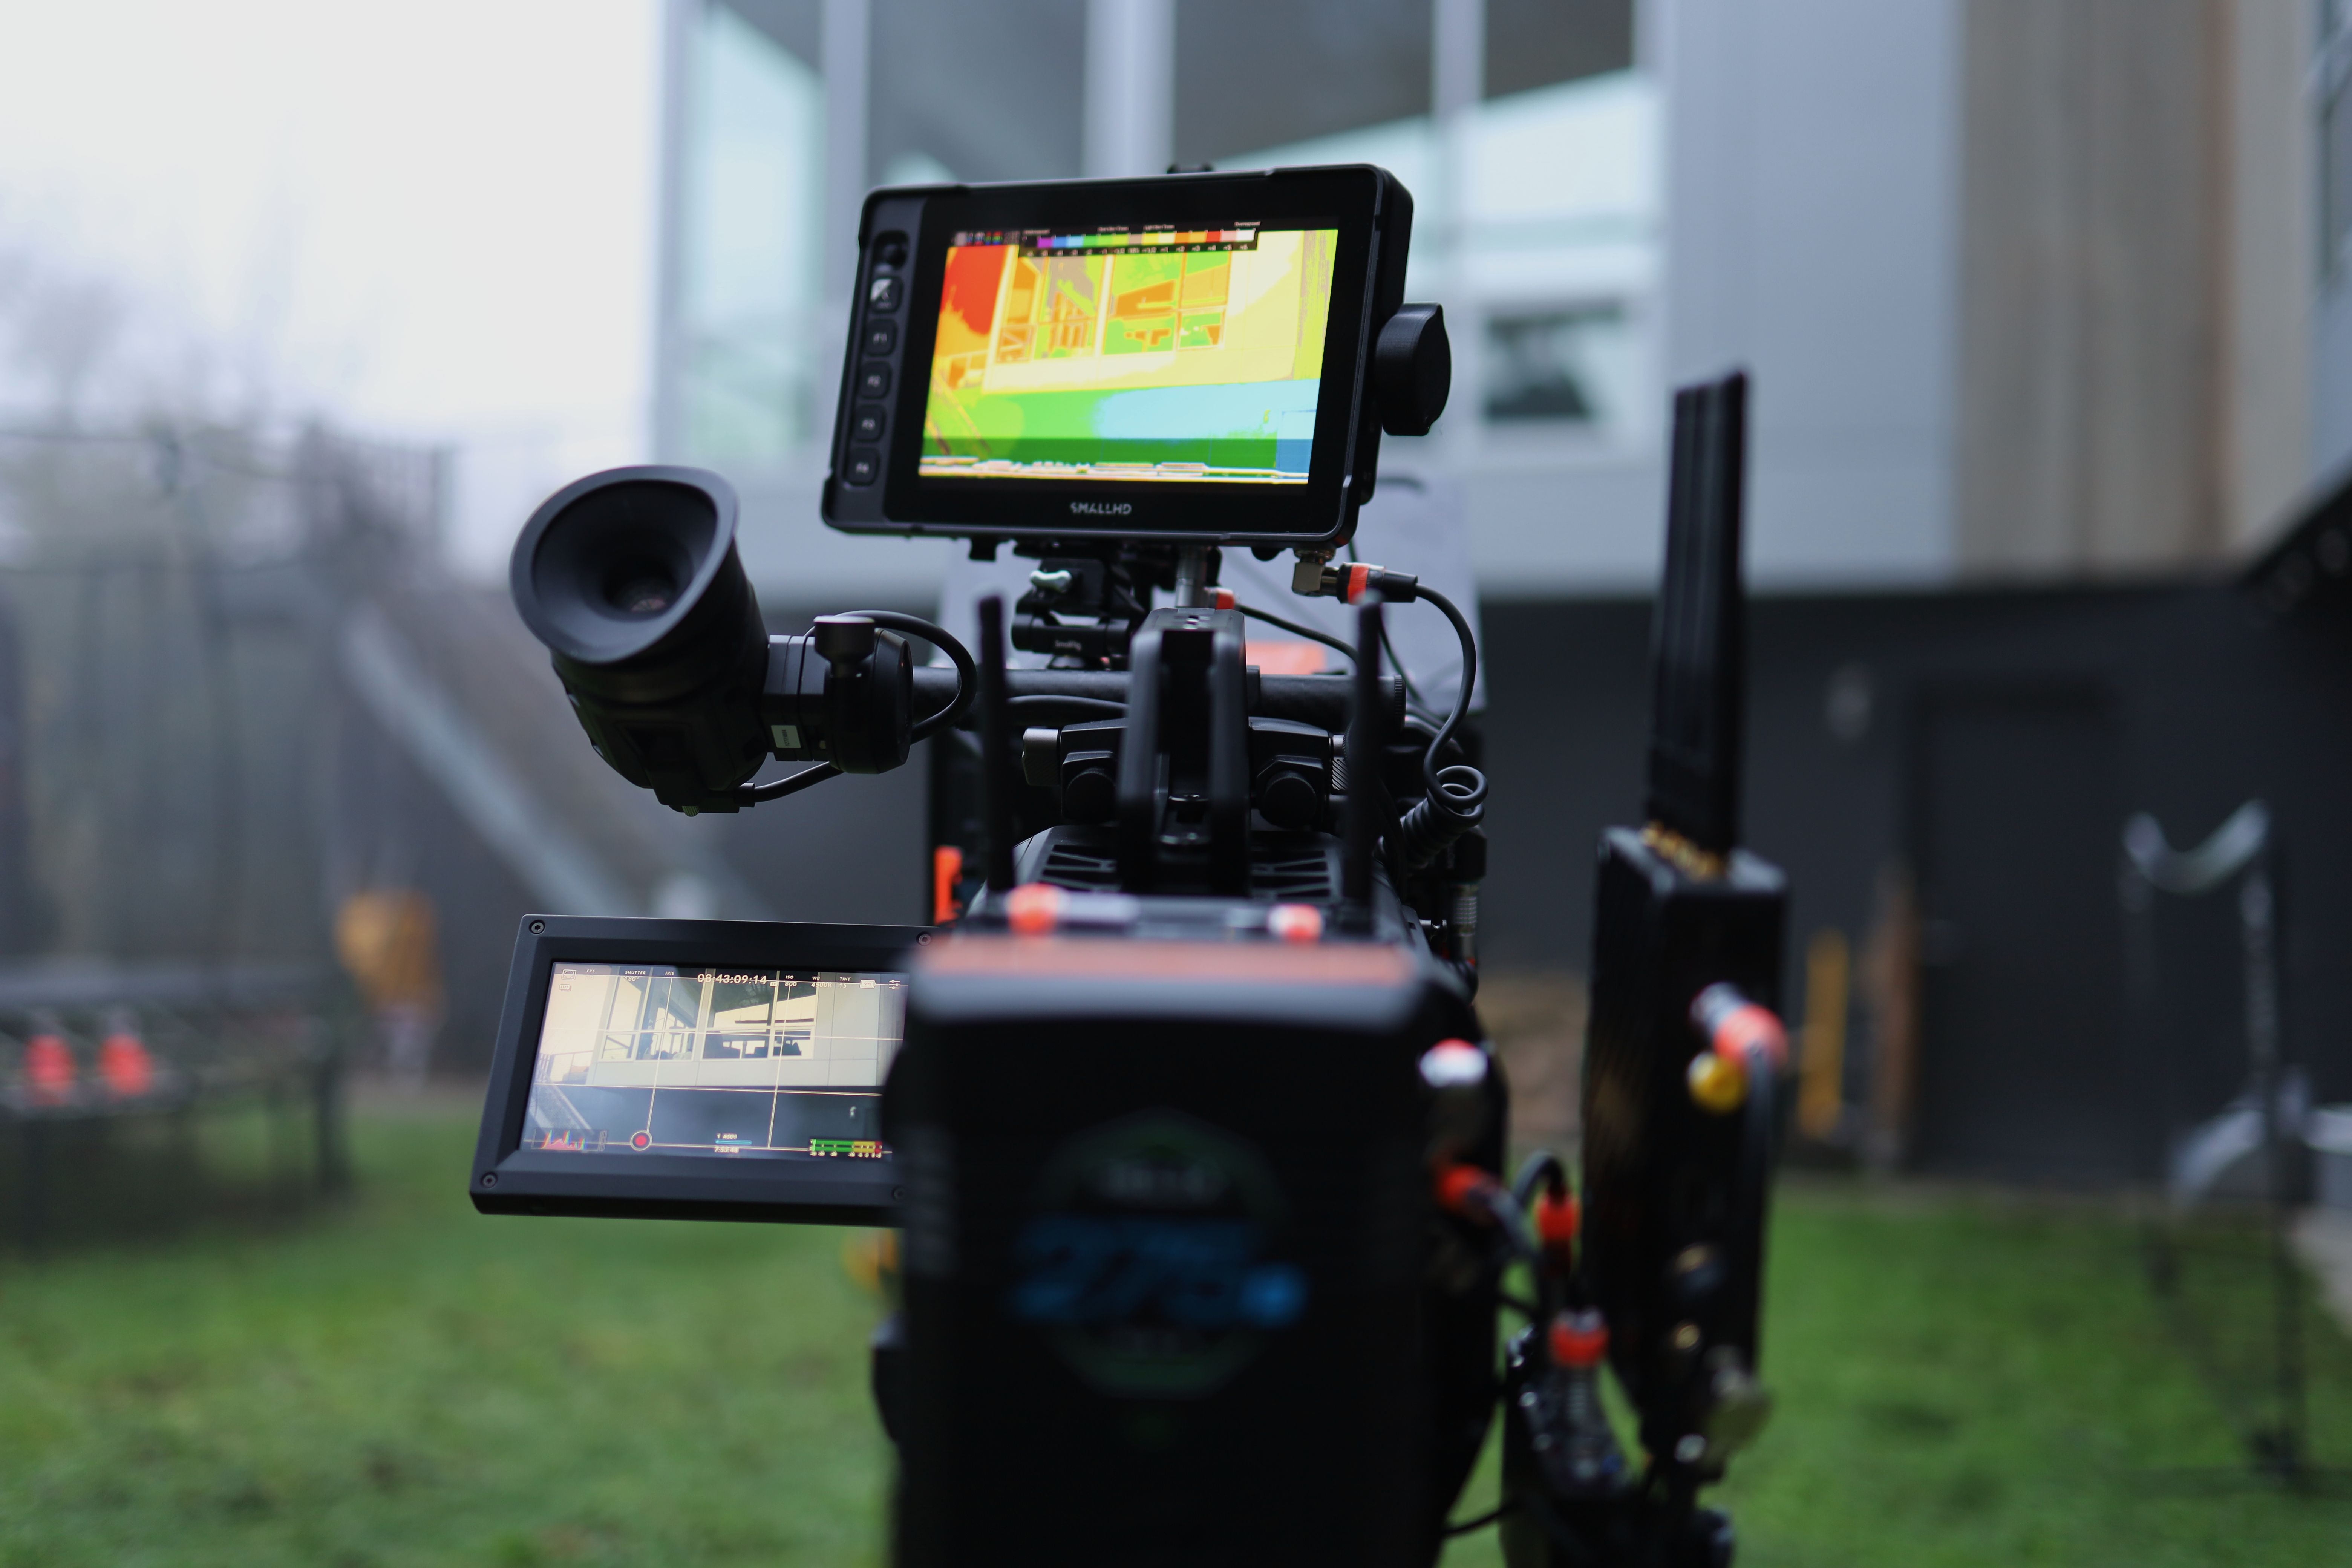
Speaking of, don't mind the Teradek factory-default antennas; they'll be replaced with Stubby antennas as soon as Nick's supplier cranks out more product.
Physical rigging
The hardware that comes with the camera is just fantastic and I saw no sense in trying for a cage system.
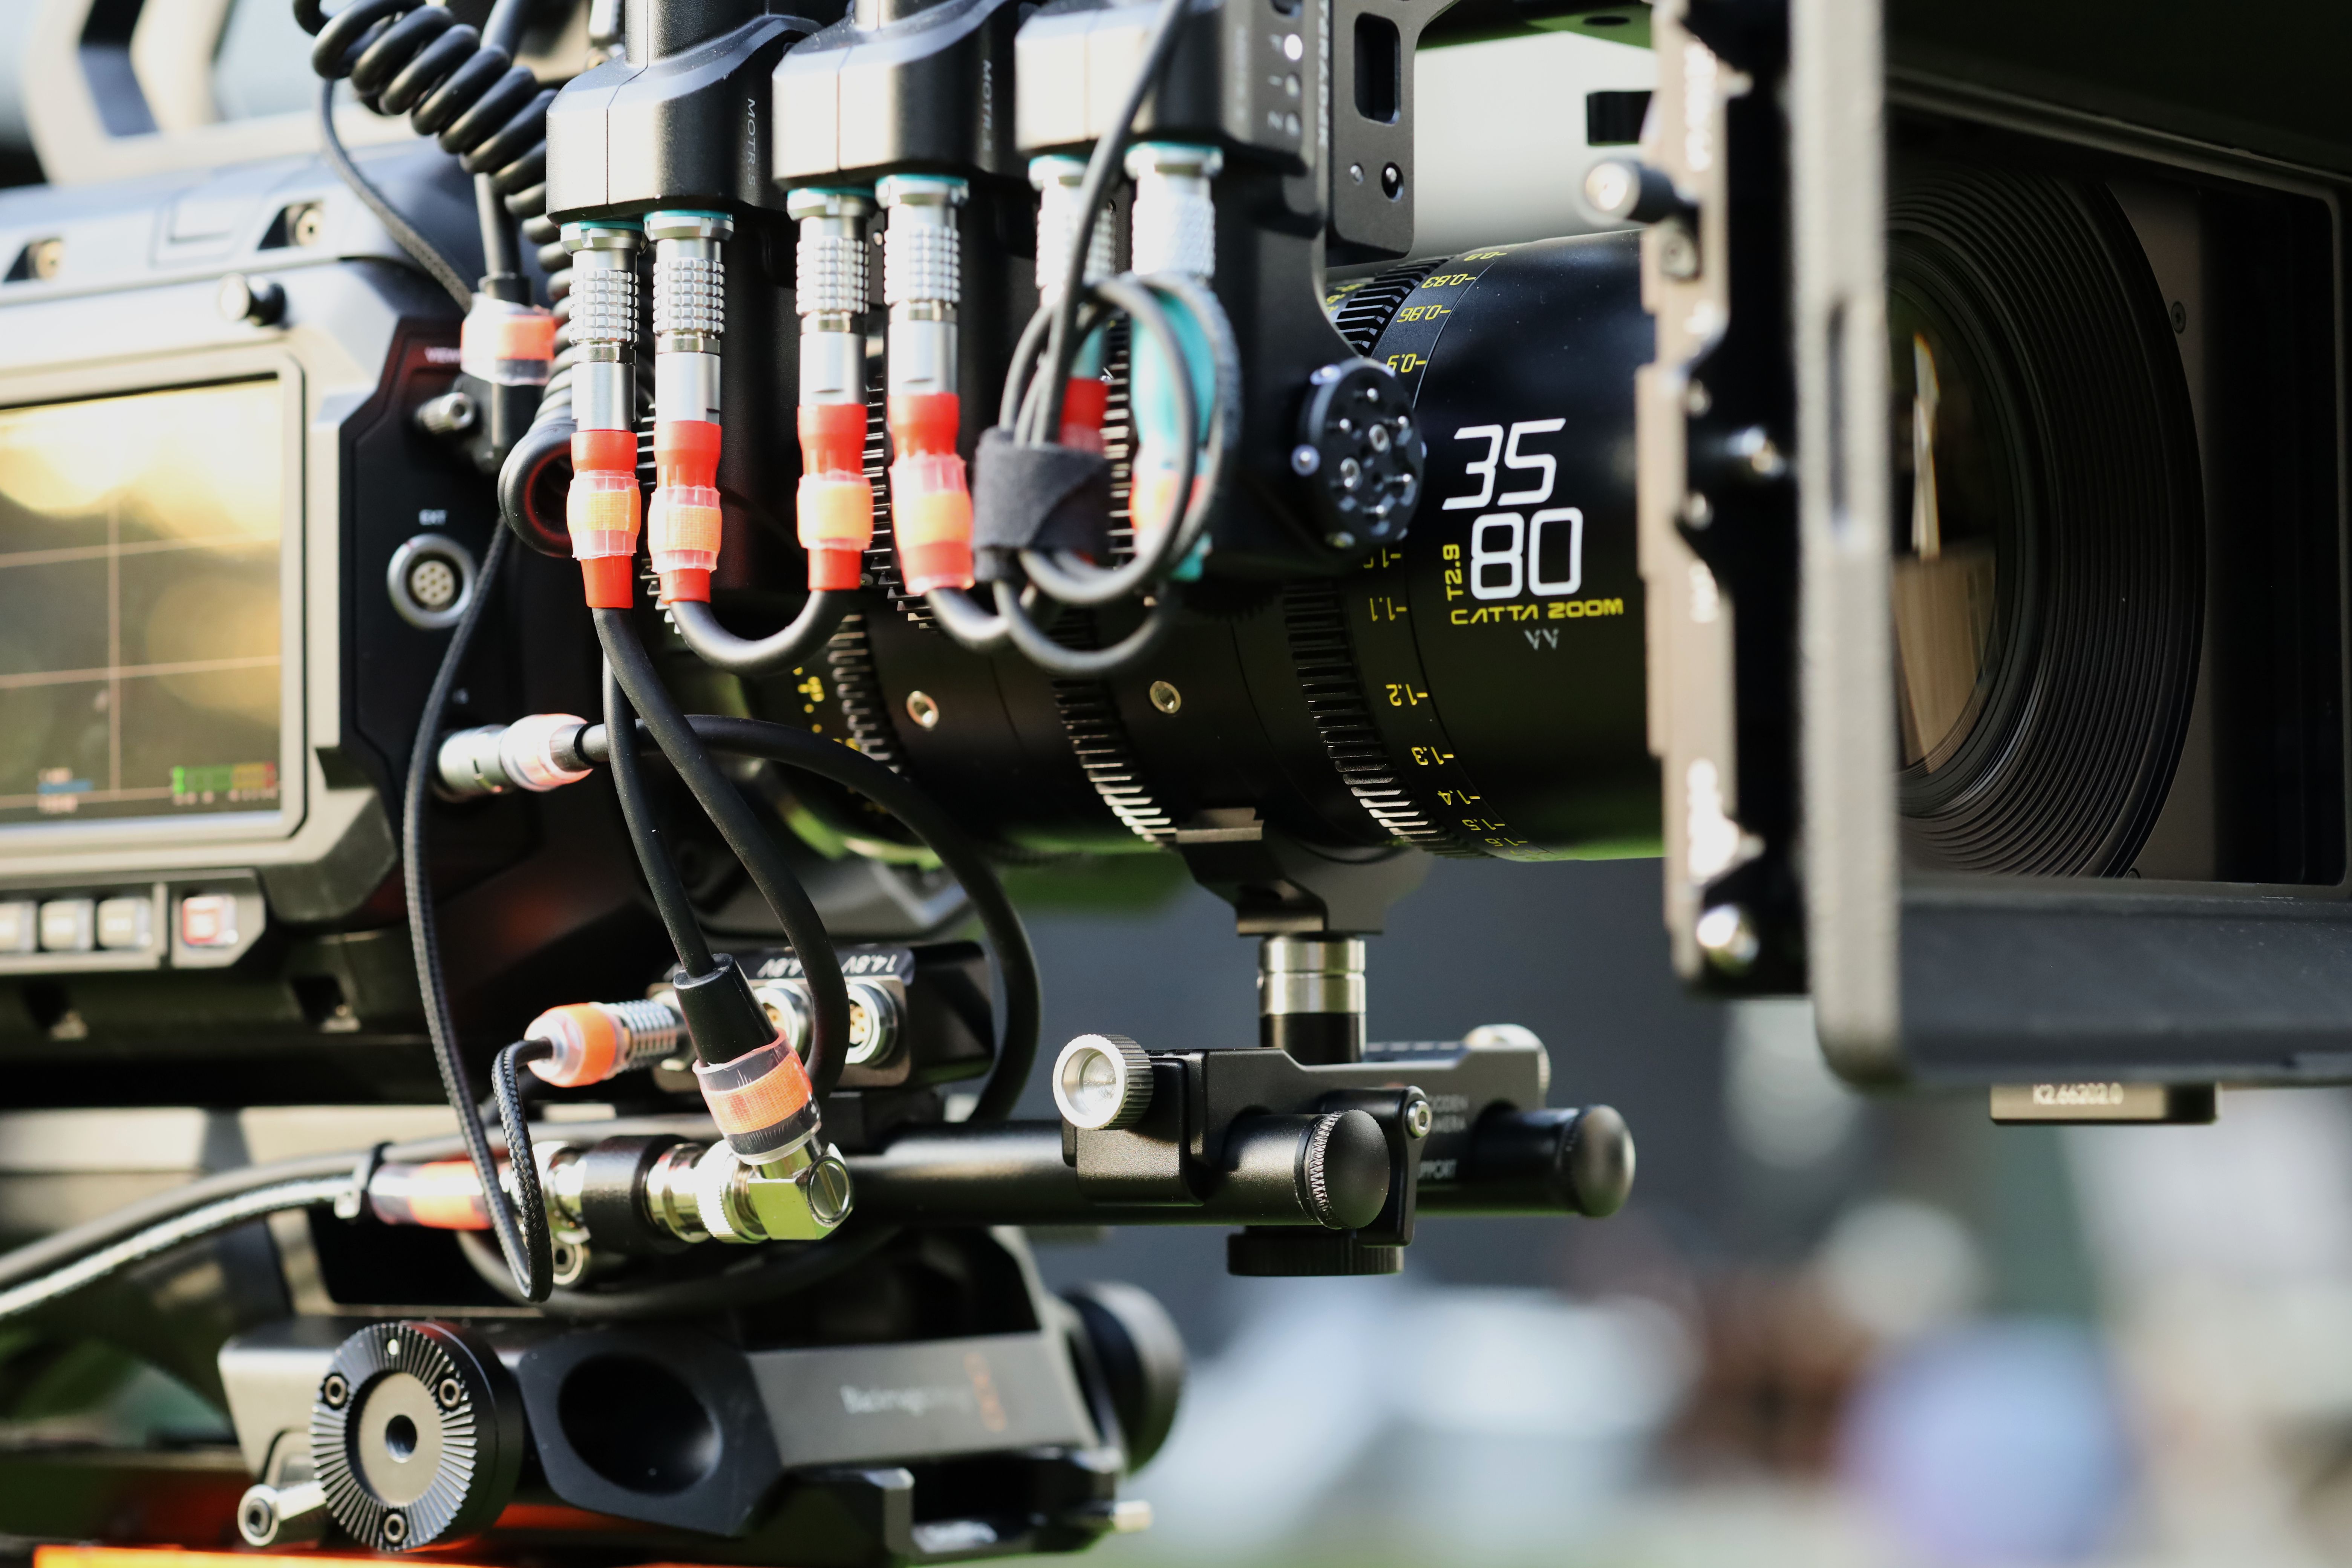
The shoulder mount contraption on the bottom can carry 15mm and 19mm rods so I'm using it with one long set of 15mm rods for my lens support in the front and then battery/MDR/Teradek gak in the back.
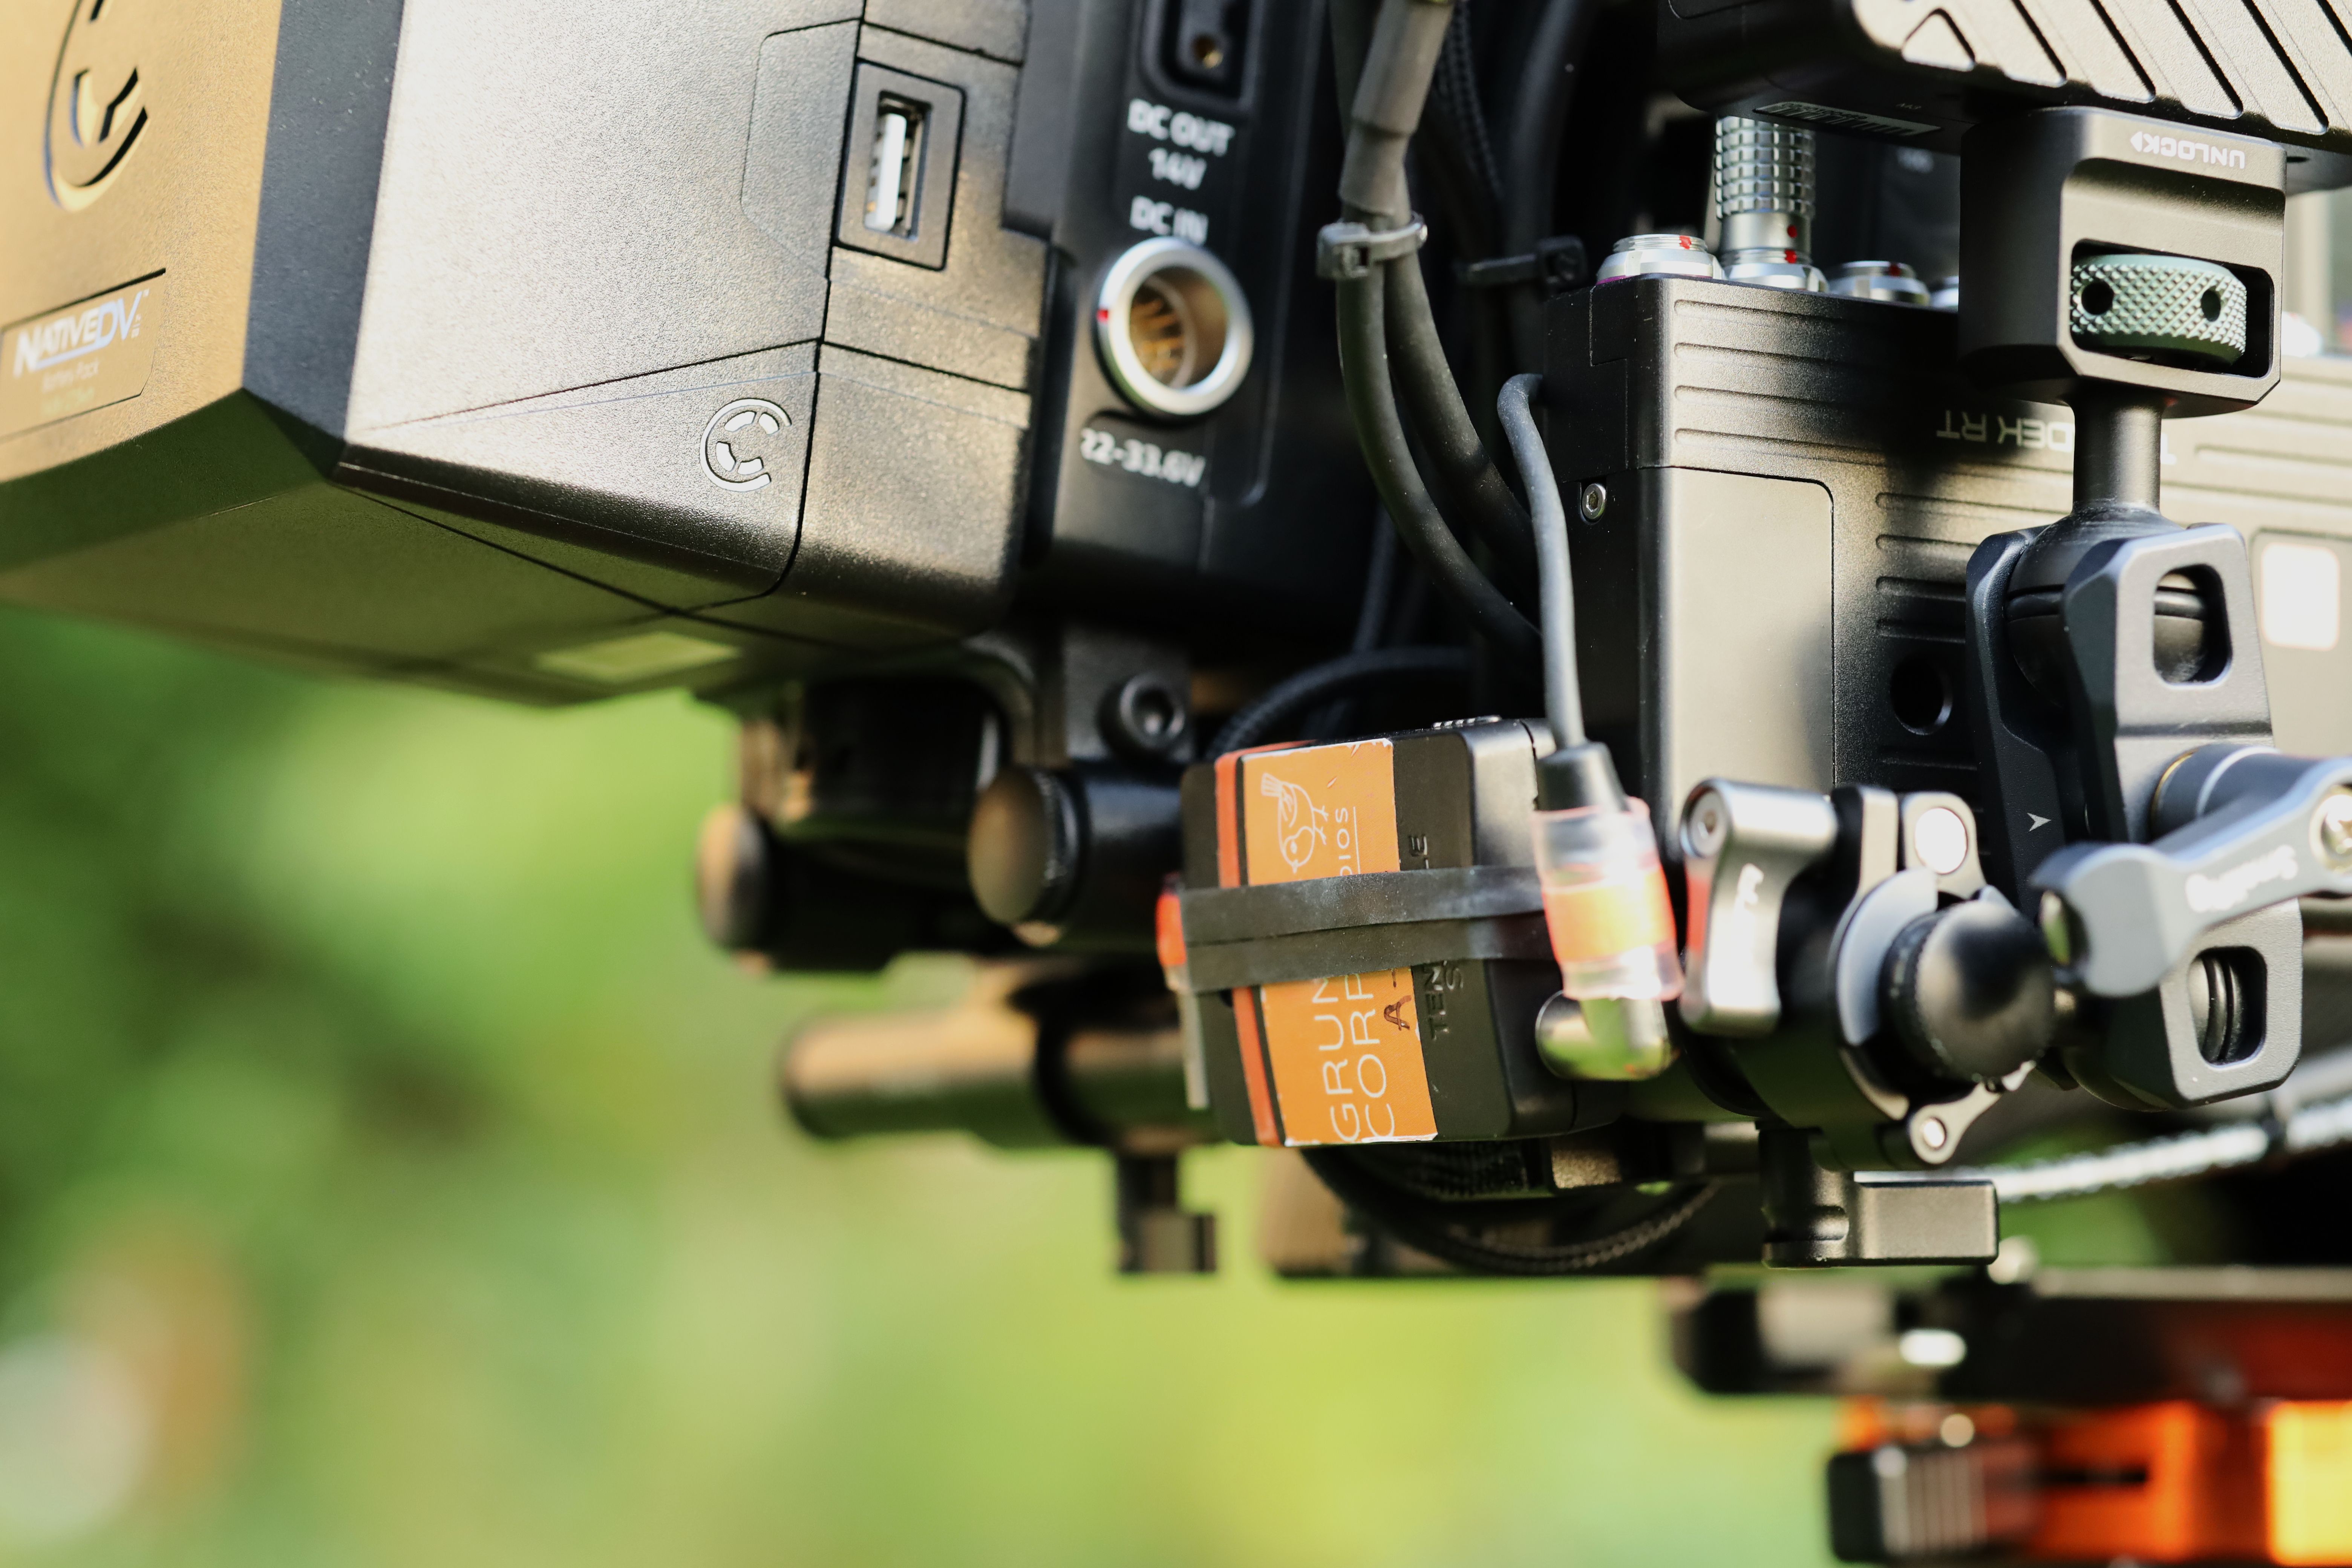
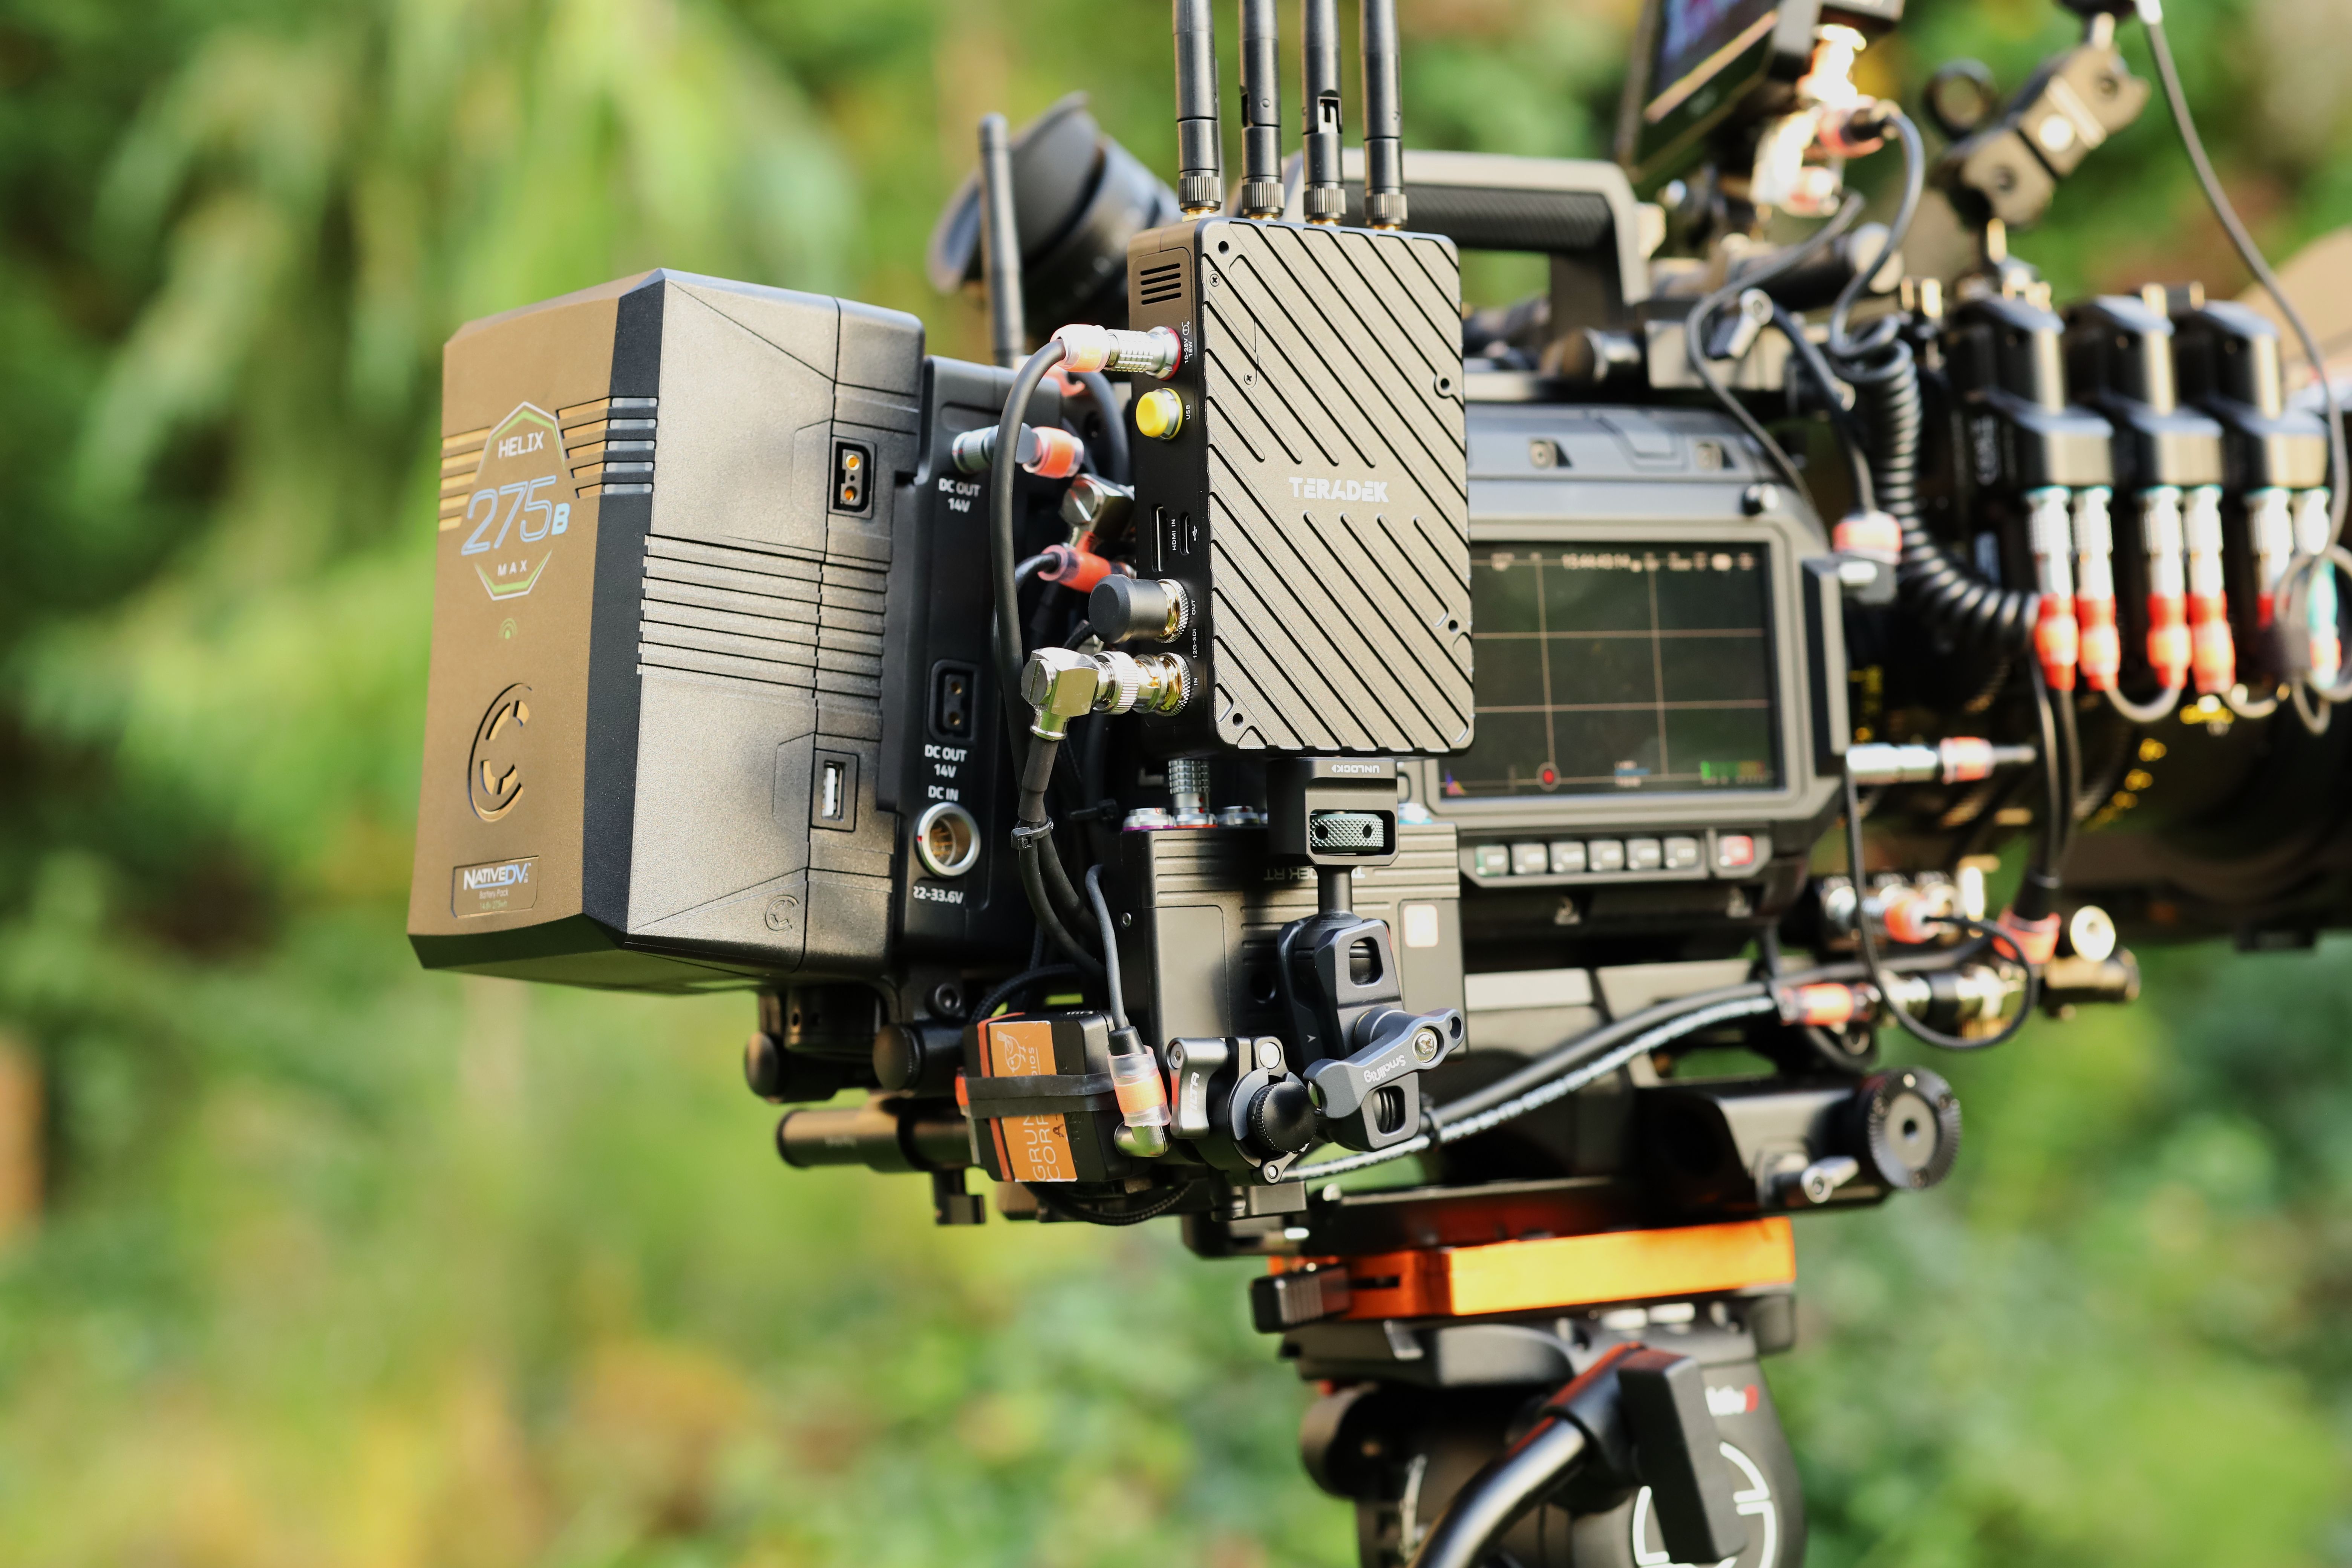
I added a small rod running left-to-right underneath the butt end of the bottom rods. The motor driver for the FIZ lives on that rod while the Teradek lives on a small articulating arm directly attached to that rod with a ball head to 15mm rod clamp. It's great for using that space as efficiently as possible while still being able to swing the Teradek out of the way very easily. It also keeps the toaster oven Teradek away from anything I generally need to touch.
Despite the aggressively contained (let's just say) cabling back there, I can still get to the Ethernet port on the camera just fine, as well as to the DC In on the hotswap plate.
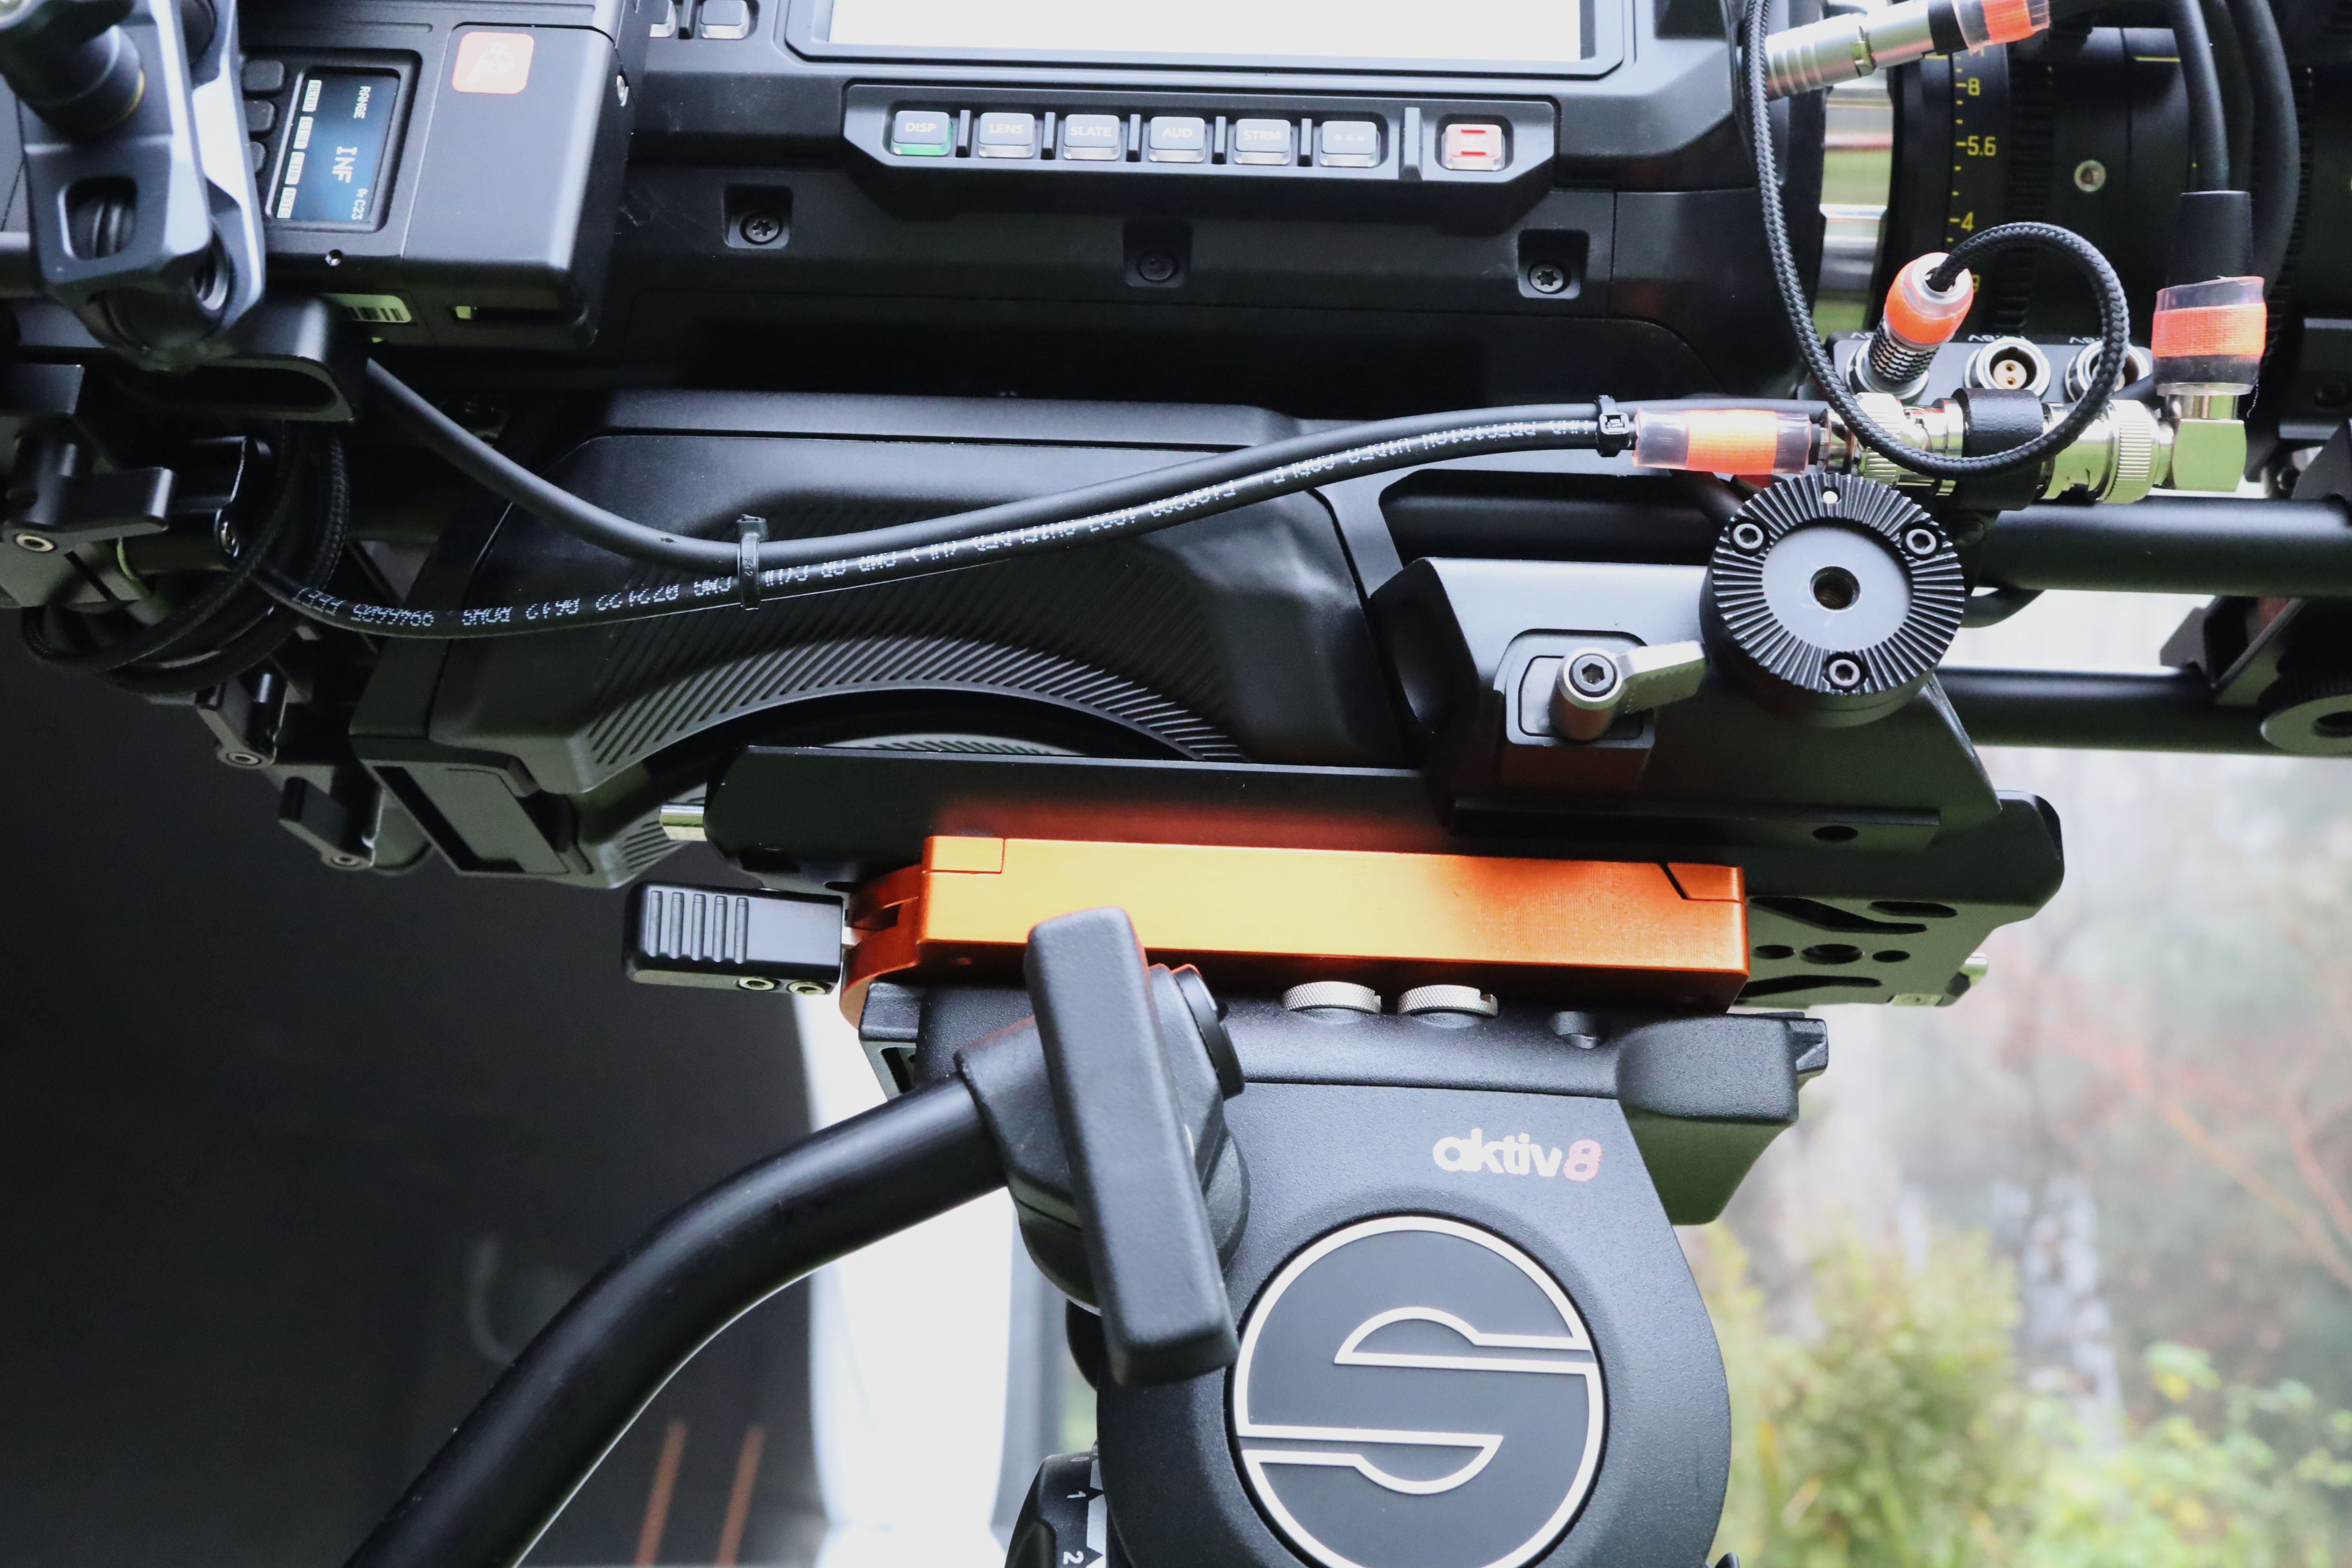
Blackmagic's included shoulder mount also makes for a perfectly fine actual shoulder mount; the handles from my Tilta shoulder-mount kit swap onto the ARRI rosettes perfectly.
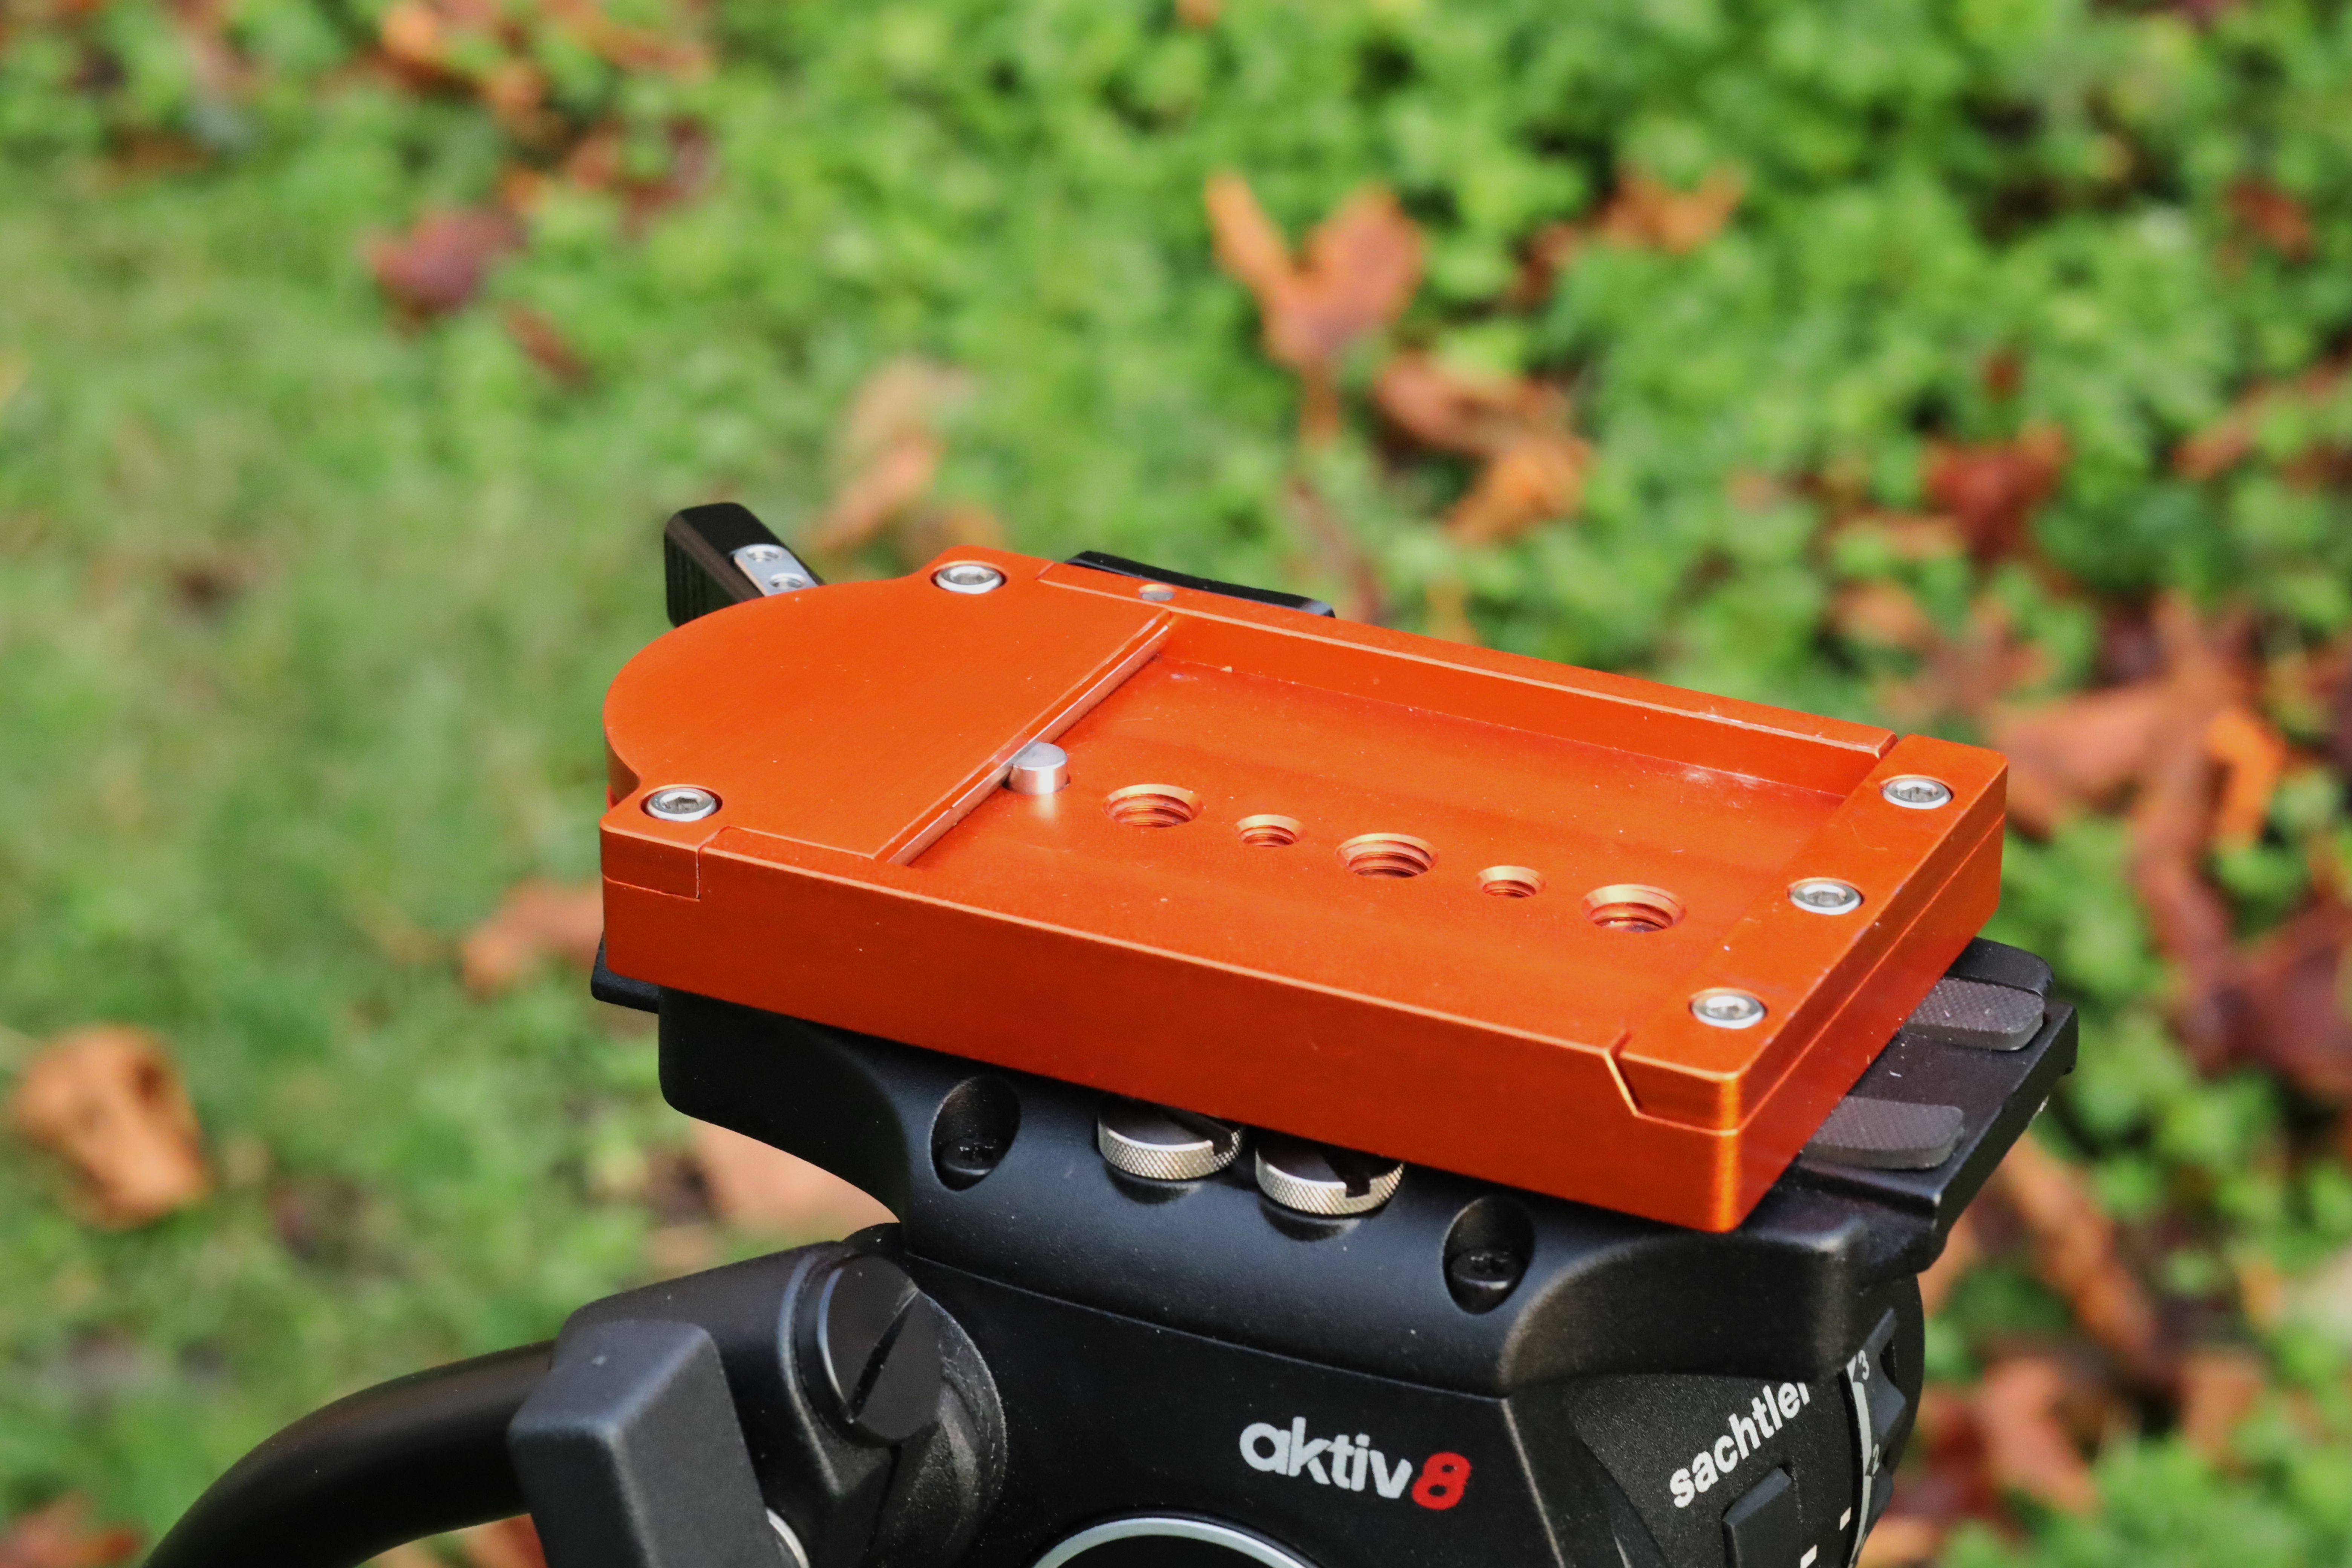
When the rig is not shoulder-mounted, the bottom of the shoulder-mount snaps into a SmallRig ARRI dovetail which connects to my MiniQRB plate.
Speaking of, these MiniQRB plates and bases from Clean's Camera are the bee's knees and they've made my workflow so much faster. They're super-sturdy and I'm never worried that my rig is gonna fly off its support. I've got one on my tripod, my shoulder rig (for the Pyxis etc.), on my CamWok, and on my carts to keep the cameras safe on location.
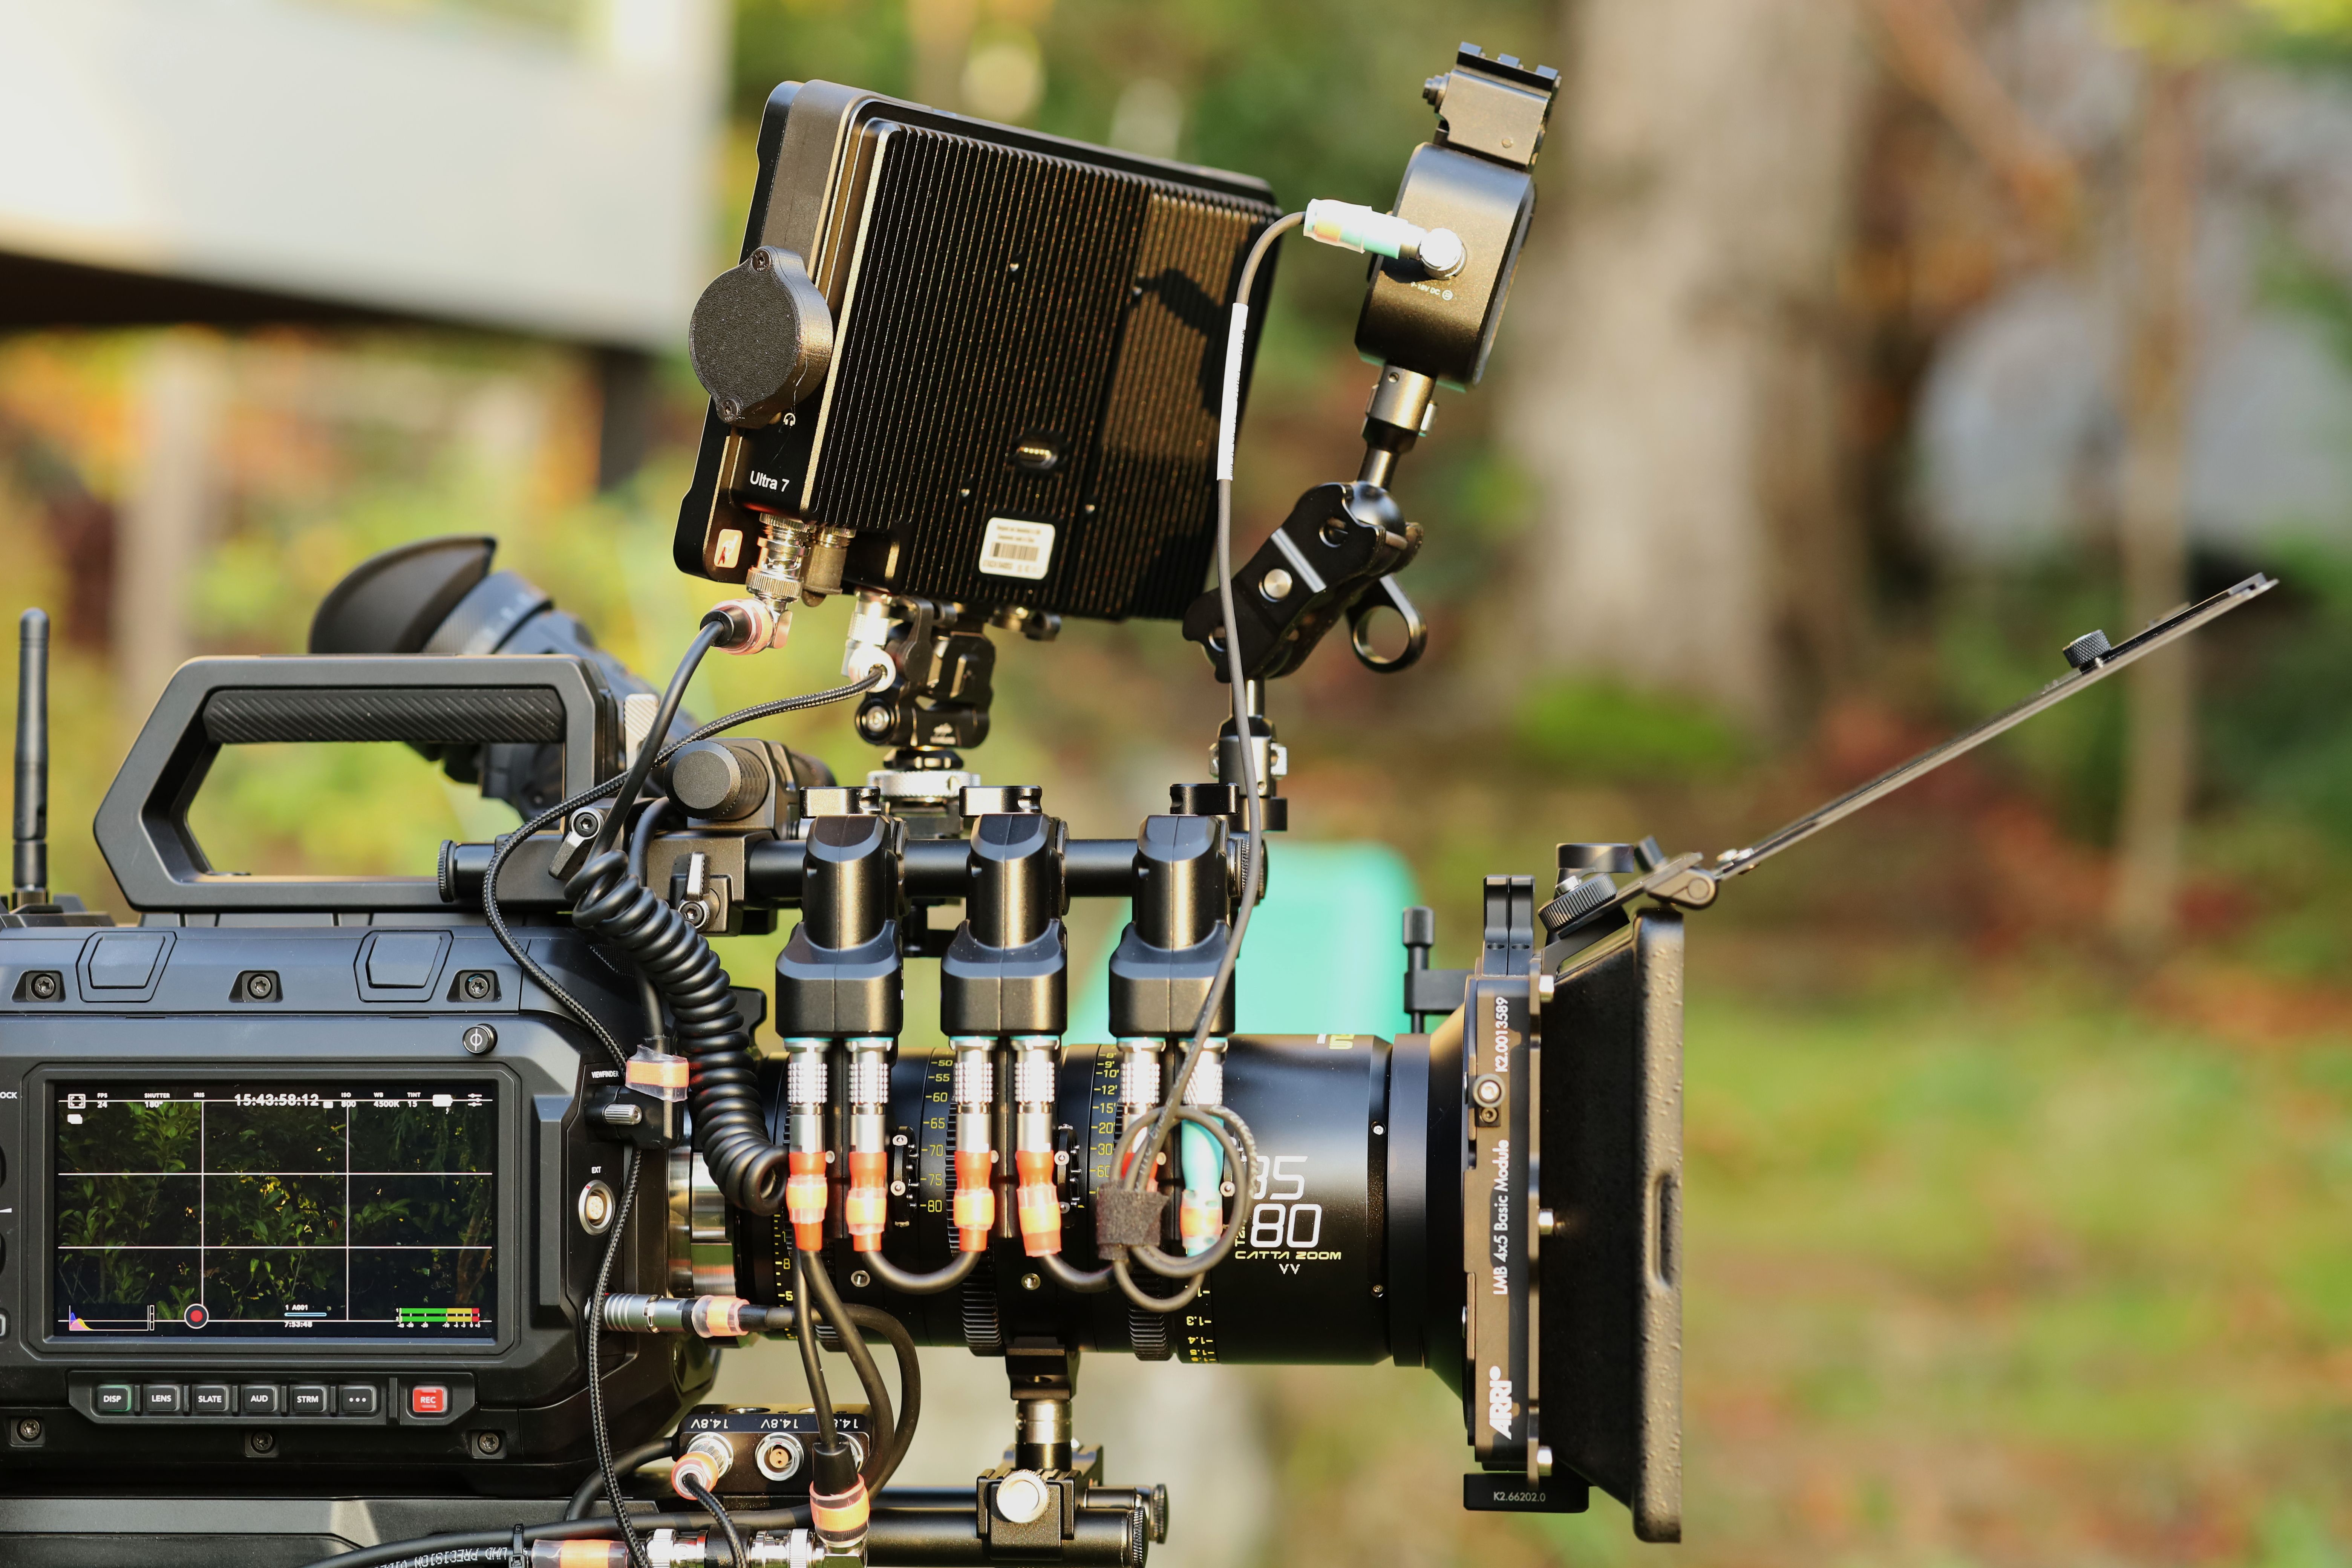
The top handle can carry top-mounted rods which I'm using to support my FIZ motors and the EVF mount. Having motors on a top rod keeps the bottom rods free for moving the lens support wherever it needs to go which is just fantastic.
The top handle's mount also has a quick release to slide up and down which I use to quickly break the FIZ motors from the lens for lens swaps.
Power distribution
The Ursa has a 12V 2-pin Lemo output on the back rated at 1.5A and a 24V output (3-pin Fischer R/S or 7-pin EXT connector) on the front rated at 2A combined.
The 12V 2-pin on the back takes its 1.5A rating quite seriously and will power down when I try to use it with my FIZ. It does, however, power the Teradek transmitter just fine.
The front output can power my Ultra7 monitor nicely and I use a small Alvin's Cables 3-pin Fischer → triple-Lemo breakout to make monitor power available as 2-pin Lemo. This allows me to keep the cable running to the monitor as a conventional 2-pin-to-2-pin Lemo from my library of such cables.
That does still leave me with the problem of powering the FIZ, though, and I'm a bit pissy with Blackmagic over this because the 12V output isn't strong enough and the 24V output isn't either (if it were to run FIZ + Ultra7) and, like, how hard would it have been to route out more power. (Plus my Teradek RT MDR-X isn't 24V-compatible, as a final poke in the eye.)
Enter the hotswap plate
SWIT makes a B-mount to B-mount hotswap plate with a 14V 2-pin Lemo out rated at 5A as well as two equally-rated D-Taps. This nicely solves keeping the camera on all day and powers my FIZ just fine, all without ever having to D-Tap anything or connect directly to any battery. It also has a USB-out which I use to charge my Tentacle Sync timecode box, DualLock'd and rubber-banded (just in case) at the bottom of the back rail.
Unfortunately the SWIT hotswap plate doesn't have the world's tightest B-mount (or maybe Blackmagic's is to blame?) - either way, the battery block is a bit jiggly.
I solved this by 3D-printing a connector from the bottom of the hotswap plate to the bottom rails. It also features a bonus of two 1/4-20-tapped holes for a SmallRig AirTag holder so I can find my camera should it grow legs.
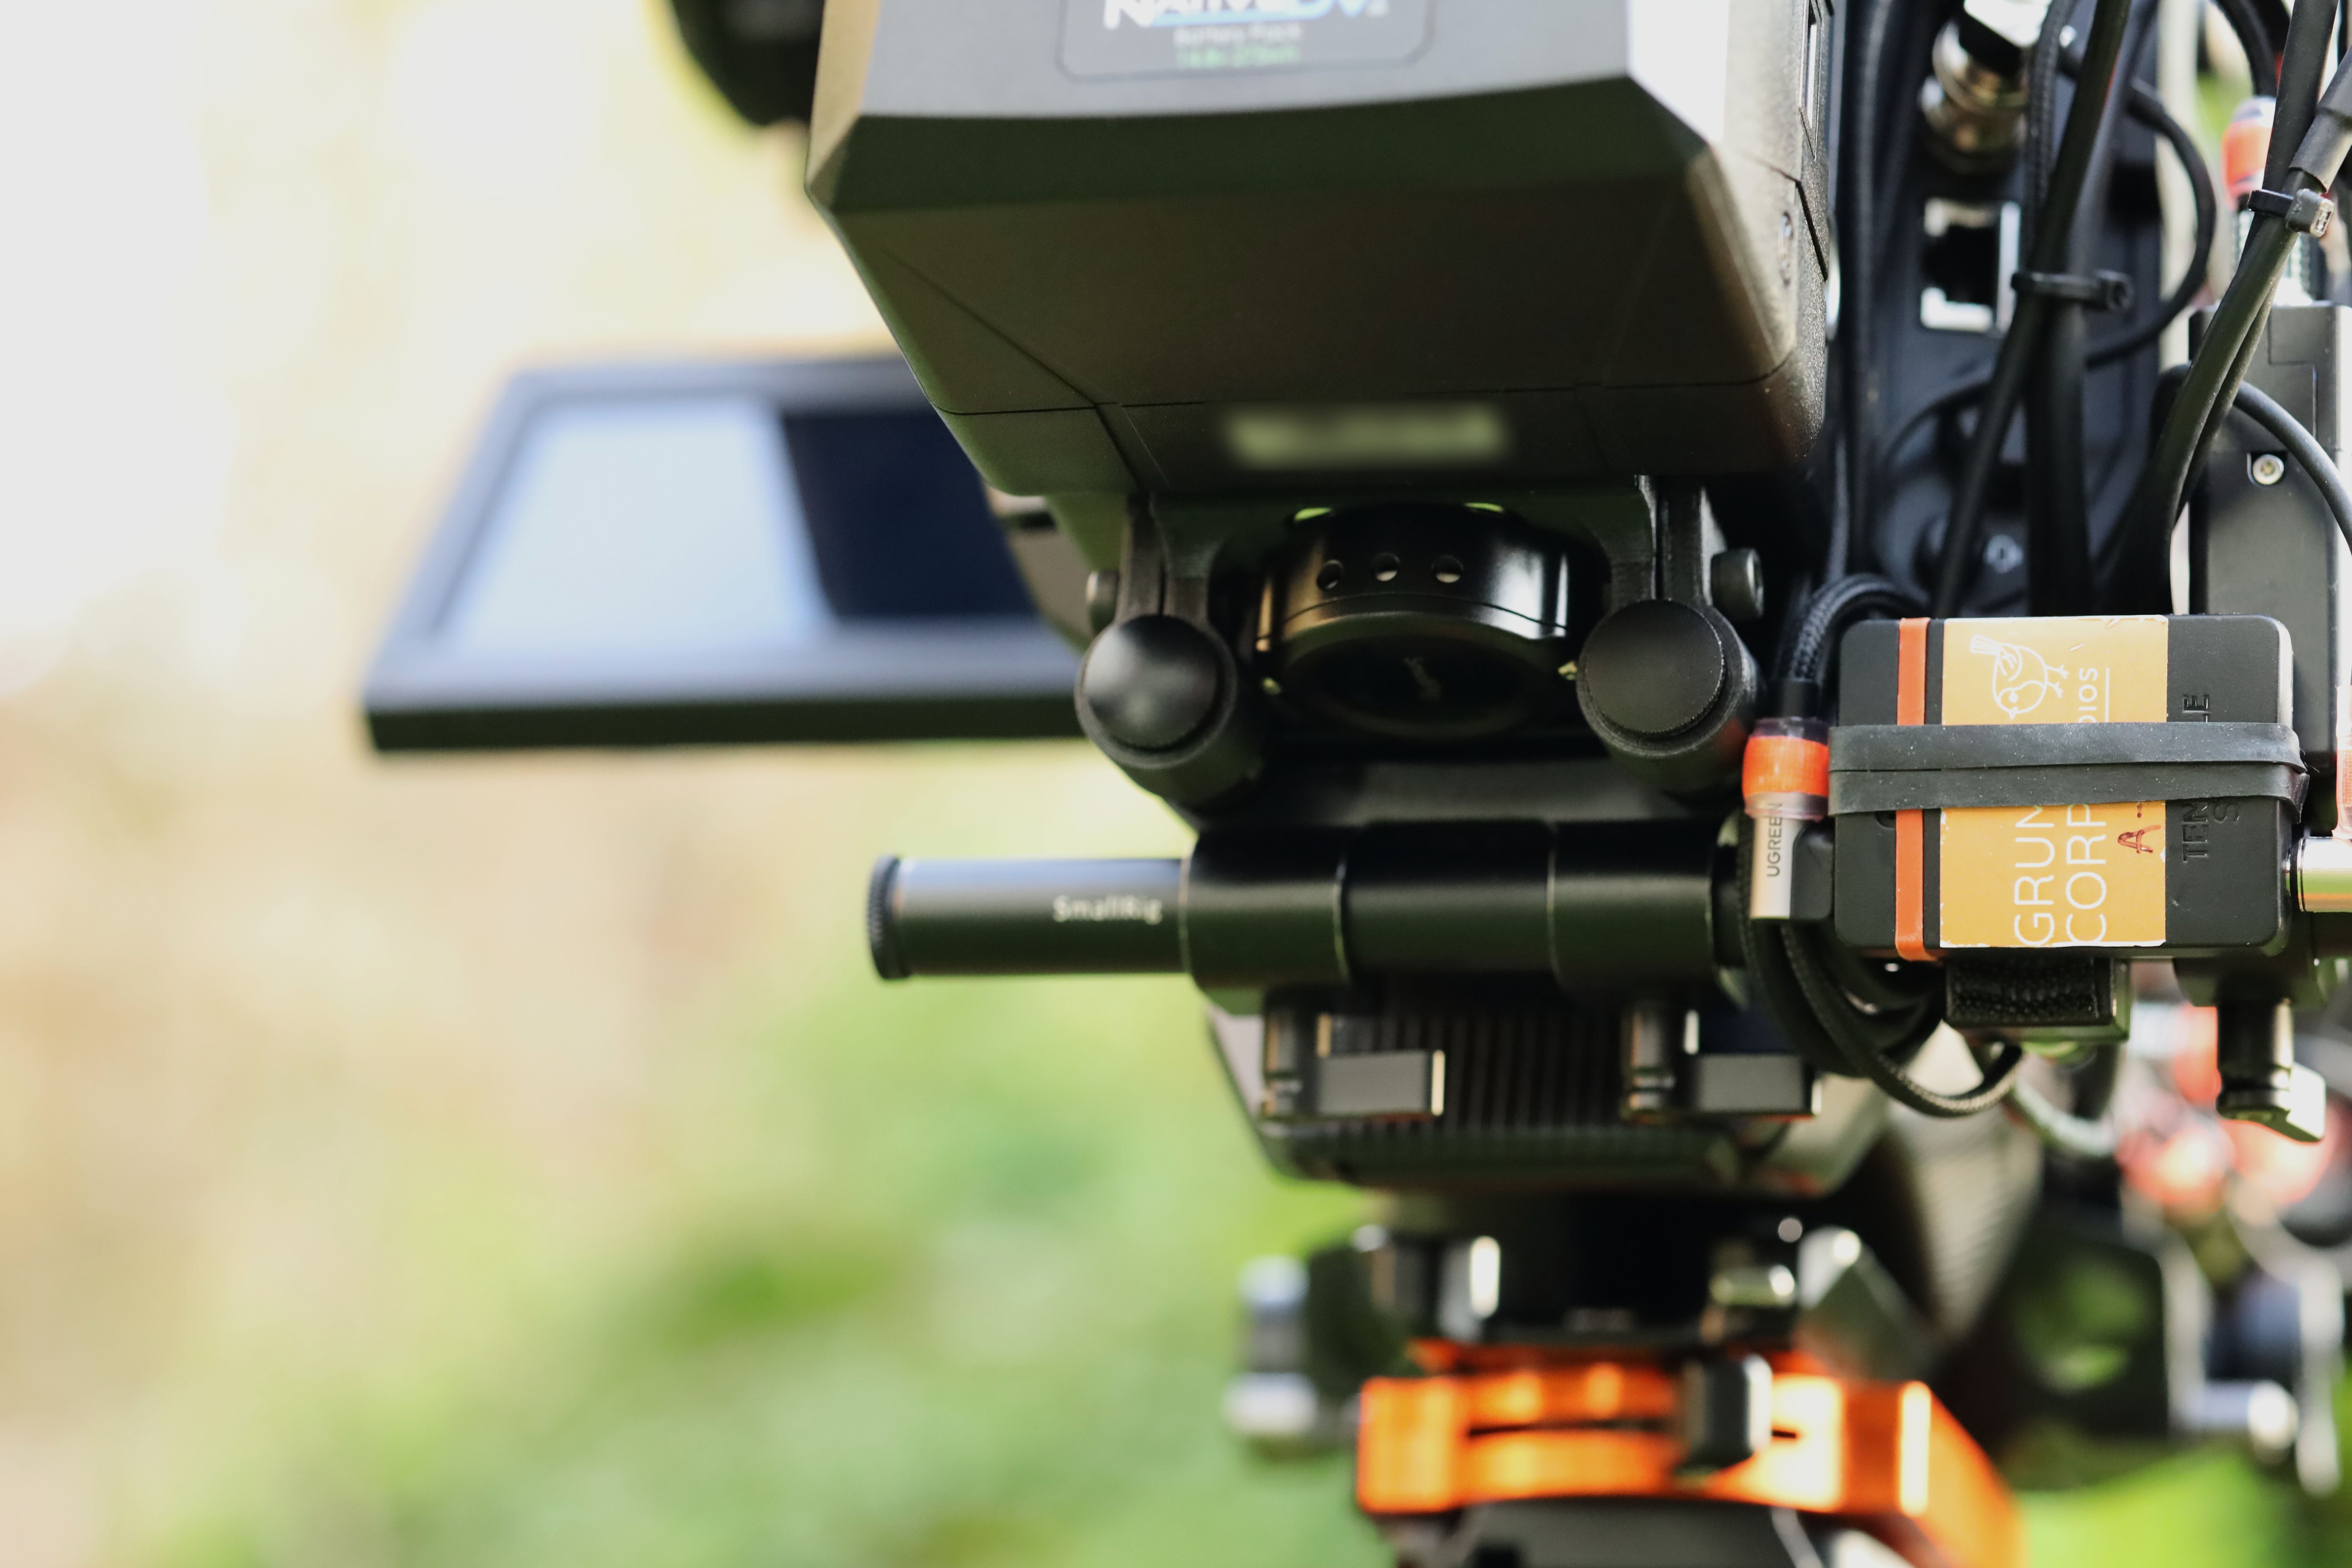
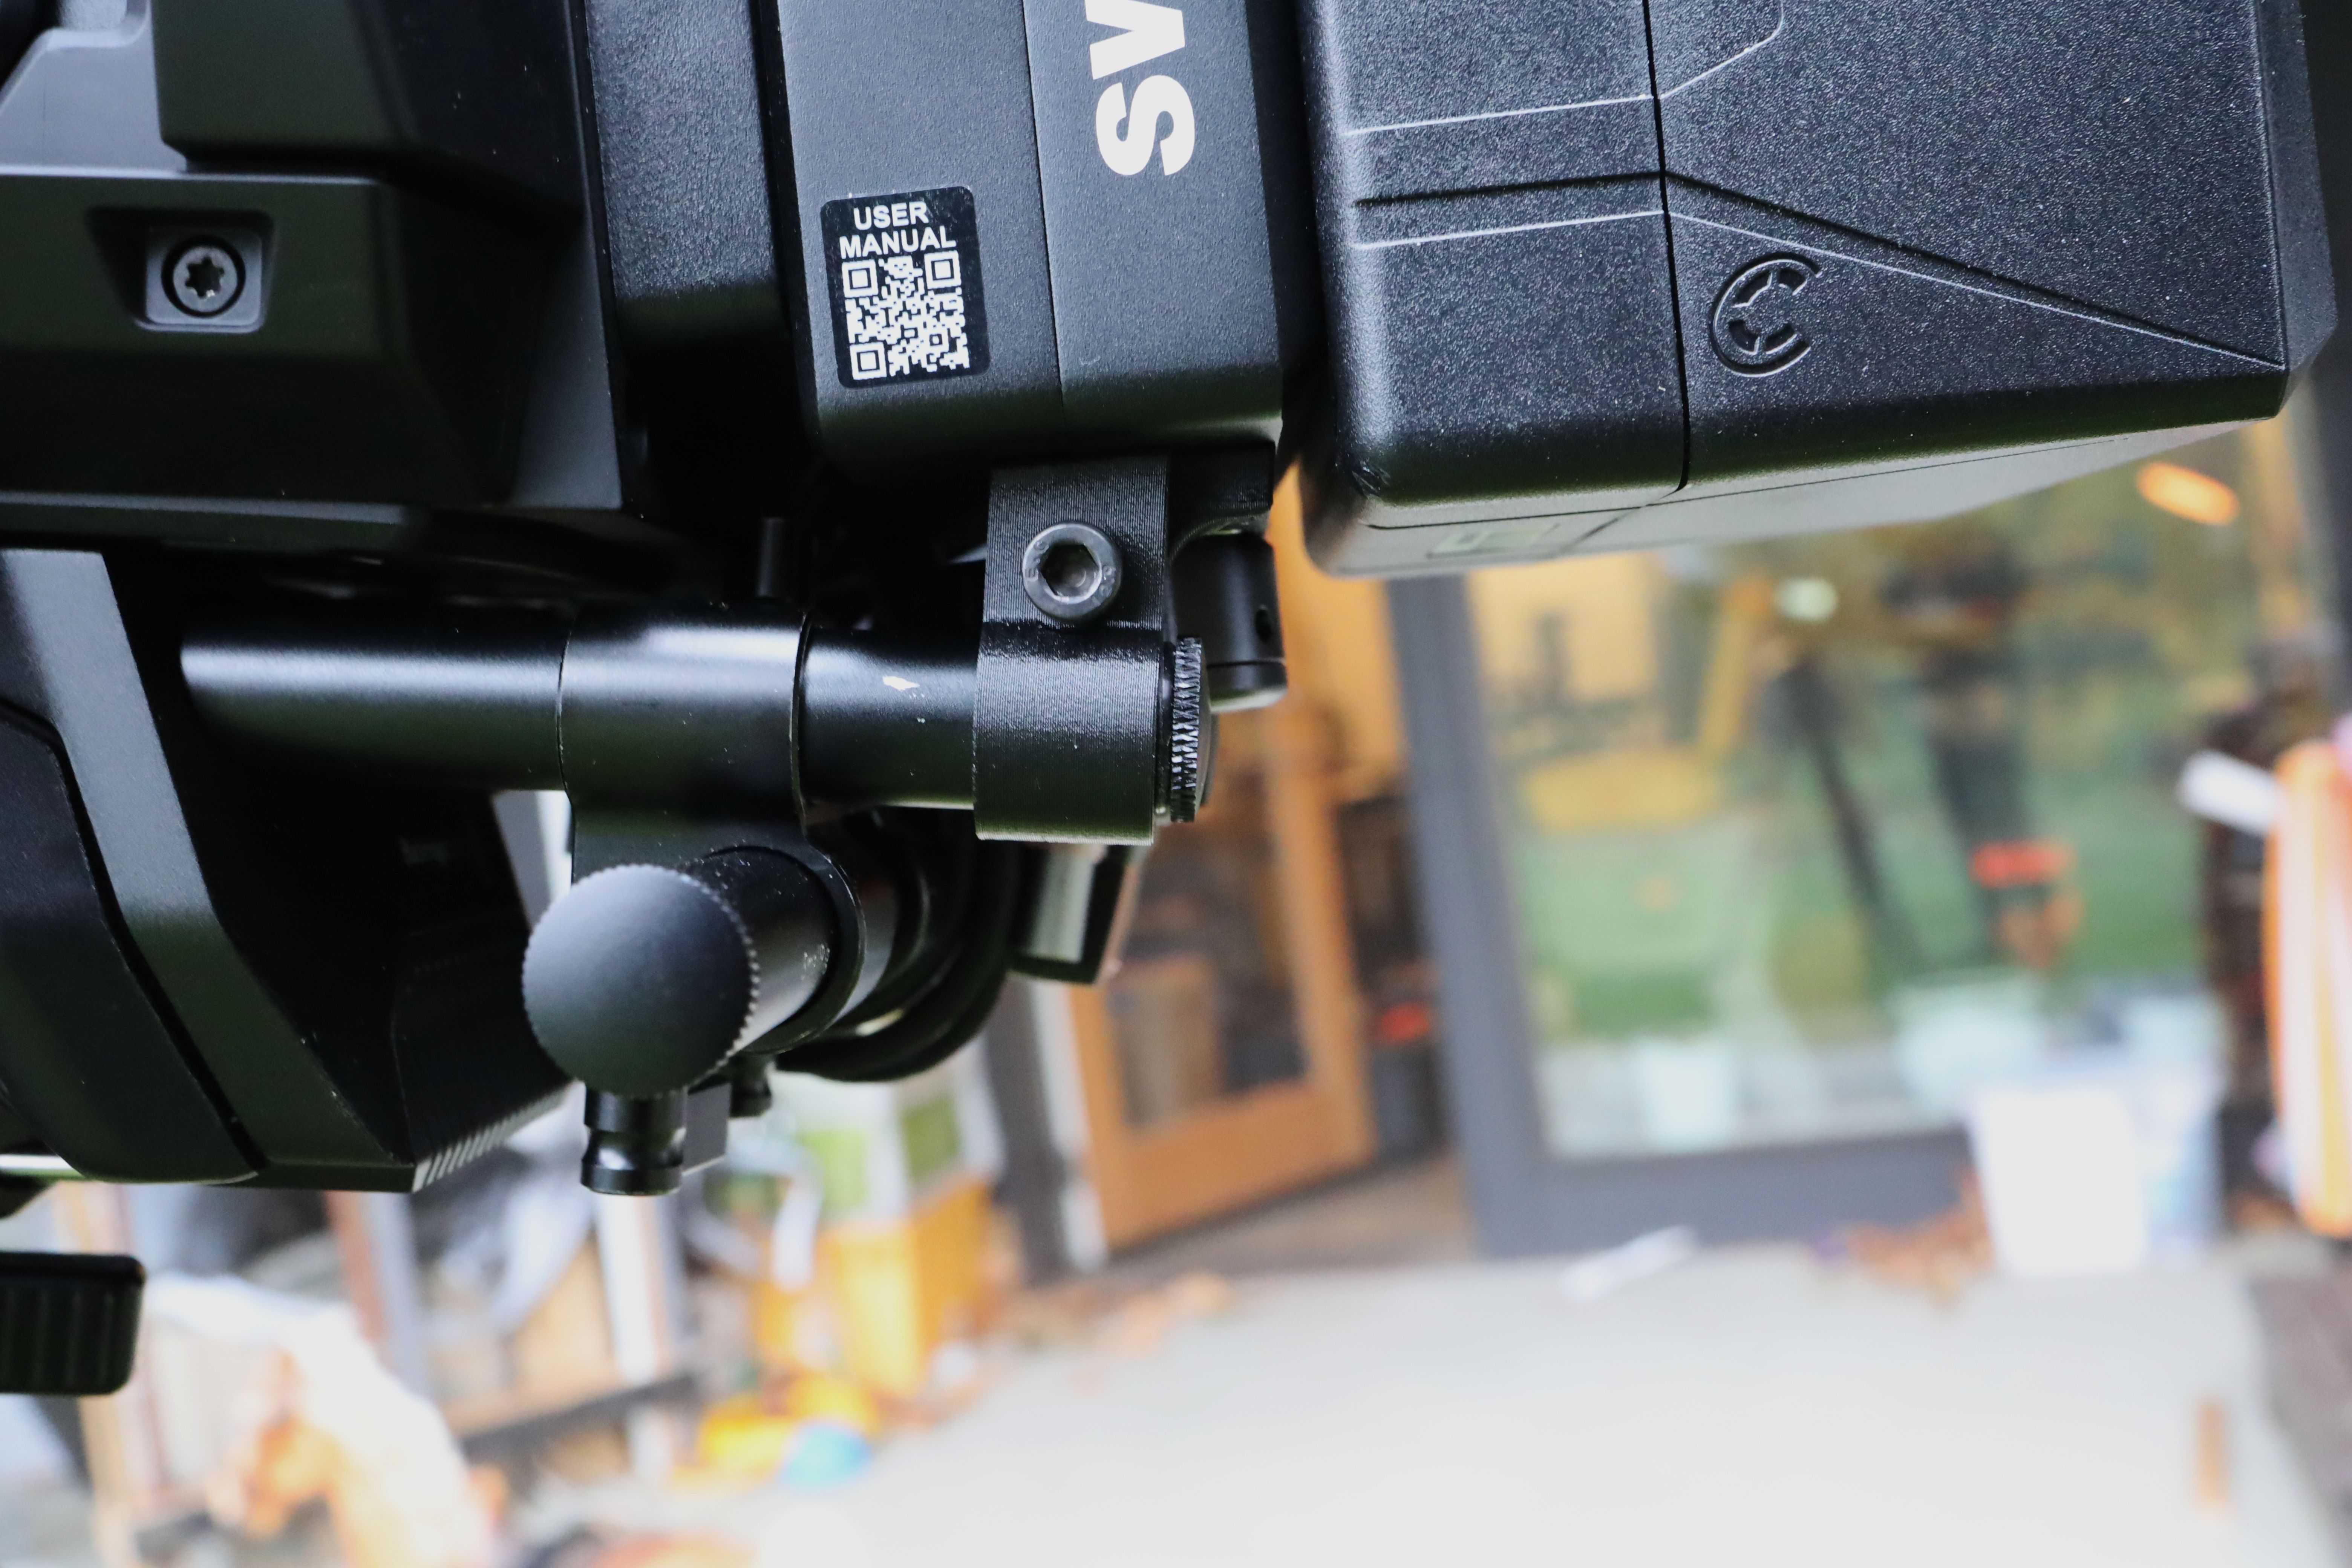
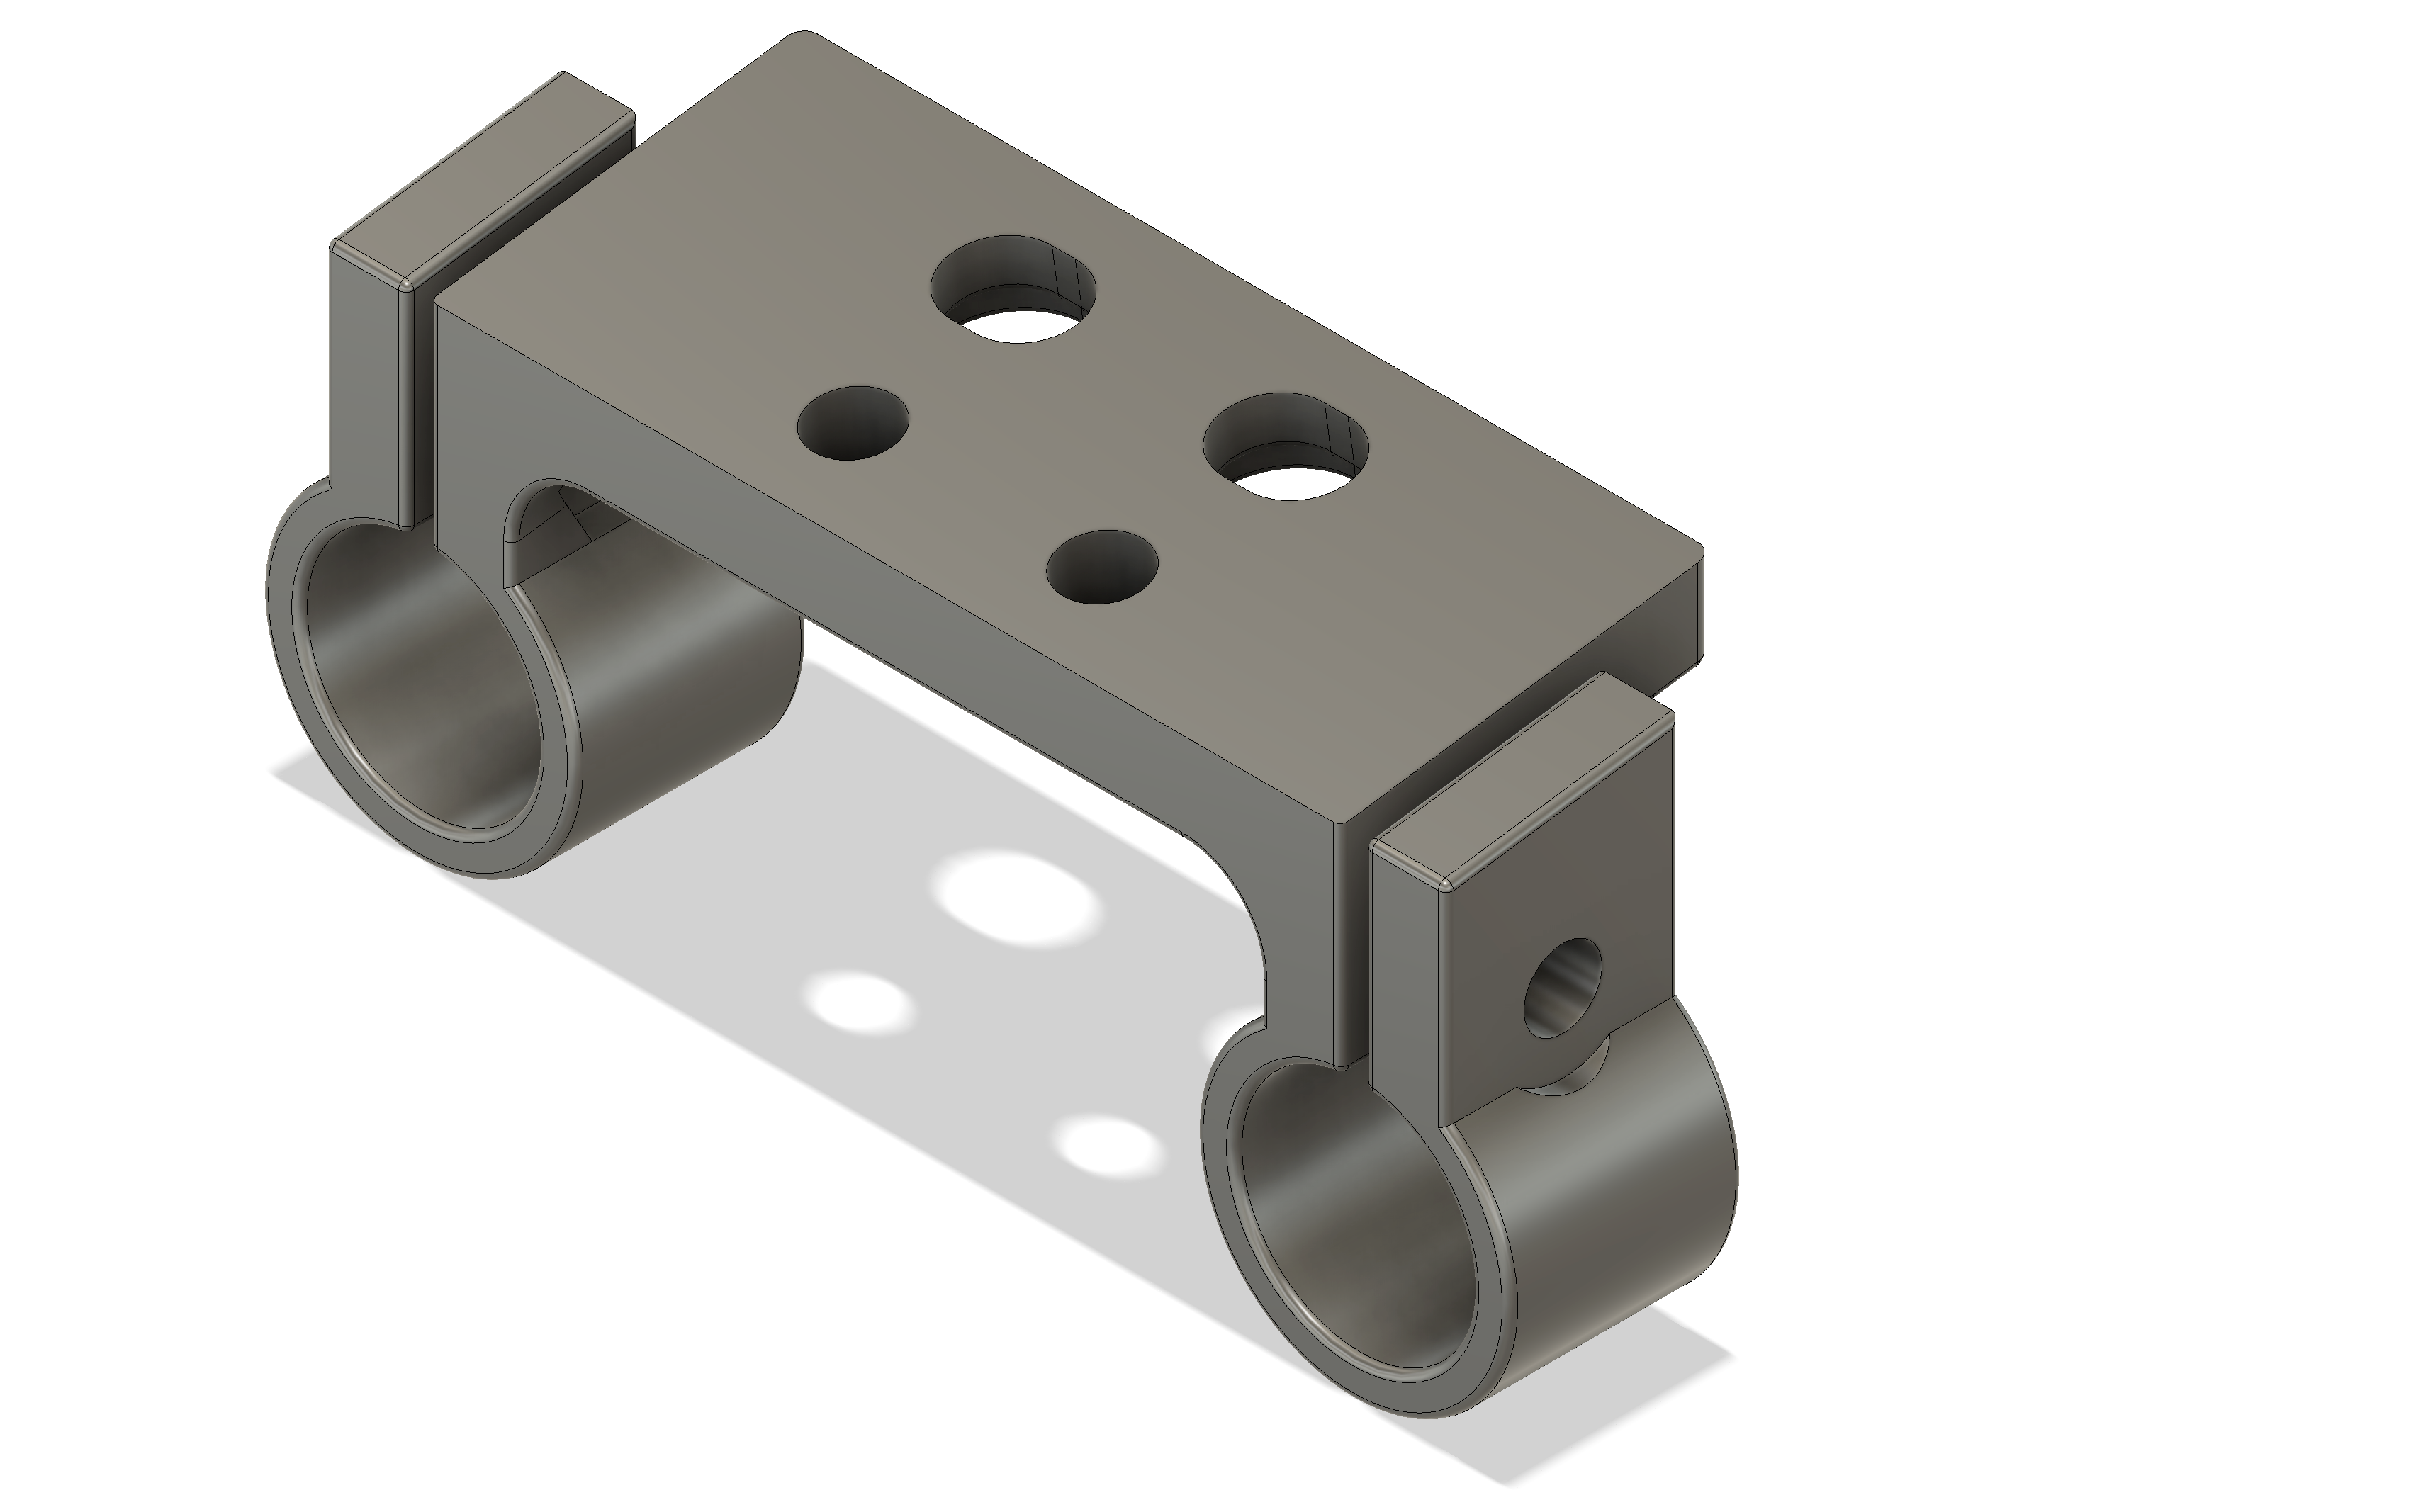
Feel free to grab the STL file or the original Fusion360 f3d and run your own. Note that I print these with black carbon fiber PETG and that holds up pretty well. The clamp uses M5 screws to hold on to the rails; these screws use basically the same hex key as standard 1/4-20 camera screws. The 1/4-20-tapped holes are just printed with the minor diameter for those screws and tapped with a thread tap after printing.
The battery block is now rock solid and ready for operating.
Video distribution
I'm not always going to use the external monitor (SmallHD Ultra7) but I still want tidy cabling. I elected to create a front SDI port connecting back to SDI Out 2 in the back with a simple SDI cable attached to a coupler.
Side note: Should I worry about the cables and coupler being 12G for the 12G signal into the monitor? Someone on Reddit (...) said you could run 6G-SDI over paperclips for short distances so I'm just going to not worry about it.
Anyway. I wasn't a fan of this coupler just floating around in space and I already needed a way to mount the power breakout in about the same space. Inevitably, more 3D-printing happened:
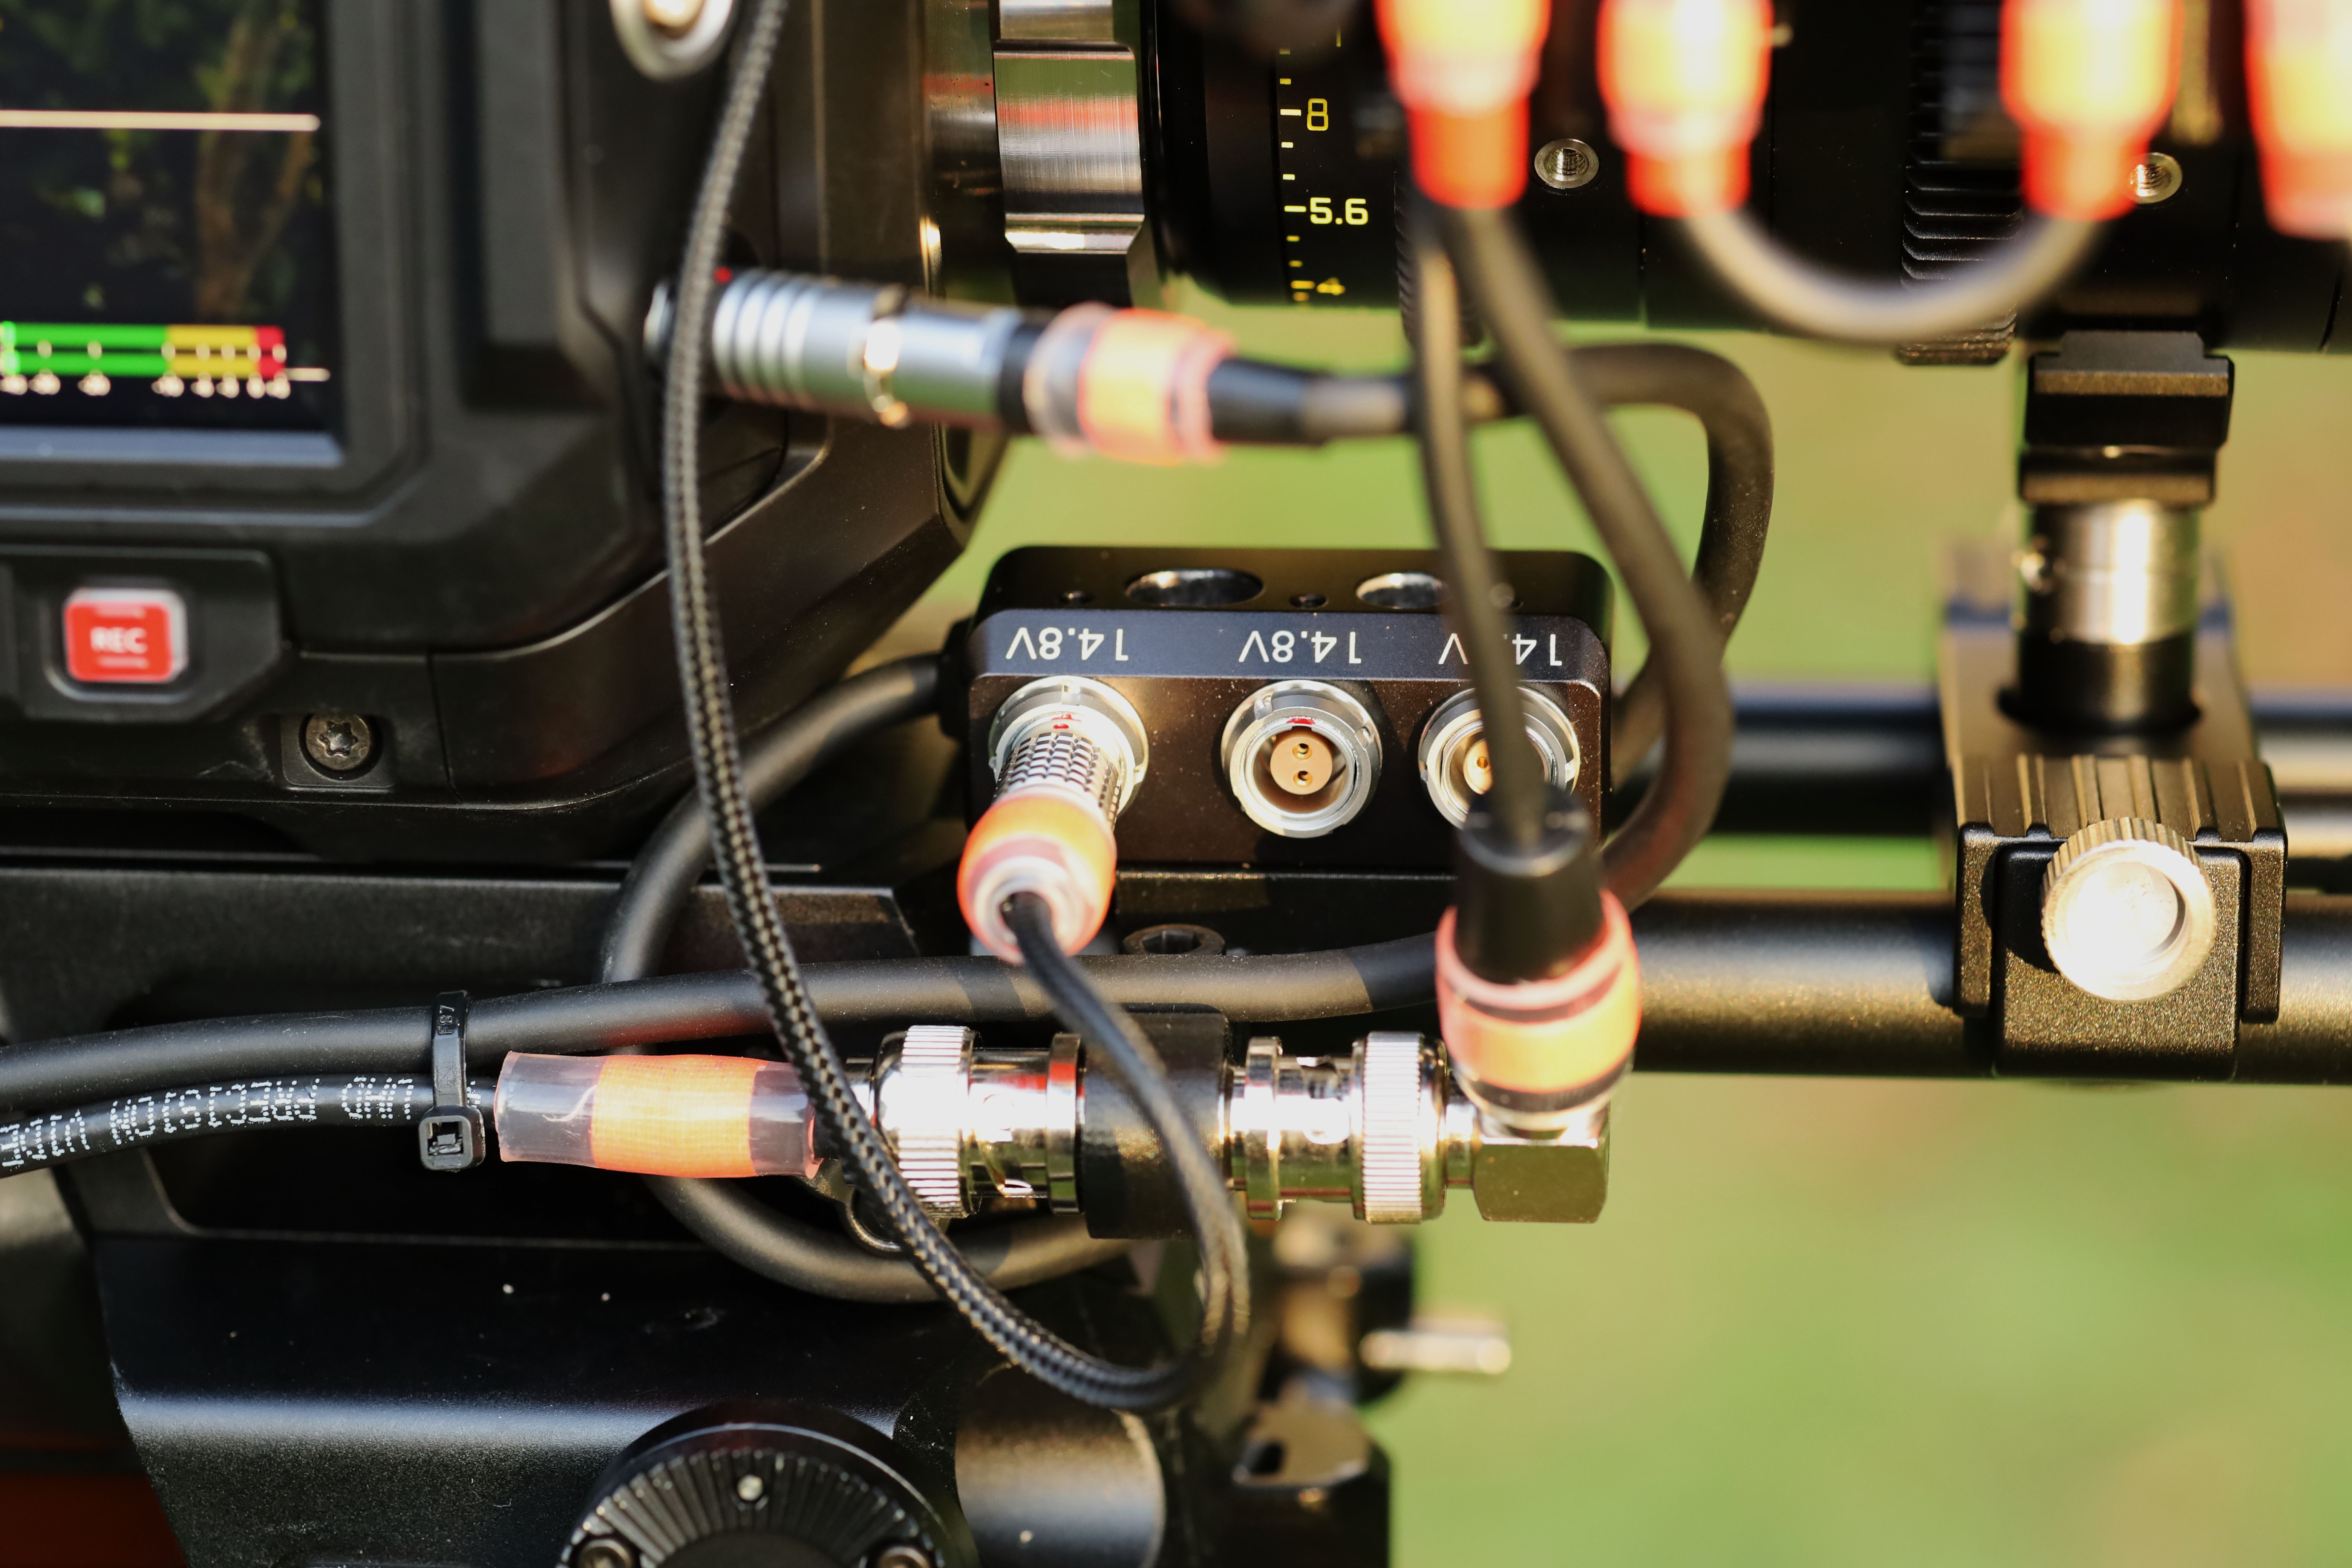
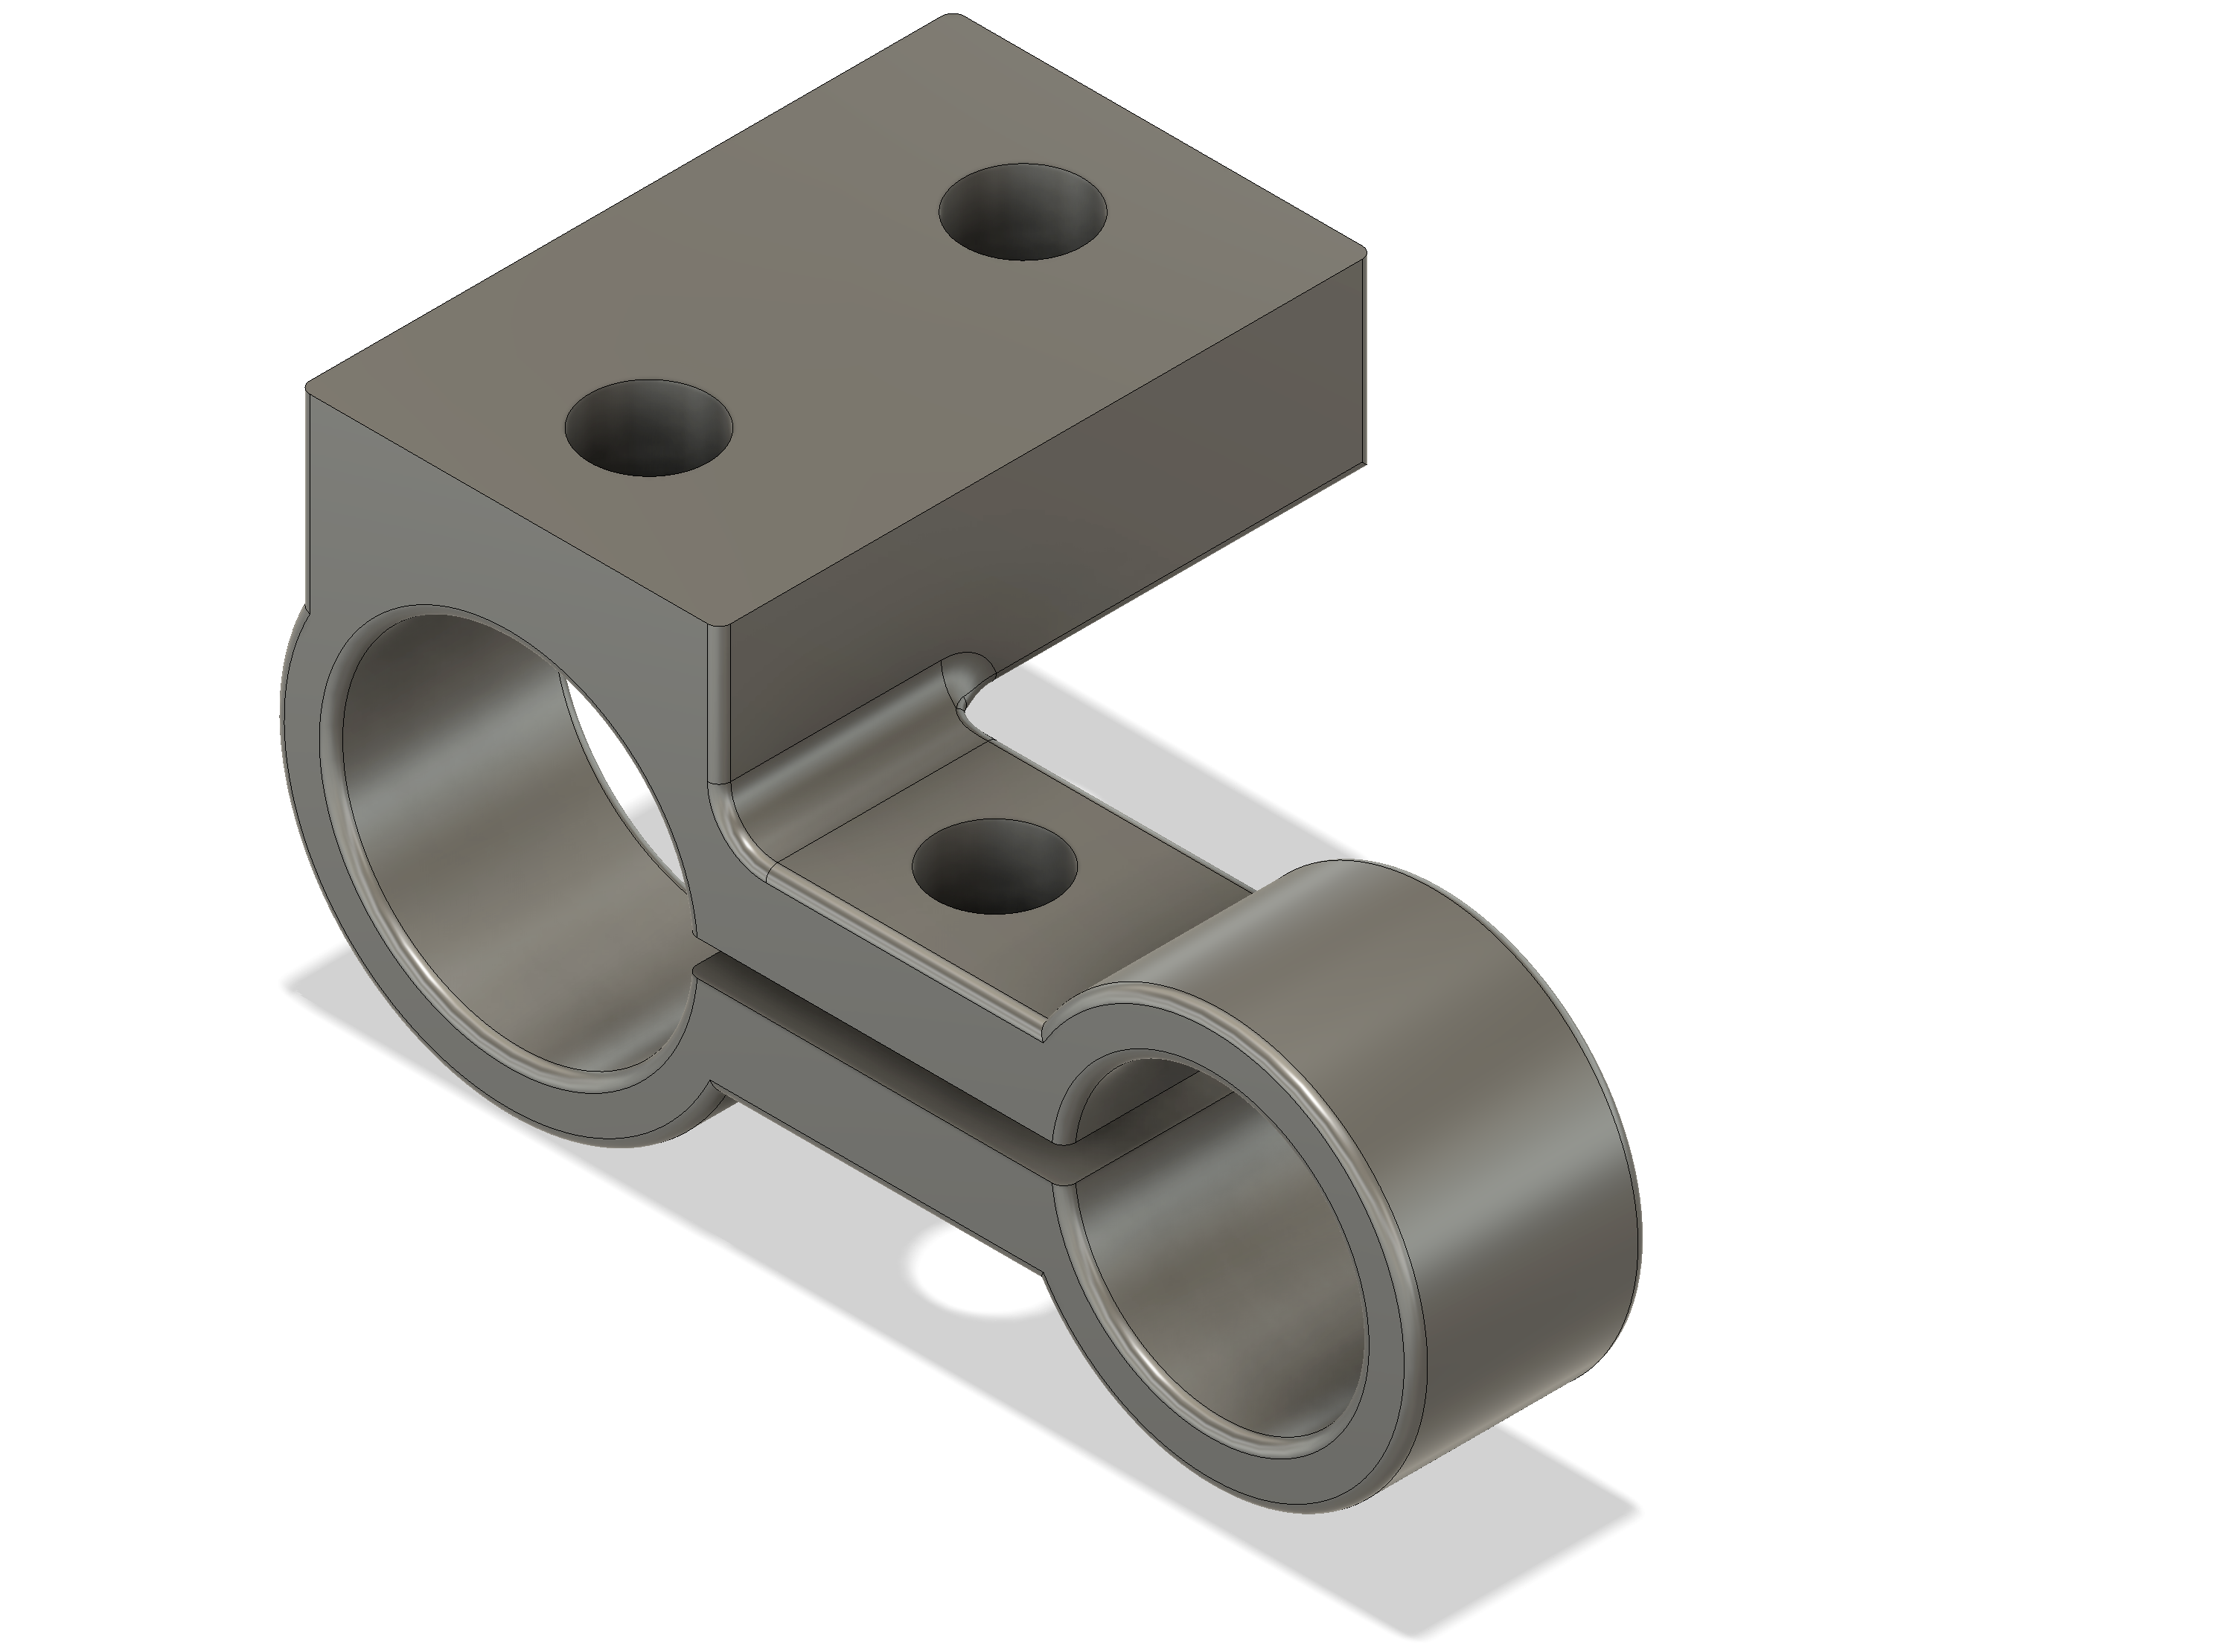
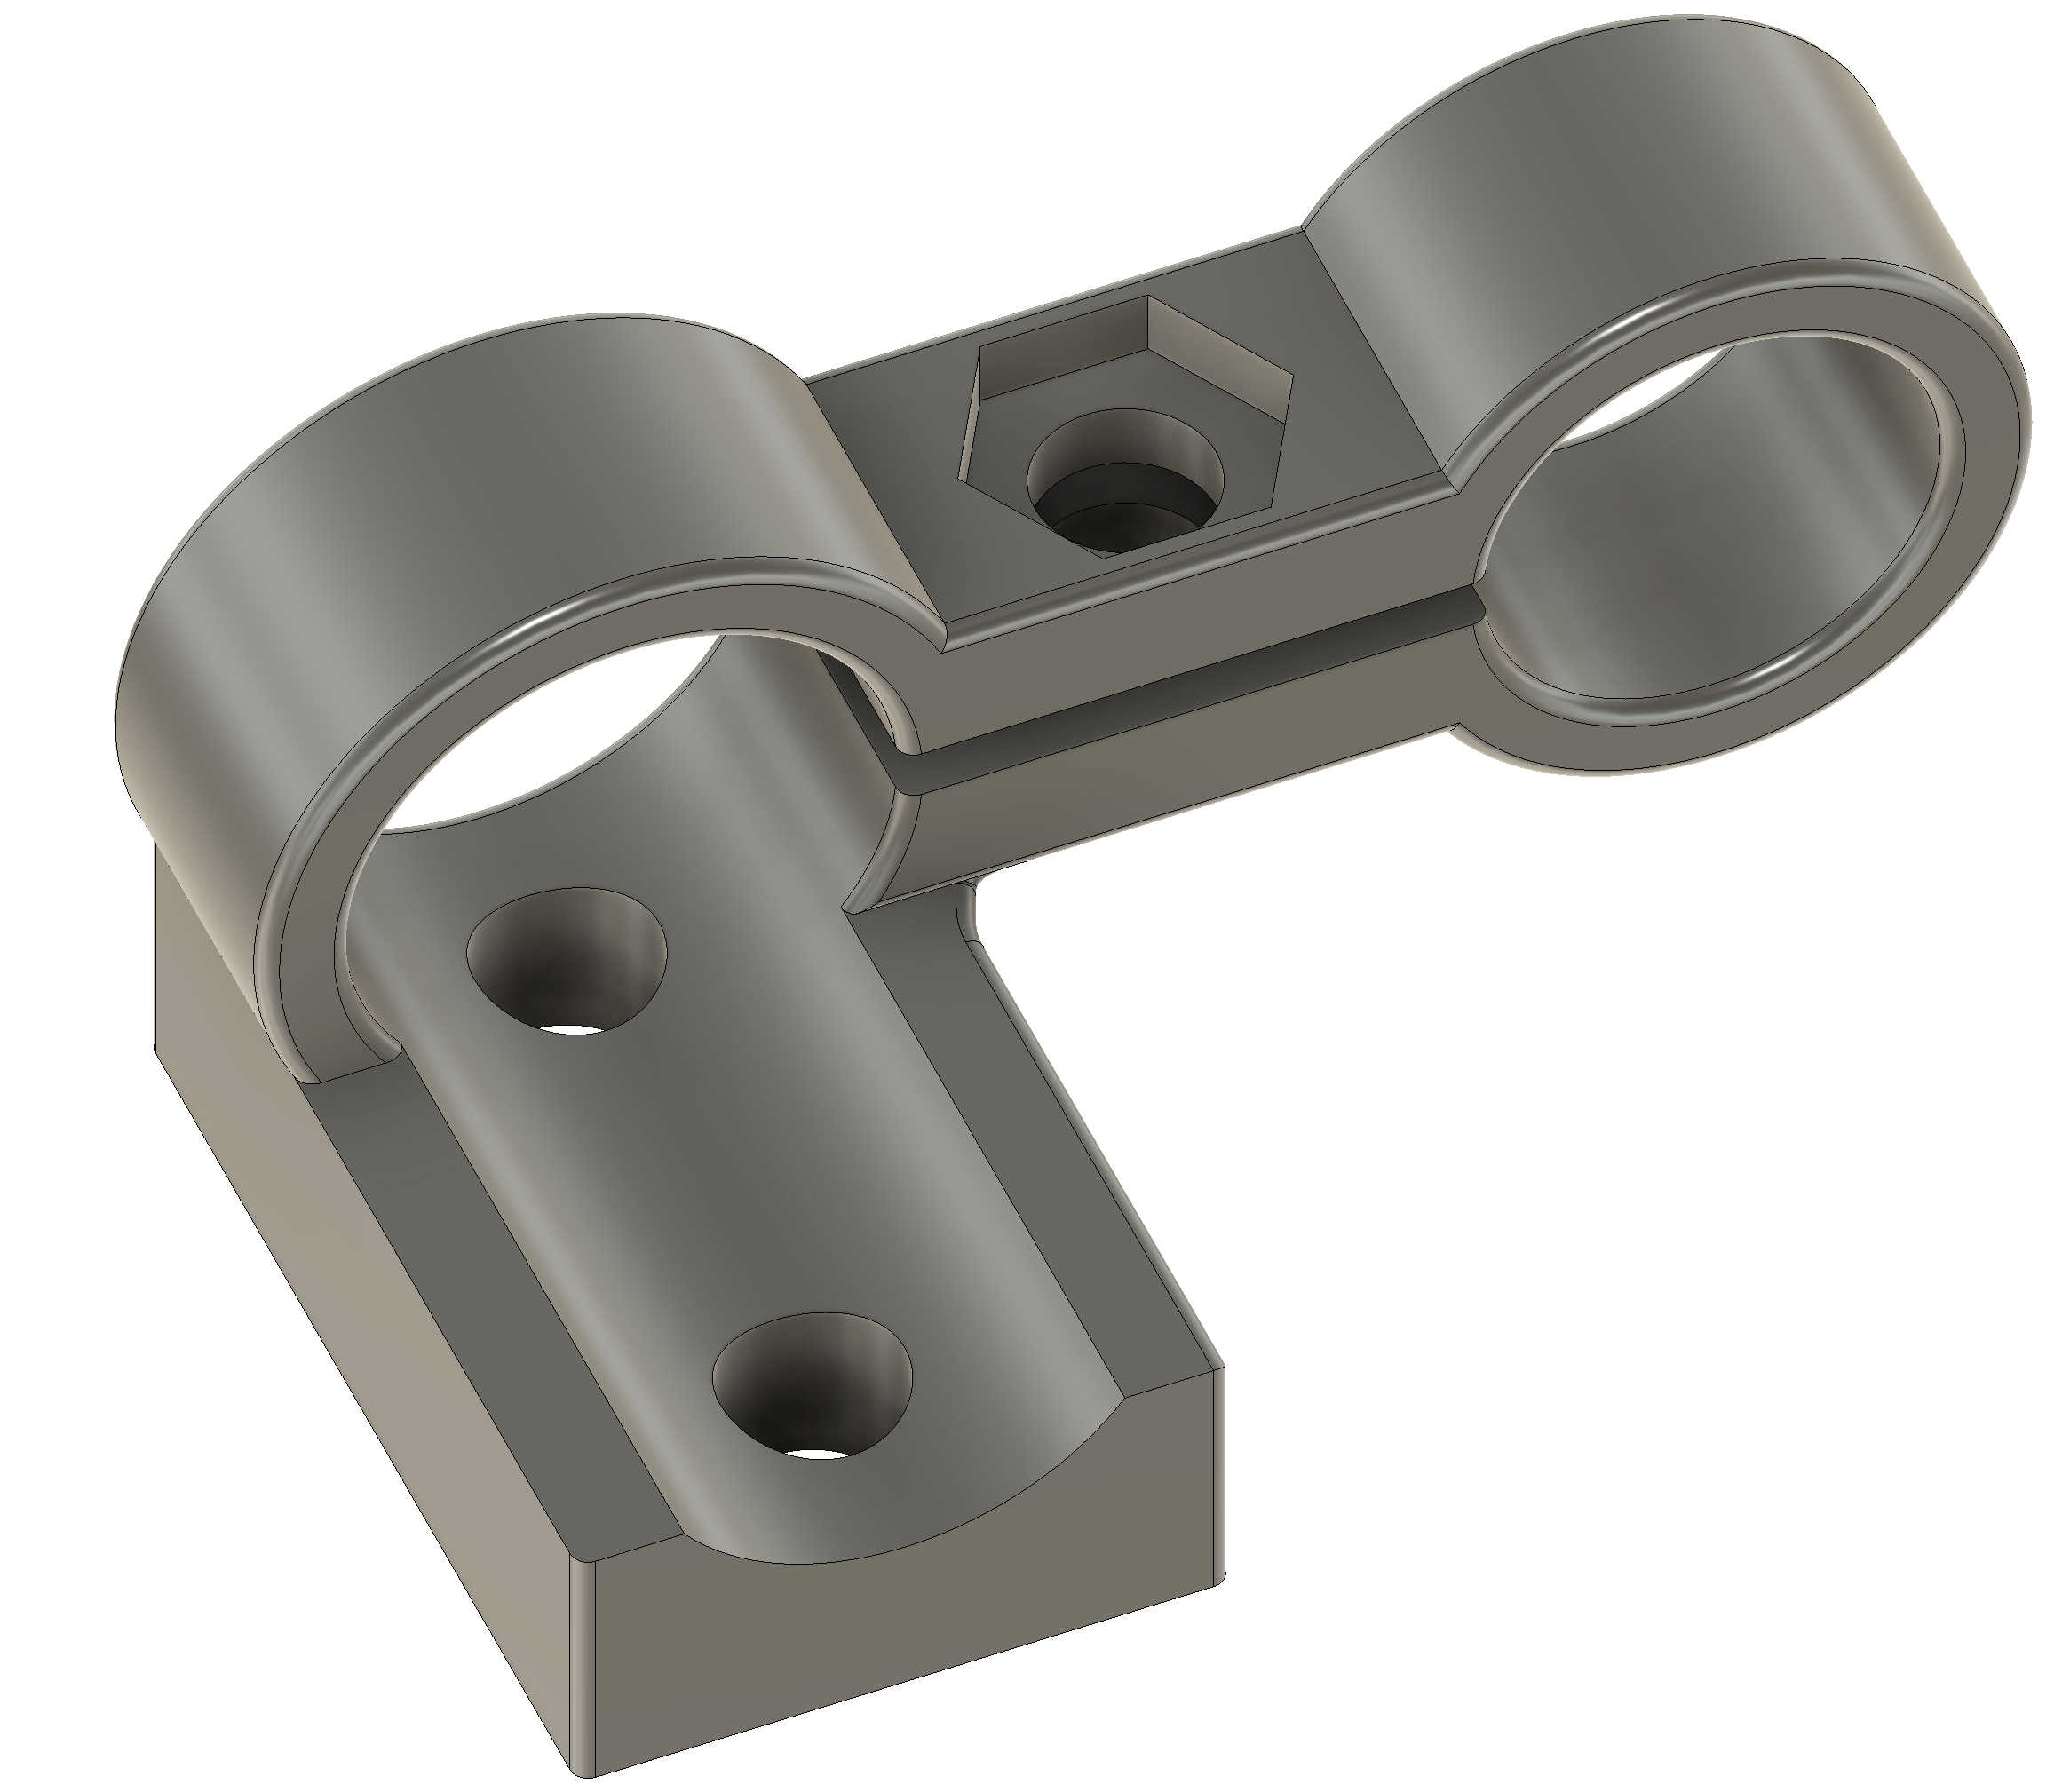
Feel free to grab the STL file or the original Fusion360 f3d and run your own. The clamp uses one M5 screw to hold on to the rail, with a recess for the nut on the underside.
Extras
Monitor adapter
I like the SmallHD Ultra 7 monitor but want to remove it when putting the rig into its coffin. To that end, the monitor lives on a SmallRig HawkLock quick-release. Of course that quick-release plate has locating pins at ARRI spacing while the SmallHD monitor has them at SmallHD spacing.
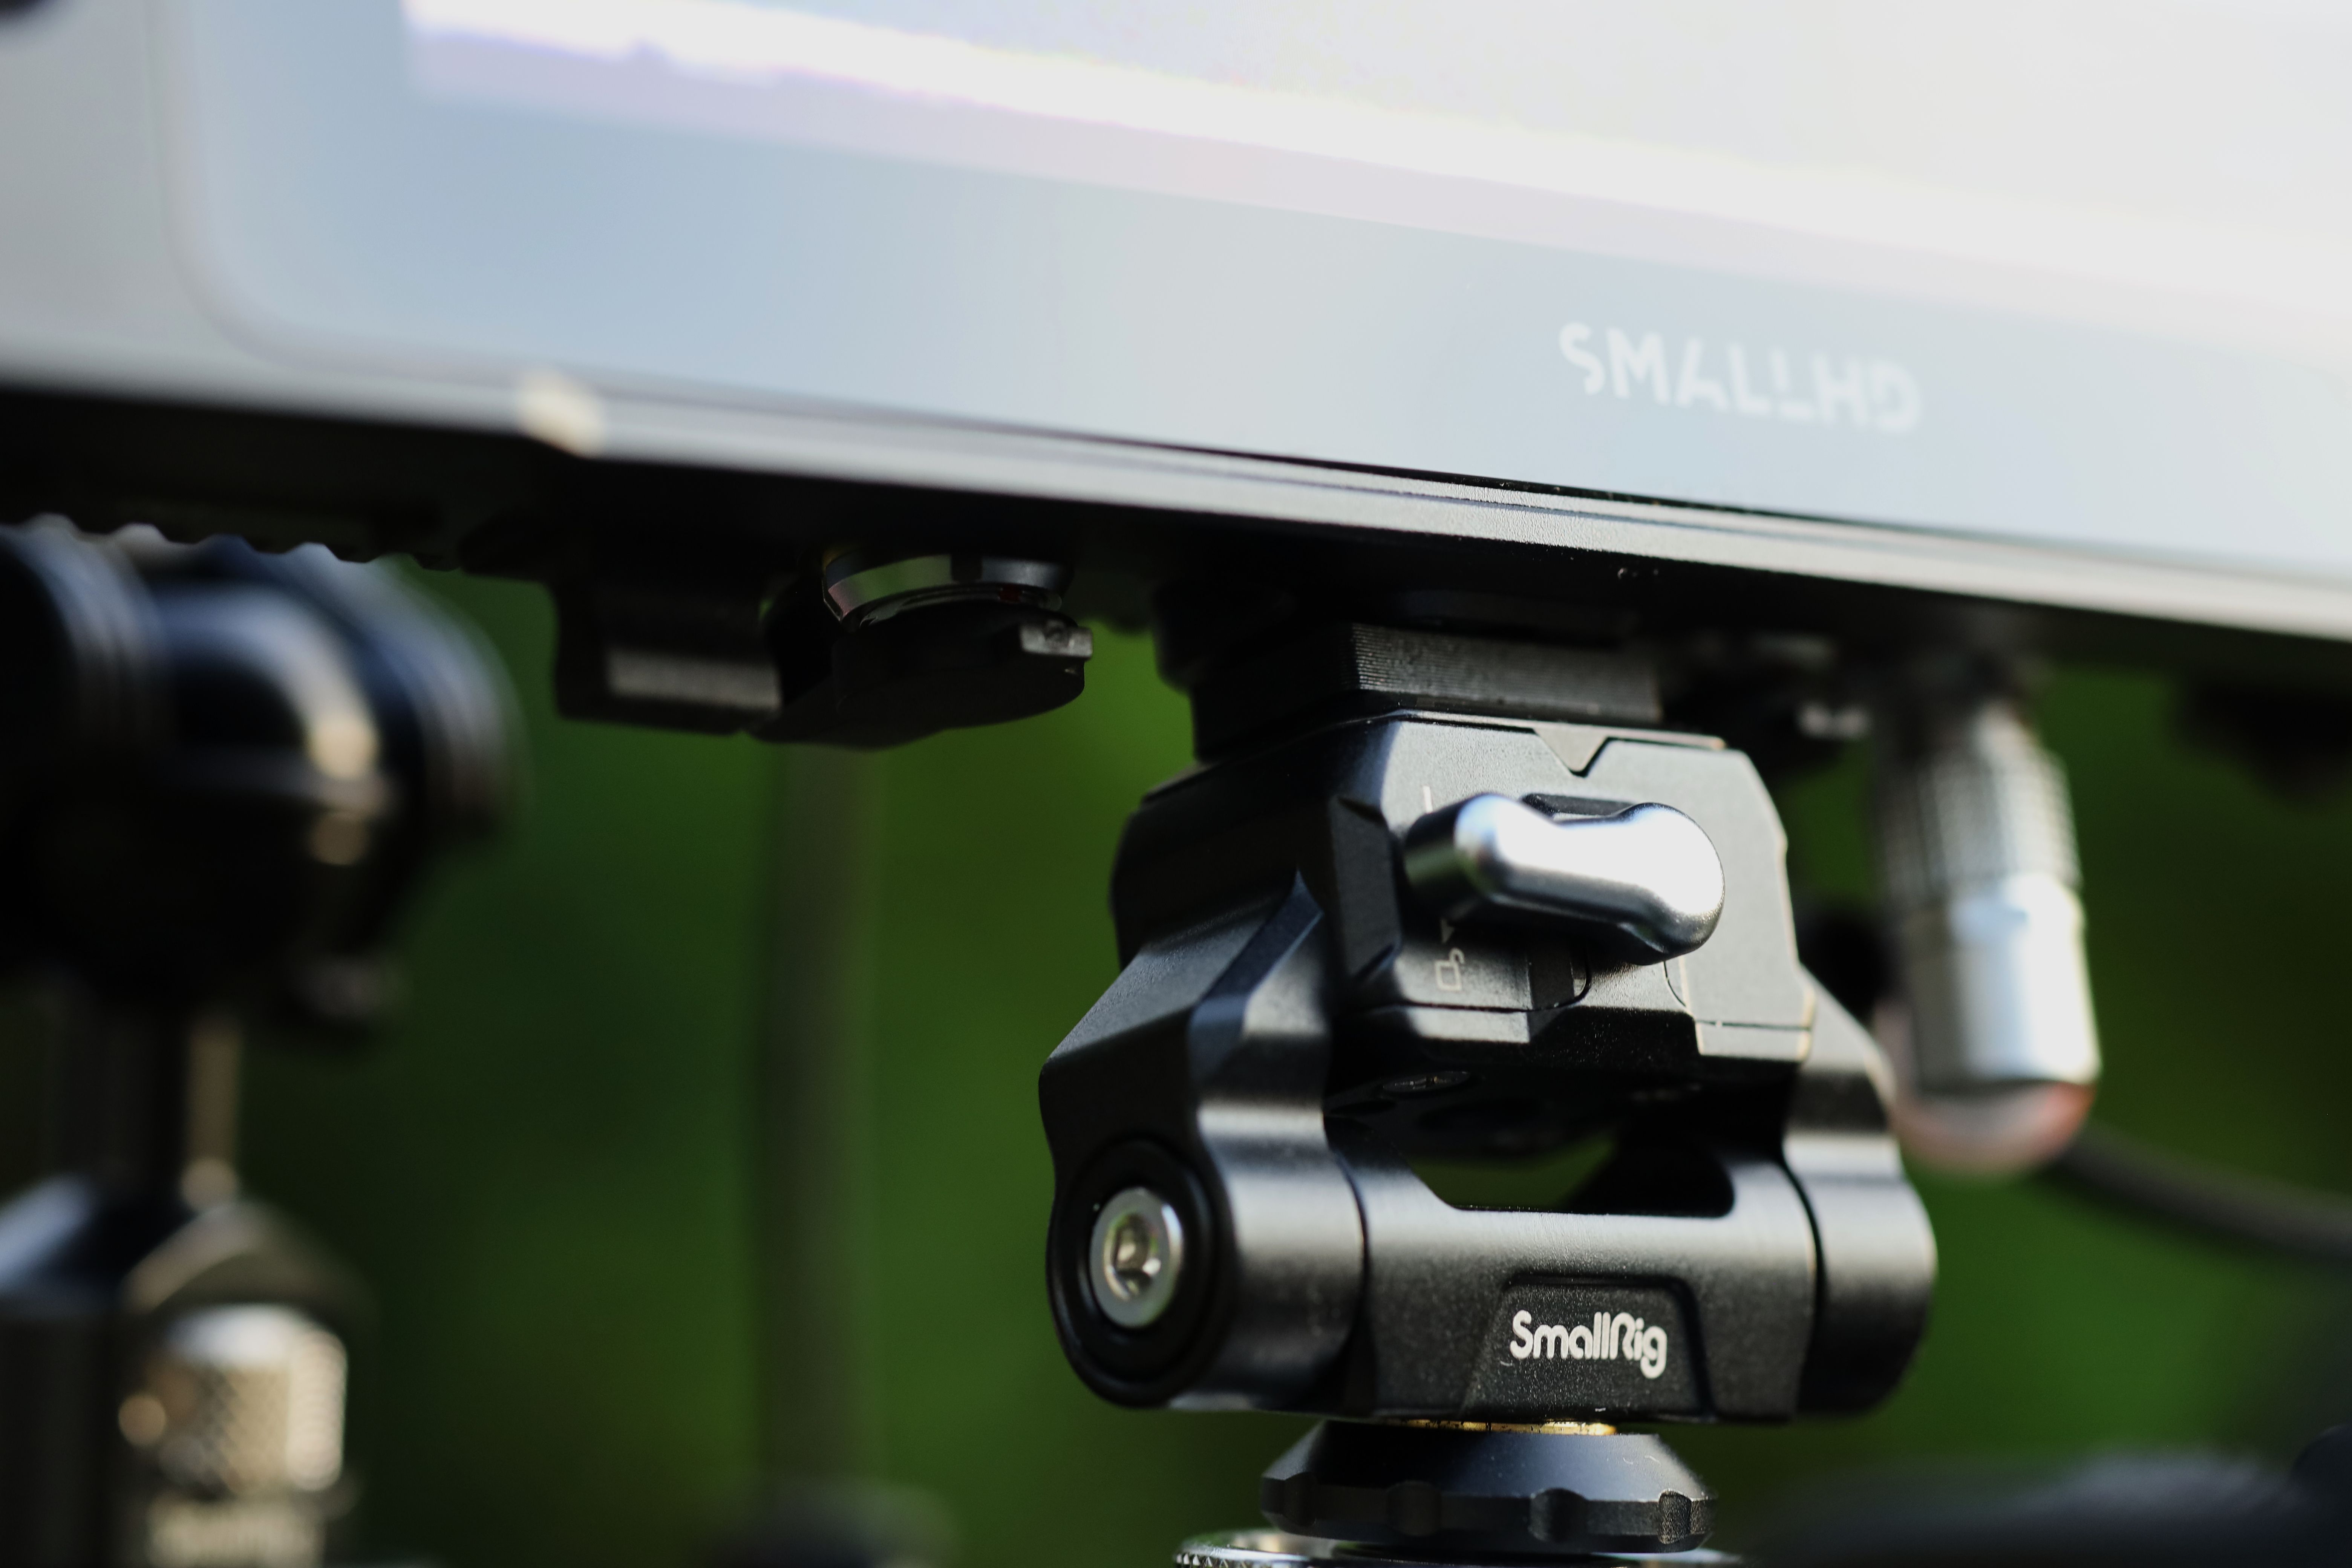
So when in doubt, 3D-print another thing: an ARRI-to-SmallHD locating pin adapter (good enough in plastic for a monitor):
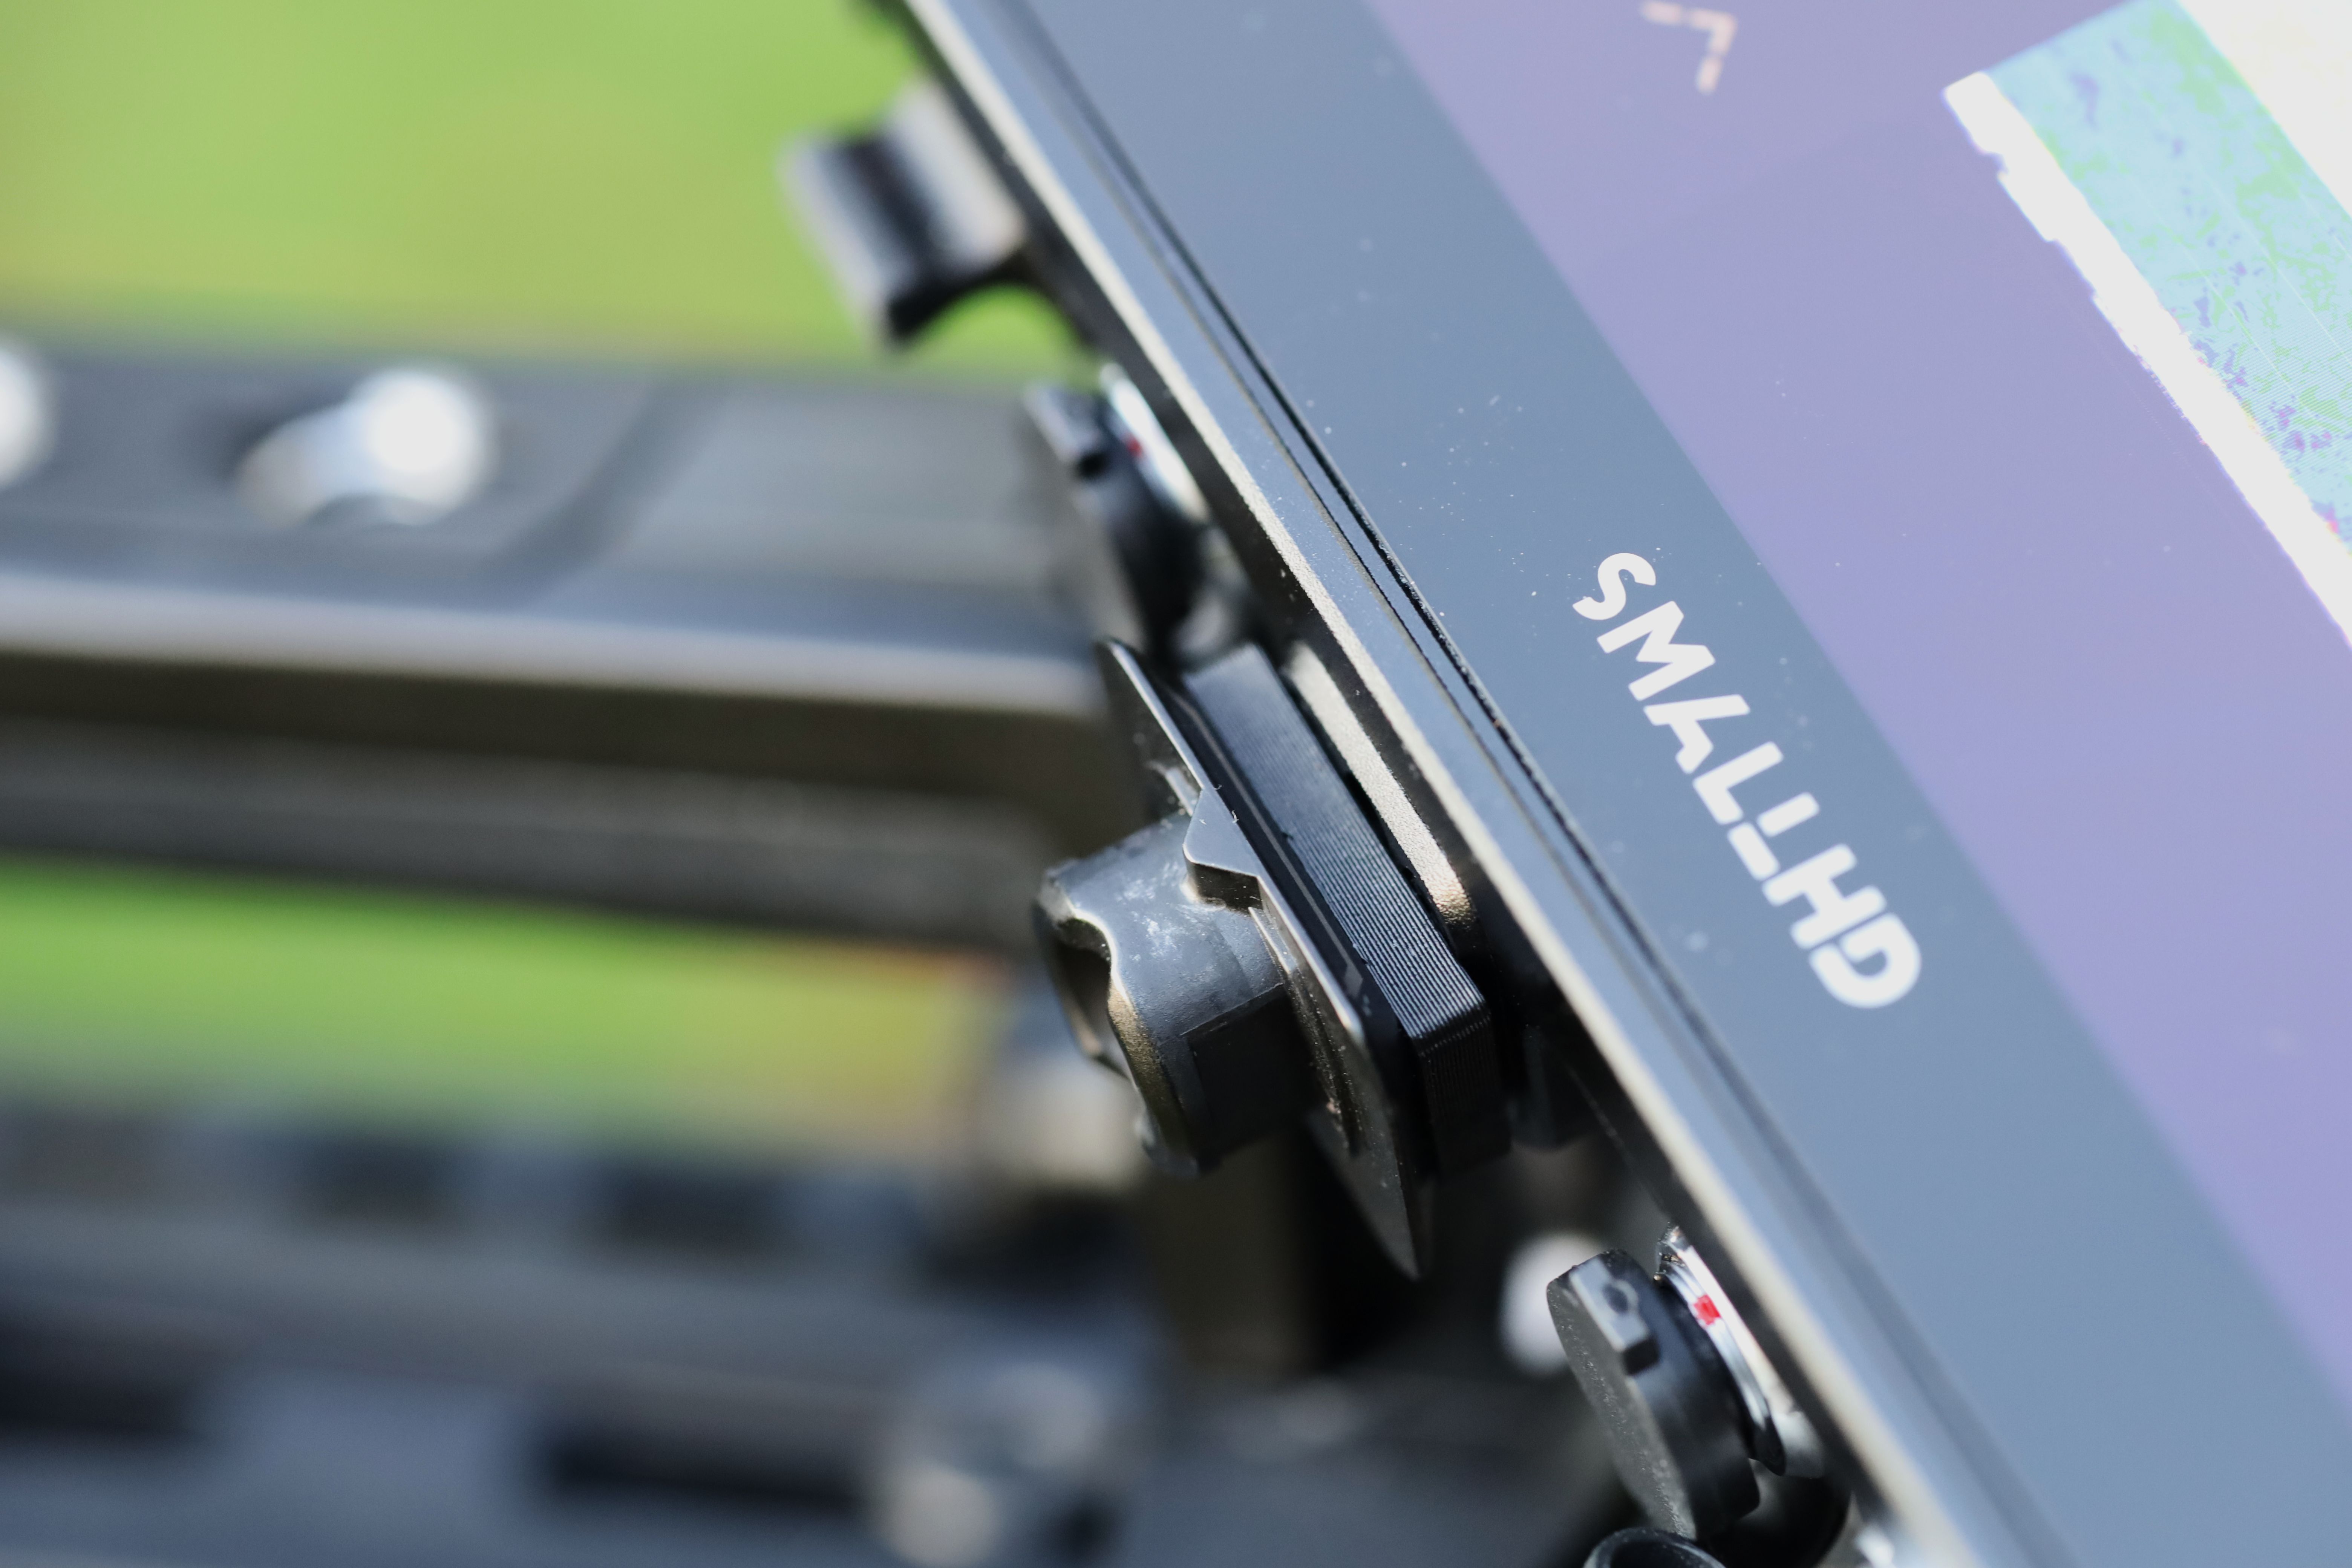
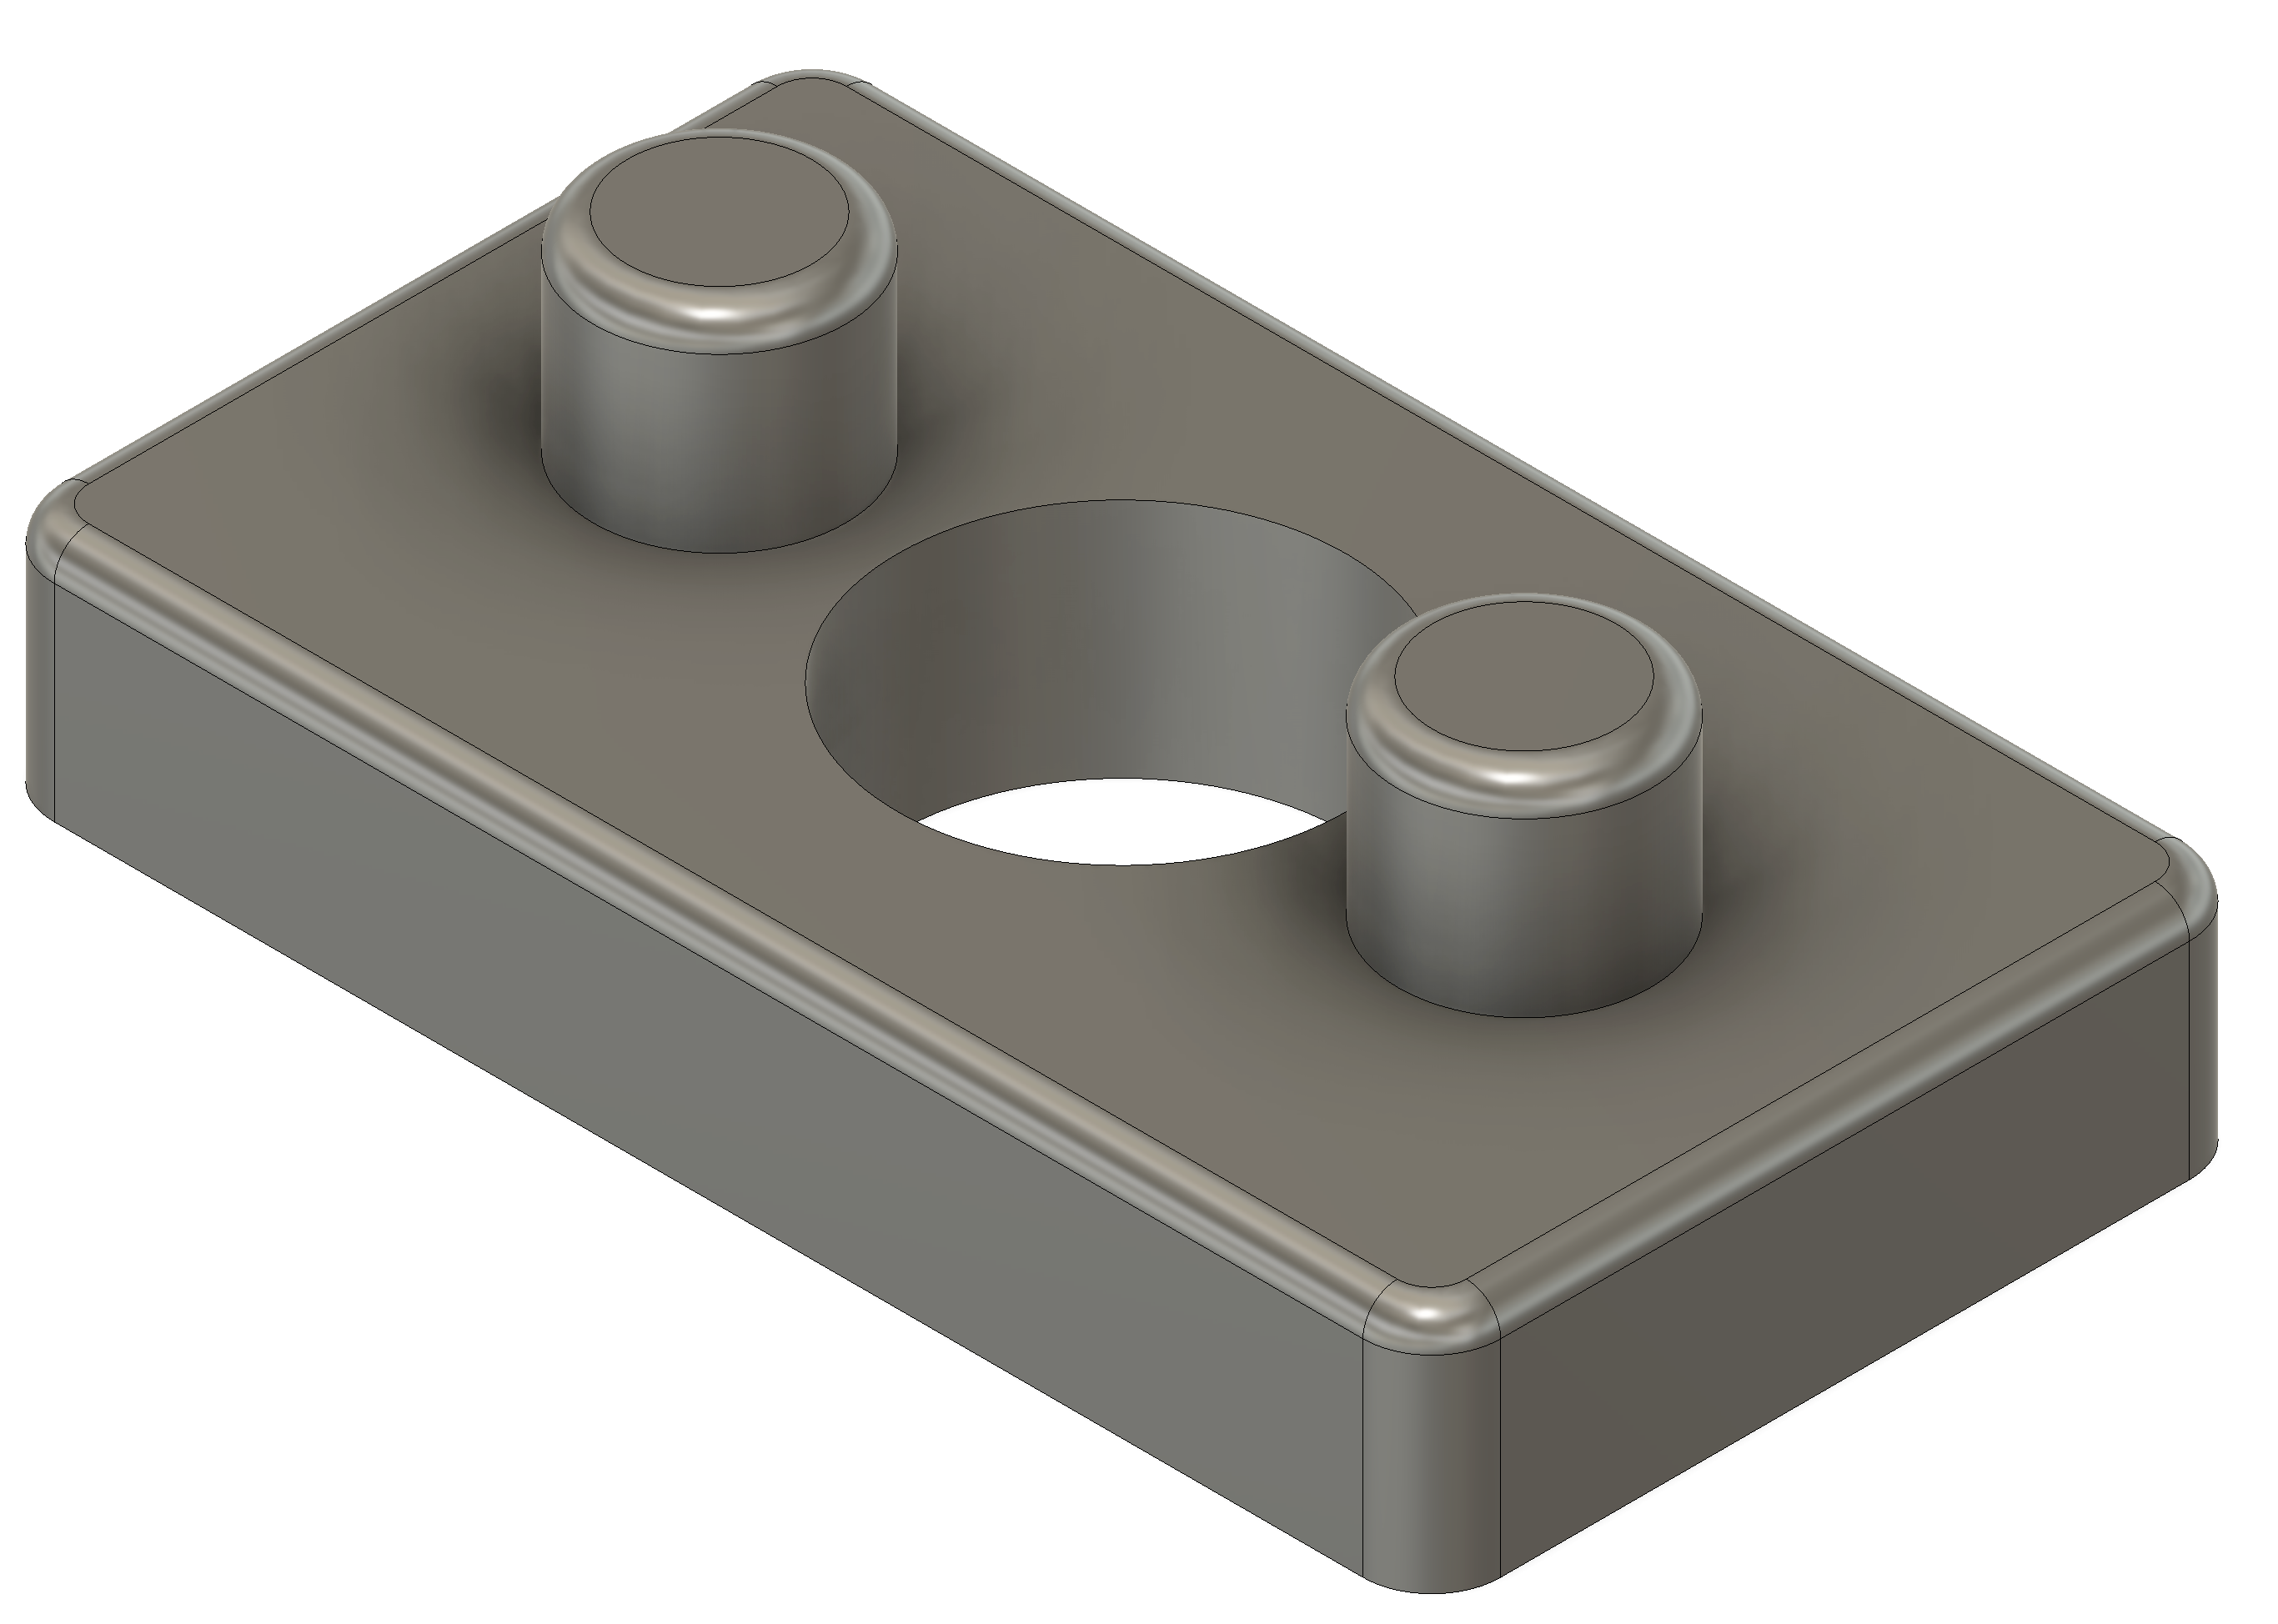
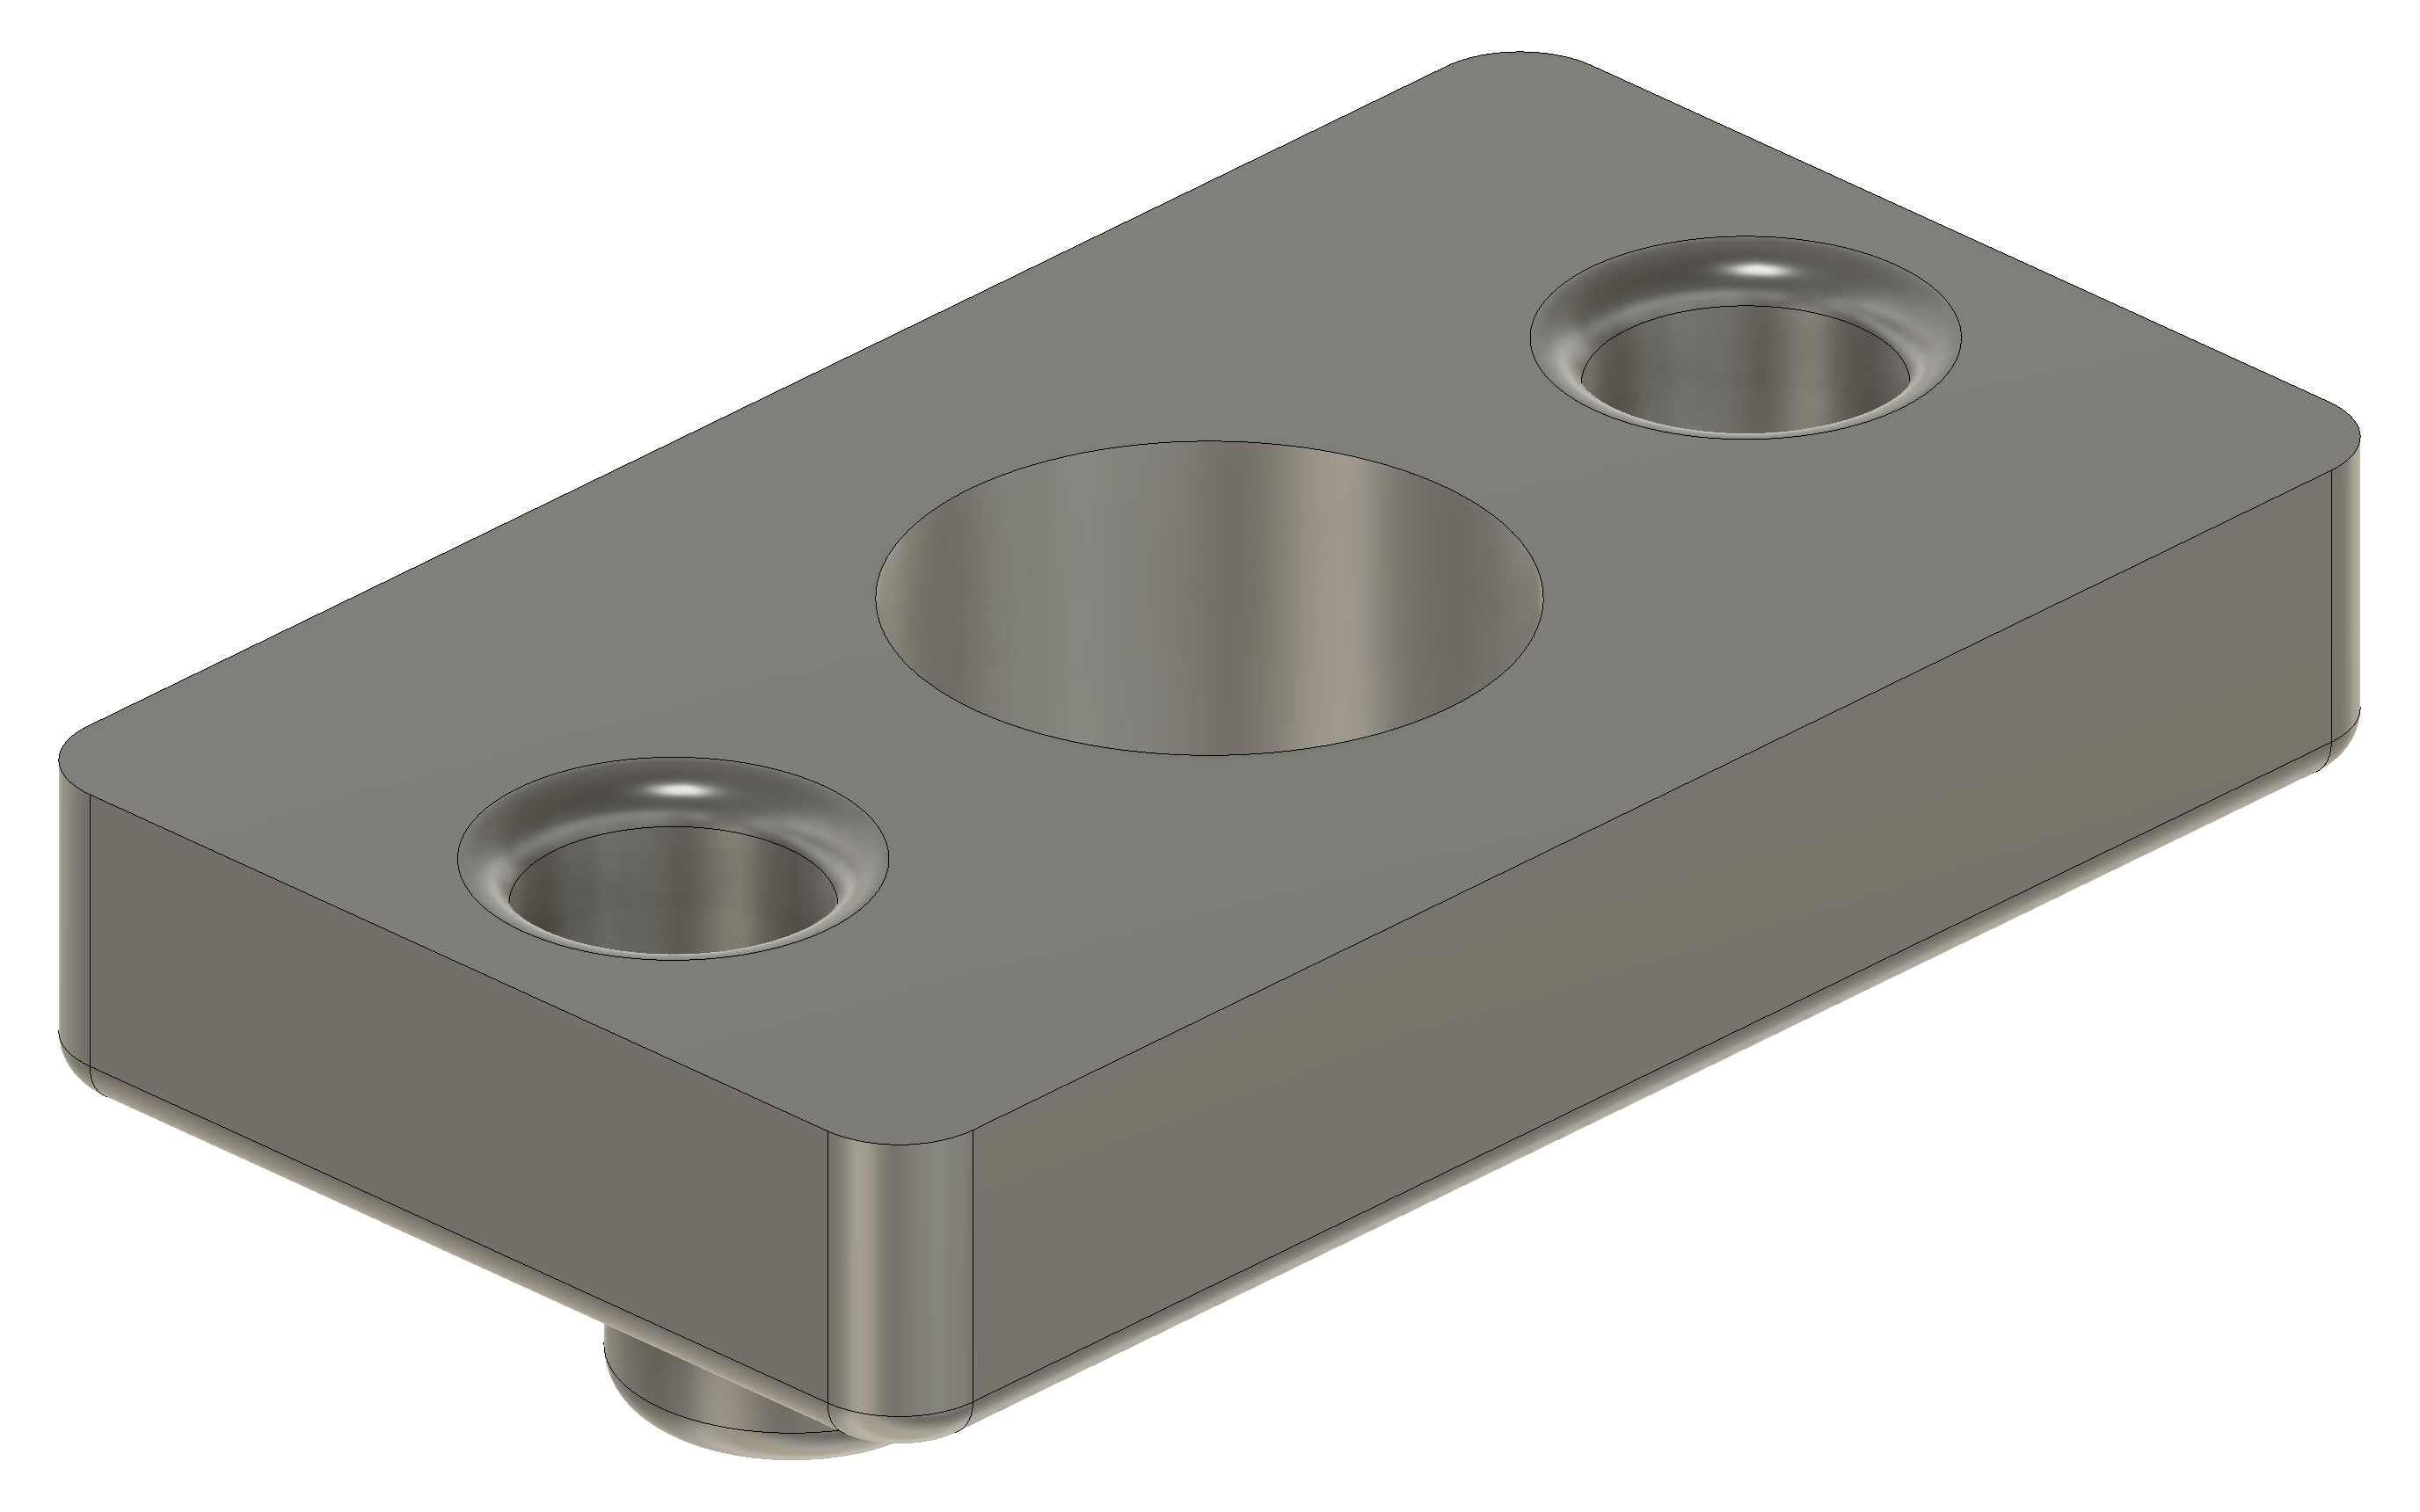
Go and grab the STL file or the original Fusion360 f3d and run your own. You'll need a slightly longer 1/4-20 screw inside the HawkLock thing than what it ships with but I thankfully had one in my kit.
Monitor AirTag
I've got AirTags attached to all my other monitors. On this one, though, the mounting points are a bit less generous (because it's not wrapped in a SmallRig monitor cage).
I could have put another SmallRig metal AirTag holder on the top but didn't feel like waiting for one so I designed and 3D-printed one that was offset and has SmallHD locating pins built in so it can mount to the side, not cross the forward plane of the screen, and still be something that can't be easily twisted off.
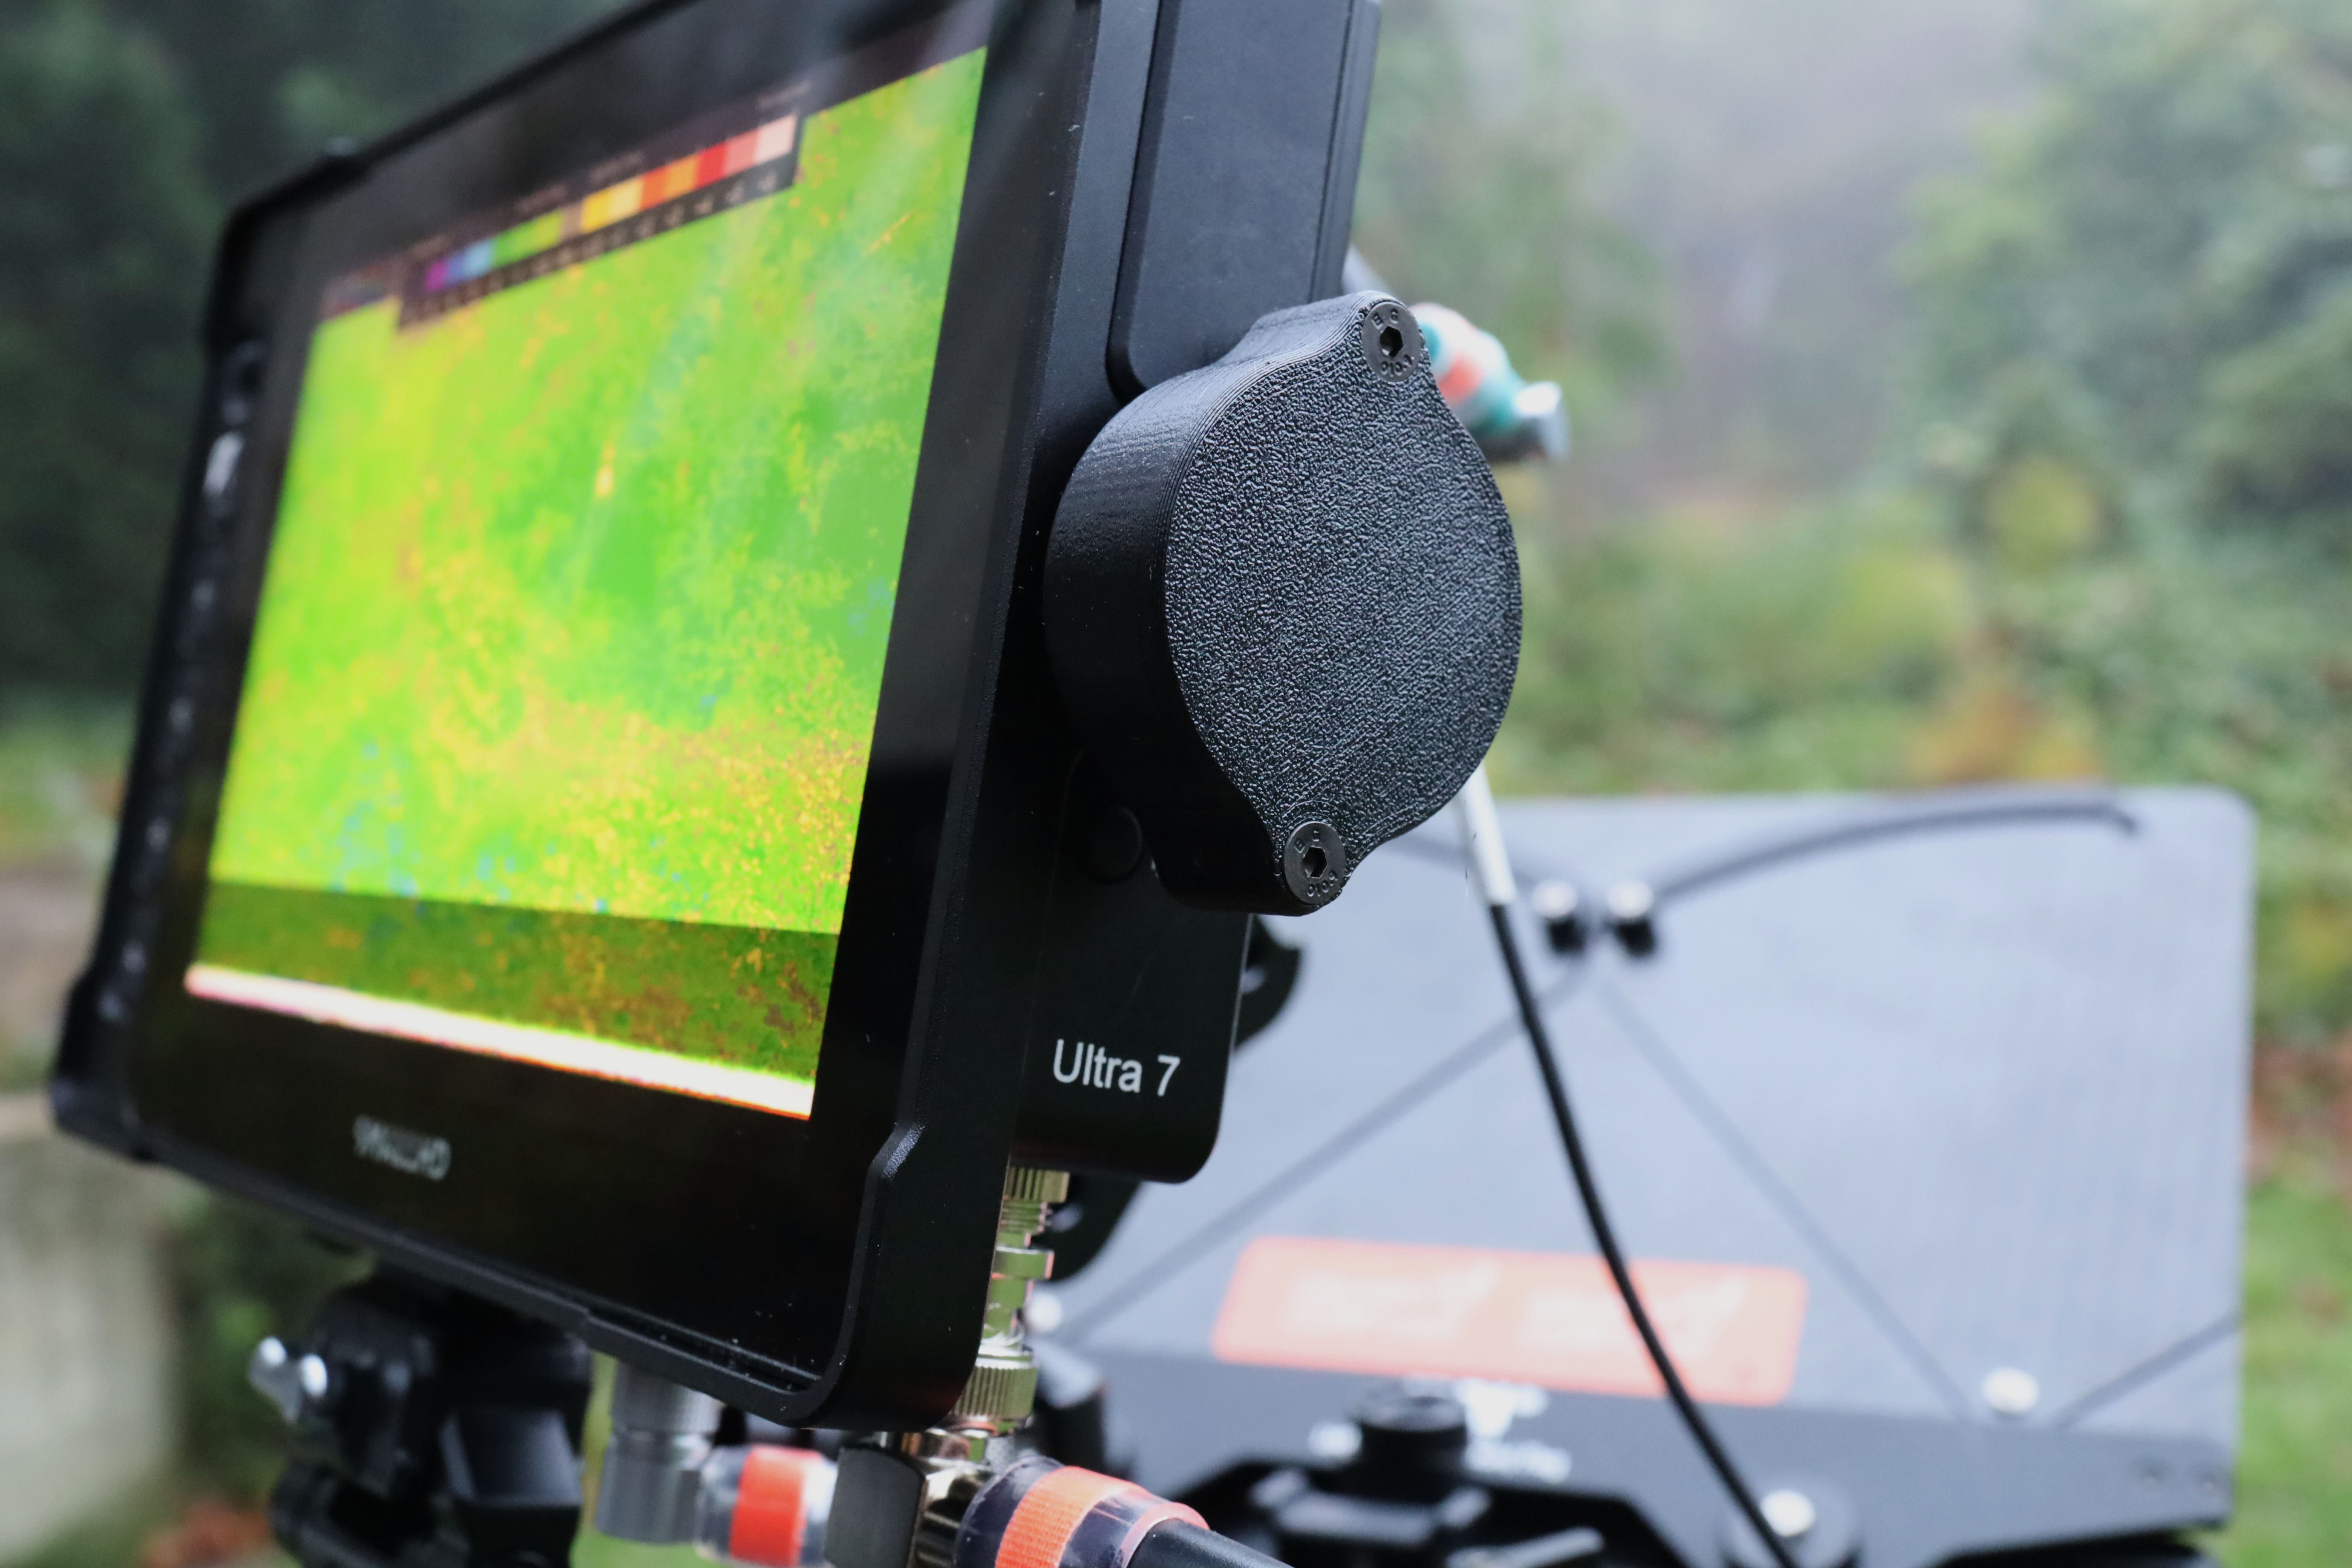
Feel free to grab the STL files for the base, lid, and locator pins, or start with the the original Fusion360 f3d and run your own. Do note that because the locator pins should protrude from the otherwise flat-ish base, I printed them separately and inserted them into the base afterwards; this way I didn't need to print the base with a sea of supports.
Cables
Major shoutout to Alvin's Cables on Amazon for making great, reliable cables, especially 90-degree rotatable Lemo 2-pin cables. The right-angle connector keeps the gak so much more tightly contained and less likely to catch on stuff.
| « Building out a Pyxis | Welcome to Phinneywood » |