Radiant heating rework
| « Insulation | Drywall » |
The problem
Our house is heated with in-floor hydronic heating a.k.a. radiant heat. It's a fantastic way to heat a house, particularly in our relatively mild climate; however, I've never been happy with how our control system worked (or didn't).
Radiant heat has a number of upsides:
- It can be controlled on a room-by-room basis.
- It's completely silent.
- It works gently - no sudden changes in temperature, onslaught of hot air, etc.
- It shares infrastructure across the house (one boiler for all the water) and across systems (the same boiler also provides for our hot water supply).
Of course these can also turn into downsides:
- Room-by-room control makes it difficult to centrally inspect whether the system is set to the right setpoints or some small fry is blasting an unused room up to 85F for the fun of it.
- You can't readily tell if it's running or should be running, particularly when windows or doors are opened.
- It recovers slowly, e.g. when some small fry left a window open all through the night.
- If one room is constantly over-consuming heat (open window, wrong setpoint, etc.) it drags down the rest of the house. Our boiler is somewhat undersized, despite my back-of-the-envelope math telling my architects predicting this problem, but here we are.
All of the downsides can be eliminated with an intelligent control system, and ours was not that.
The system
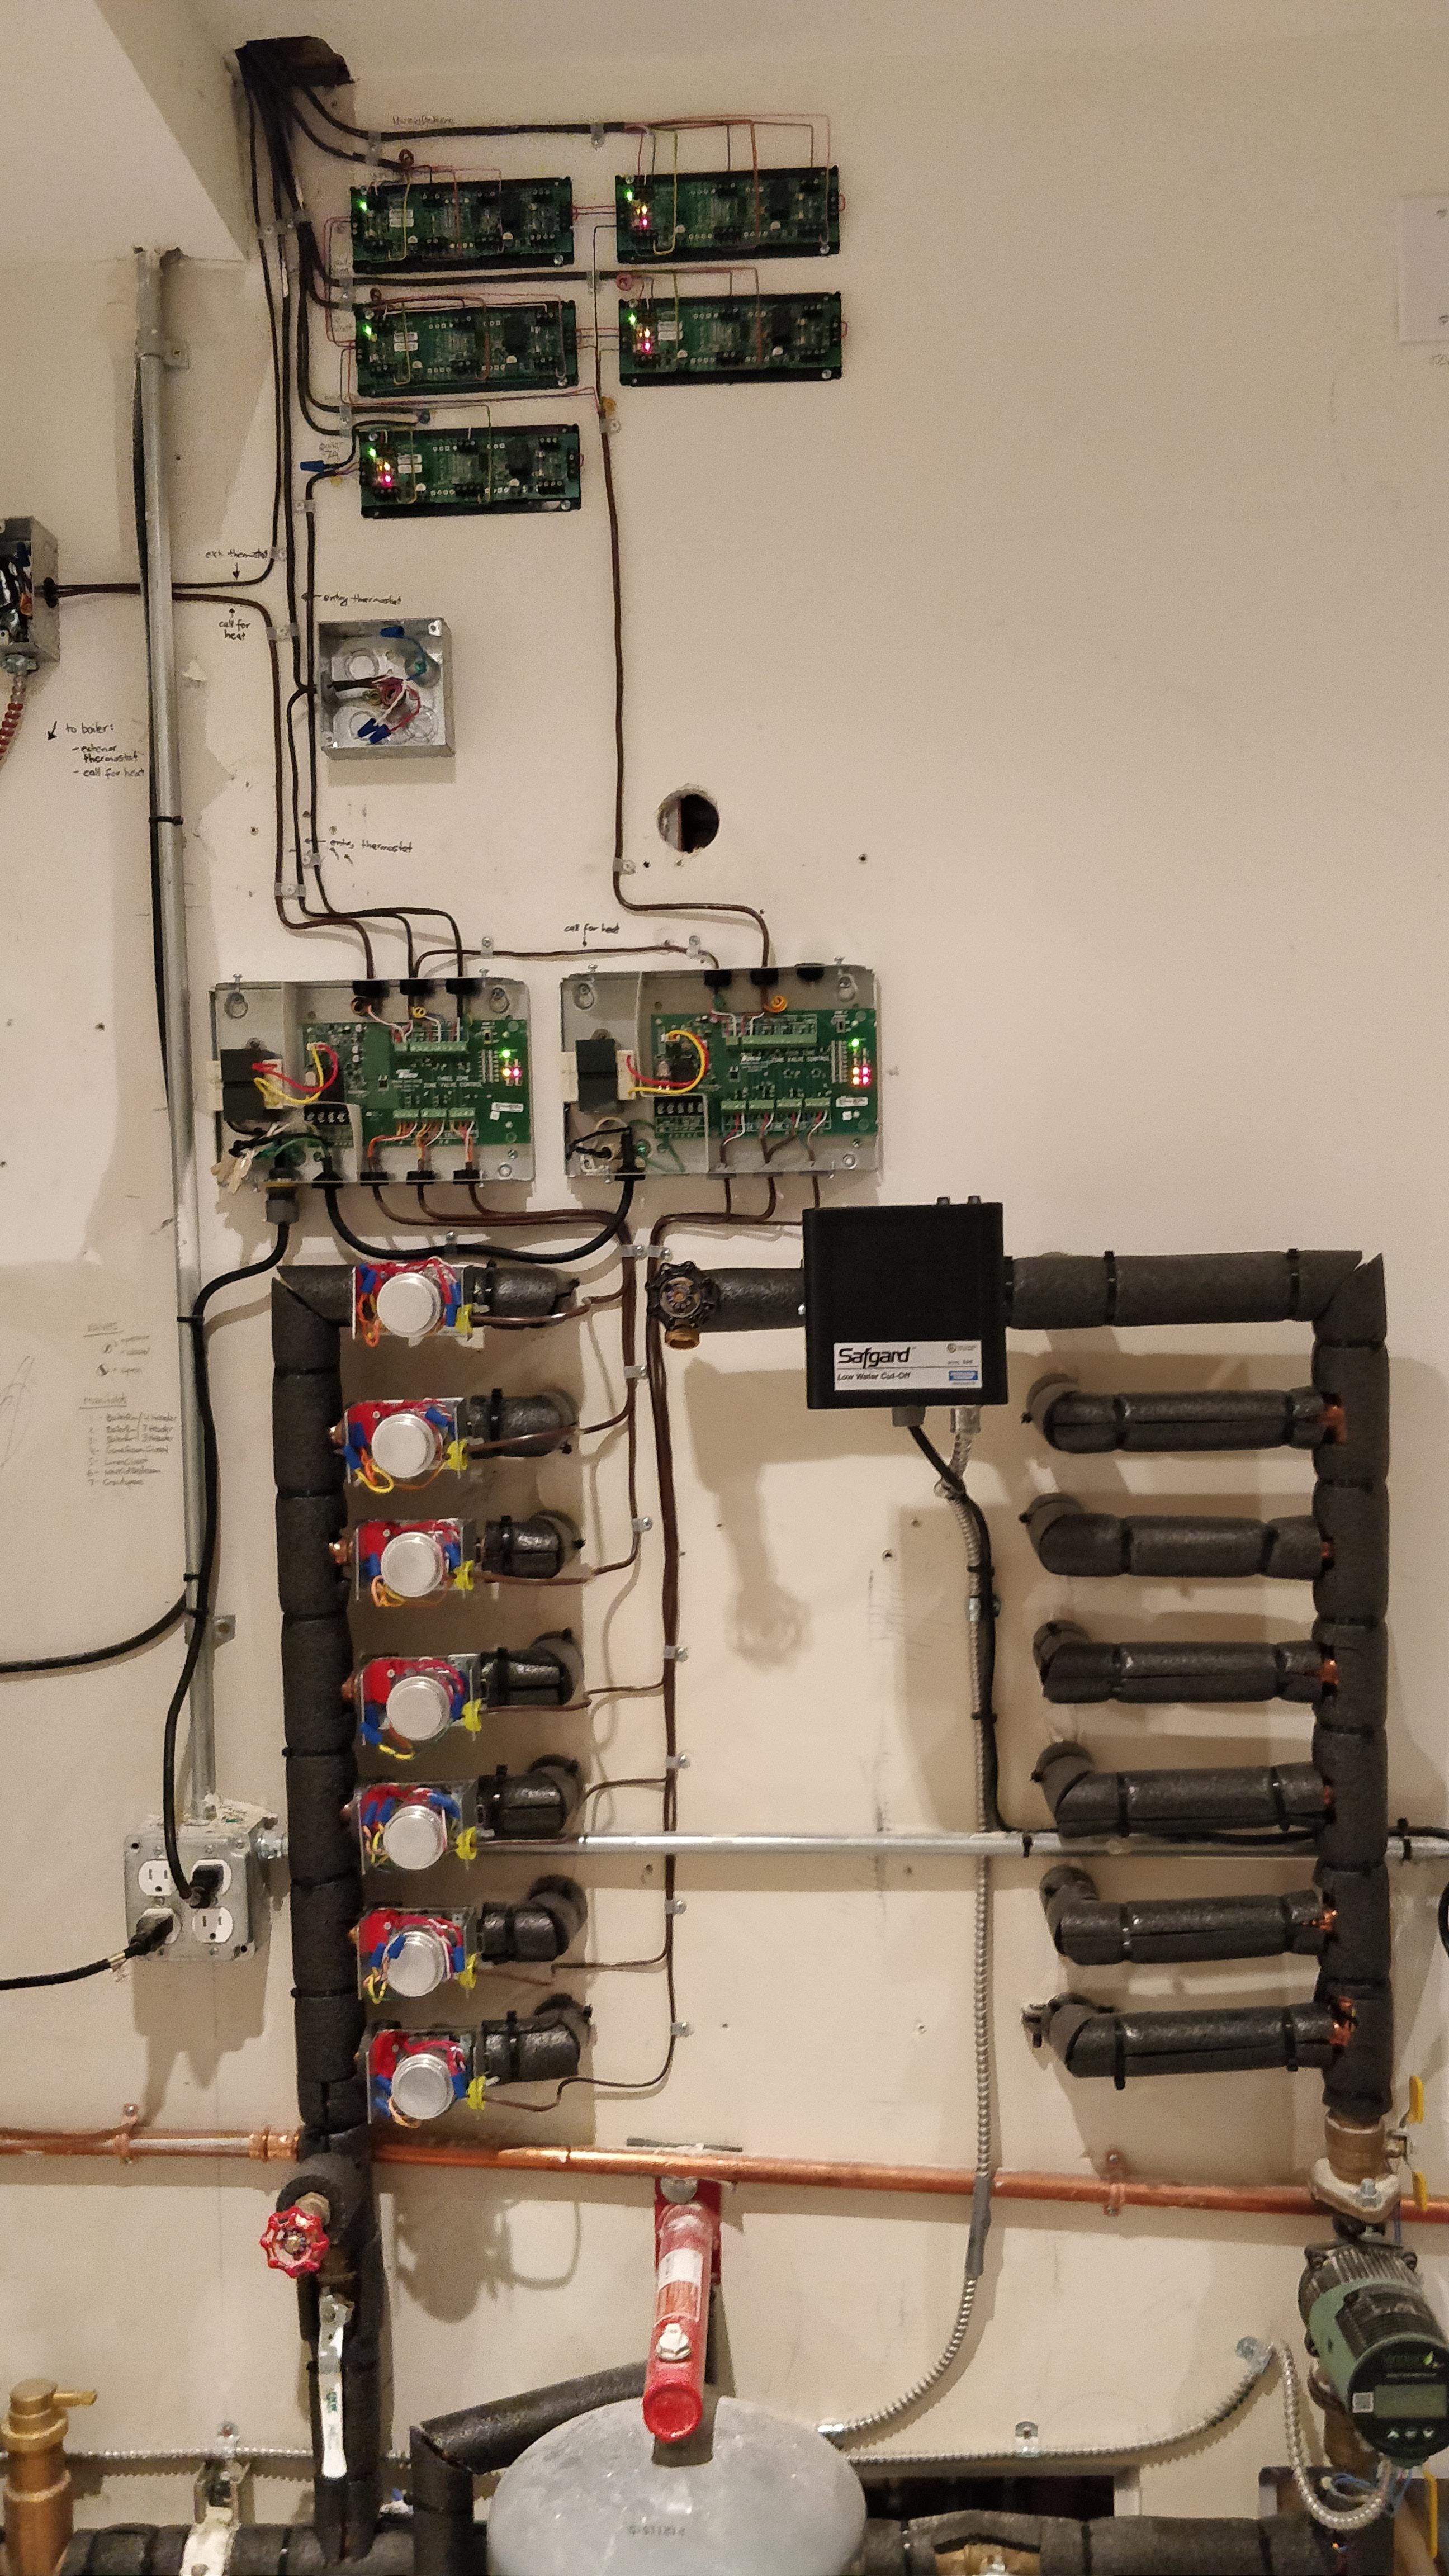
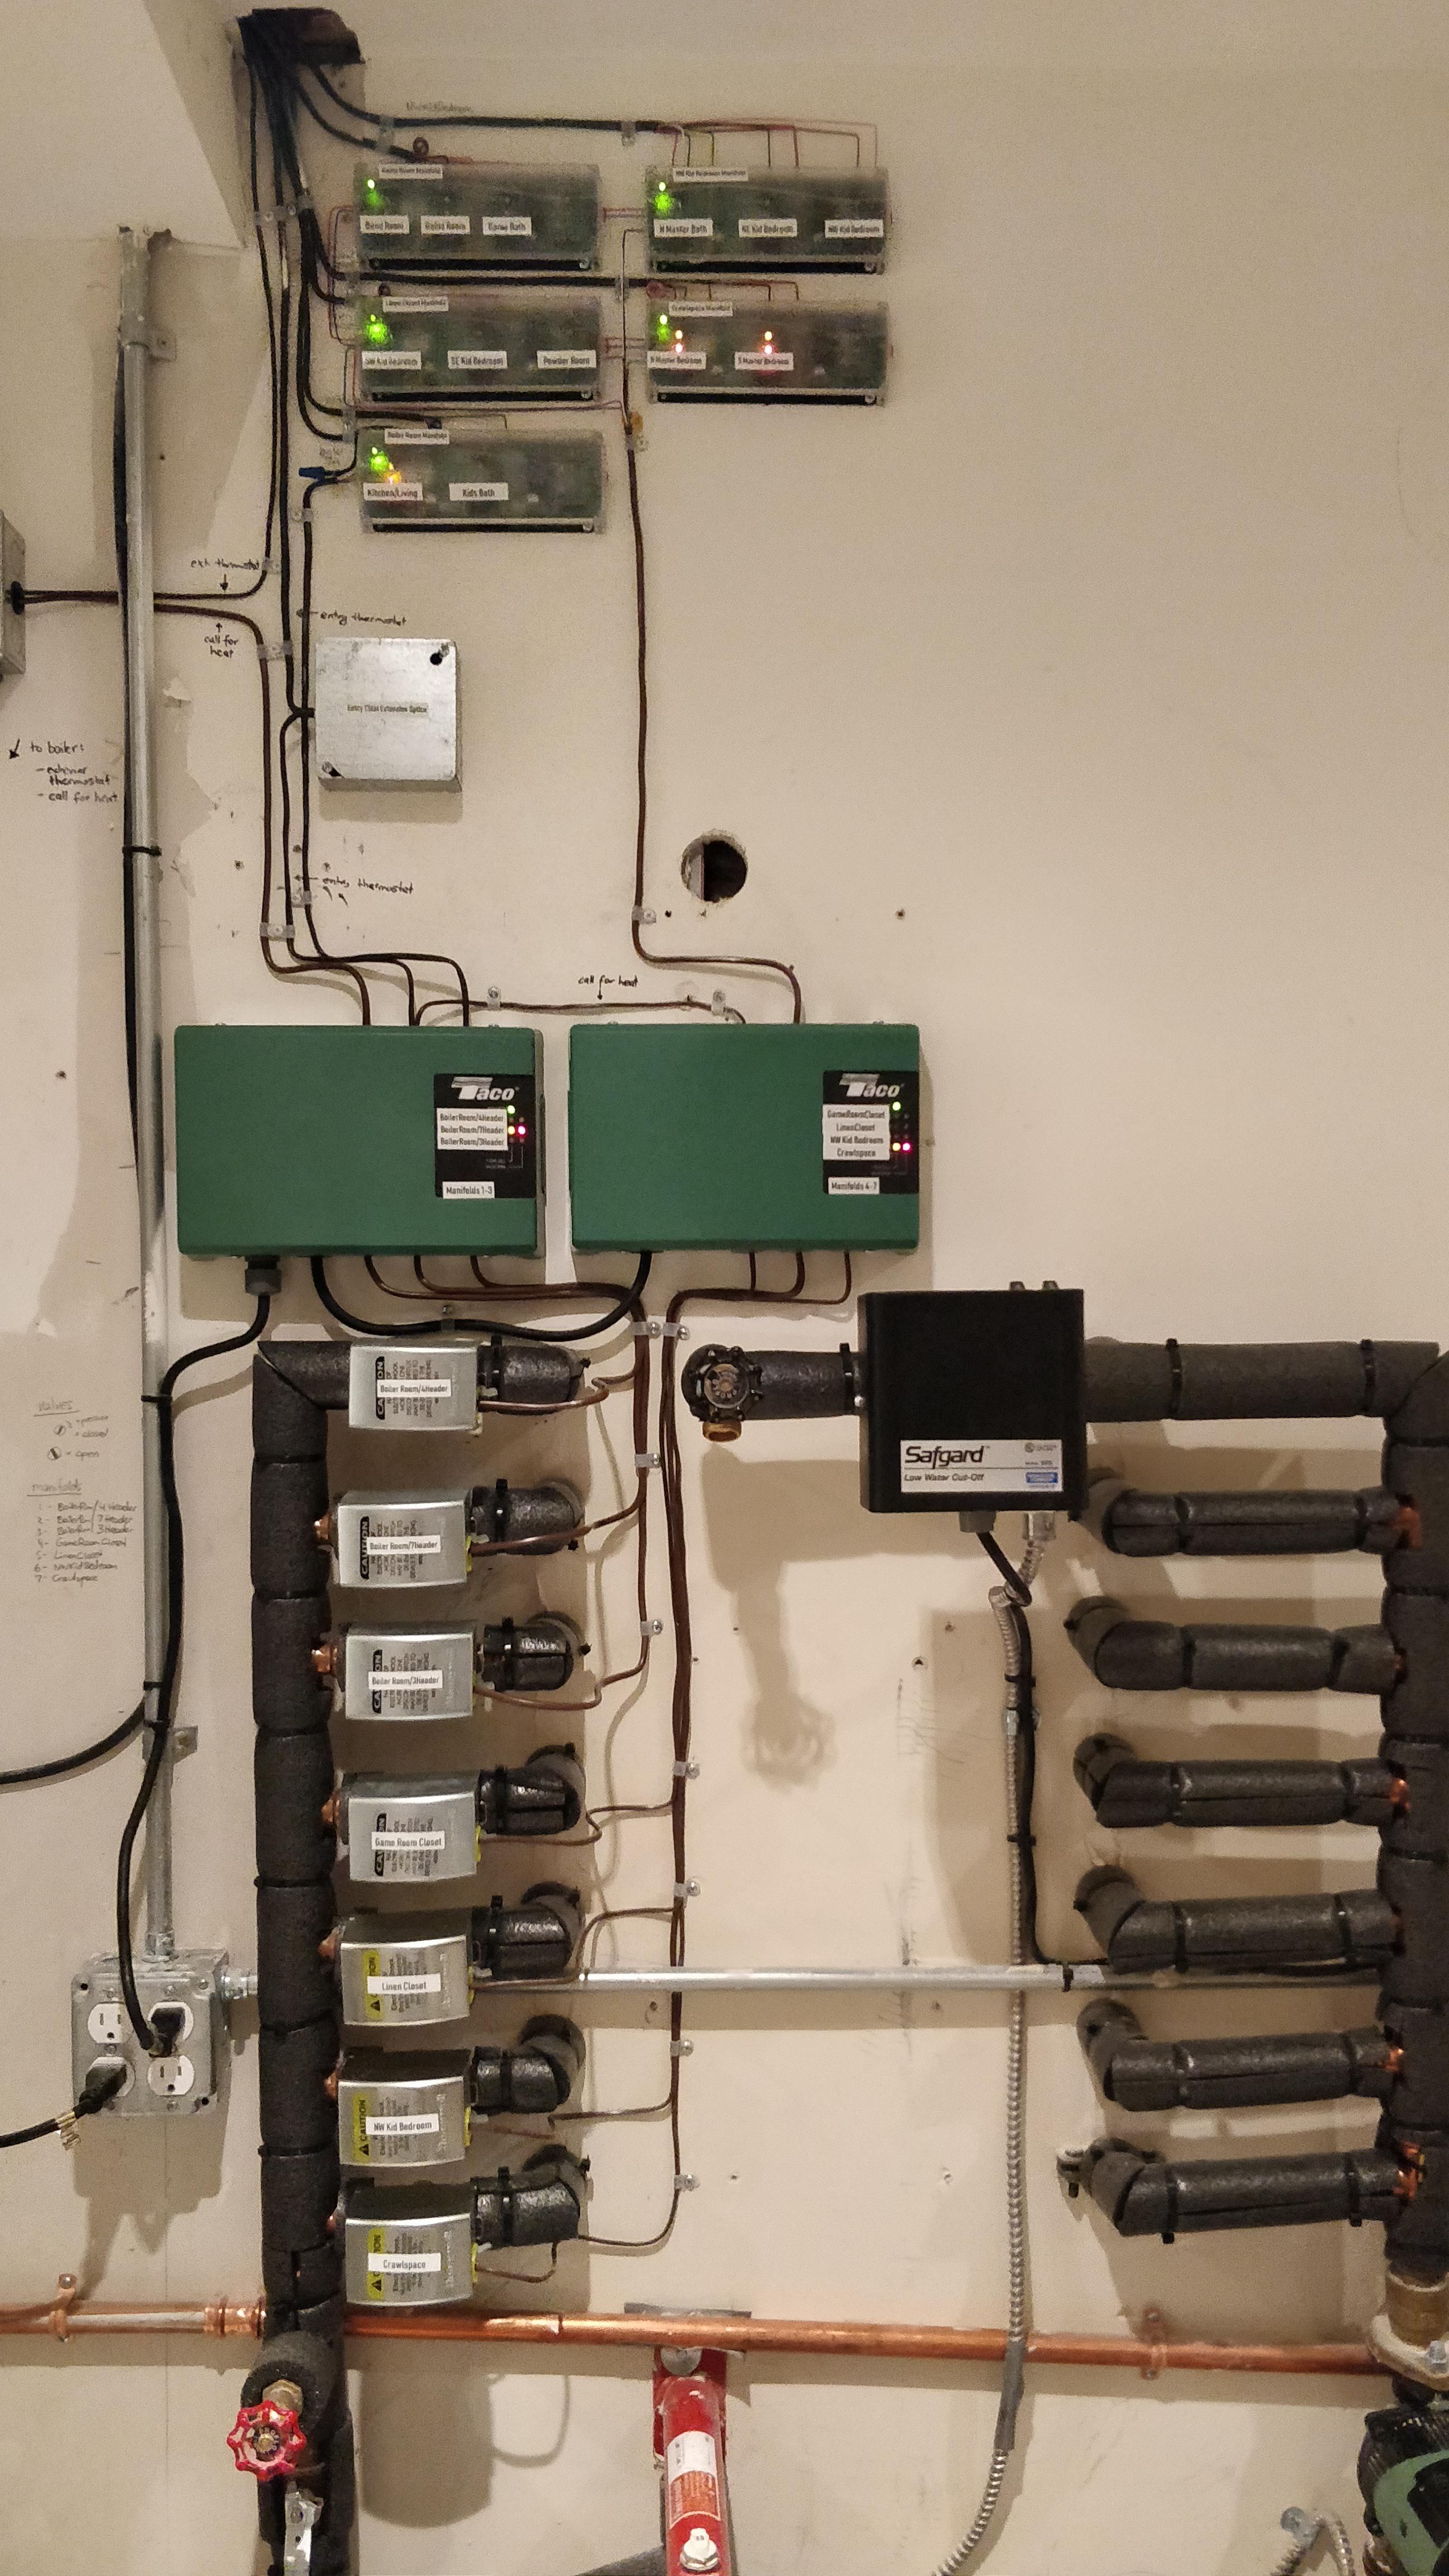
The water topology of the system is as follows:
- A boiler in the boiler room heats water in a closed loop. The loop is propelled with a circulator pump.
- Next to the boiler, a central manifold distributes water to multiple parallel local manifolds. Each distribution line is gated by a valve.
- Each local manifold distributes water to one or more parallel loops per room. Each loop is gated by a telestat[^1].
The control topology is as follows (in reverse order to the above):
- Each room has a thermostat. When the room's temperature falls below the setpoint, it calls for heat.
- The thermostat wire routes to a local manifold's zone control module which adapts the thermostat to the telestat(s) responsible for that thermostat's room's loops.
- The local zone control module also aggregates all of its thermostats' calls for heat into a joint call for heat back to the boiler room.
- Each local zone control module's call for heat routes to a central control board that operates the valve to allow water to flow to the calling local manifold.
- The central control board also aggregates all of its local modules' calls for heat into a joint call for heat to the boiler for the boiler to get rolling.
- The boiler powers up the circulator once the setpoint for the water temperature has been reached.
- The circulator auto-adjusts its flow speed based on the temperature difference between the water getting sent out from the boiler room to the water coming back.
For an additional level of complexity, the call for heat from the thermostat causes the local zone control module to energize the telestat(s). When the telestat(s)'s end switches confirm that the loop is open (several minutes later[^2]), the local zone control module forwards the call for heat. Similarly, the central control board doesn't forward a call for heat until the corresponding valve's end switch confirms that the valve is open. I believe the reasoning here is that this prevents the circulator from trying to push into a fully closed system. However, when I wired my last house's radiant system (my contractor at the time let me do the electrical work in return for a lower price) we didn't bother with any of that and it probably isn't really necessary.
So, easy, right?
When our house was built, our contractors placed the local zone control modules next to the corresponding local manifolds. They left most of the valves on the central manifold permanently open, relying on the local manifolds' telestats to do the work. And finally, they failed to connect the thermostat in the garage to much of anything so our garage was un-heatable. (Having a selectively heated shop space in the winter is amazing, by the by, now that I've gotten it to work.)
This made it so that there was no central place where I could go into dad mode and say, "why is this system running when it feels like it shouldn't be?". The system mostly worked but there was no easy way to debug it, and we'd already had to do a bunch of debugging due to initially mislabeled and incorrectly connected valves.
And with the simple (albeit perfectly normal) thermostats we had, there was no way to view or modify their setpoints centrally or from a phone.
The reflorgling of the system
I hatched this dream of IoT-ifying the entire system; I've had my eyes on the Particle infrastructure for some time and this seemed like a perfect application. I know enough about tech to realize that this is not a particularly complex project. However, I also know enough about tech to realize that all tech will go awry eventually, especially IoT stuff, and I didn't want to have my family murder me in a freezing cold house should my gadgetry ever fail.
As such, I designed a reflorgling of the system that would allow me to retain or move back to the simple thermostats whenever I wanted to, and that didn't rely on any network connectivity to do its job.
I then spent the better part of a week redoing all of the wiring of the radiant heat control system:
- I moved all the local zone control modules into the central boiler room, allowing me to inspect and diagnose the full system in one place.
- I rewired all thermostats to also receive power from central control in addition to their 'call for heat' outgoing signal.
- This means that I no longer need batteries in my thermostats.
- I will be able to run my future IoT thermostats off 24Vac instead of batteries.
Key to making this work was realizing that
- most of the home runs from local manifolds to the boiler room were done with ten conductor cable, and
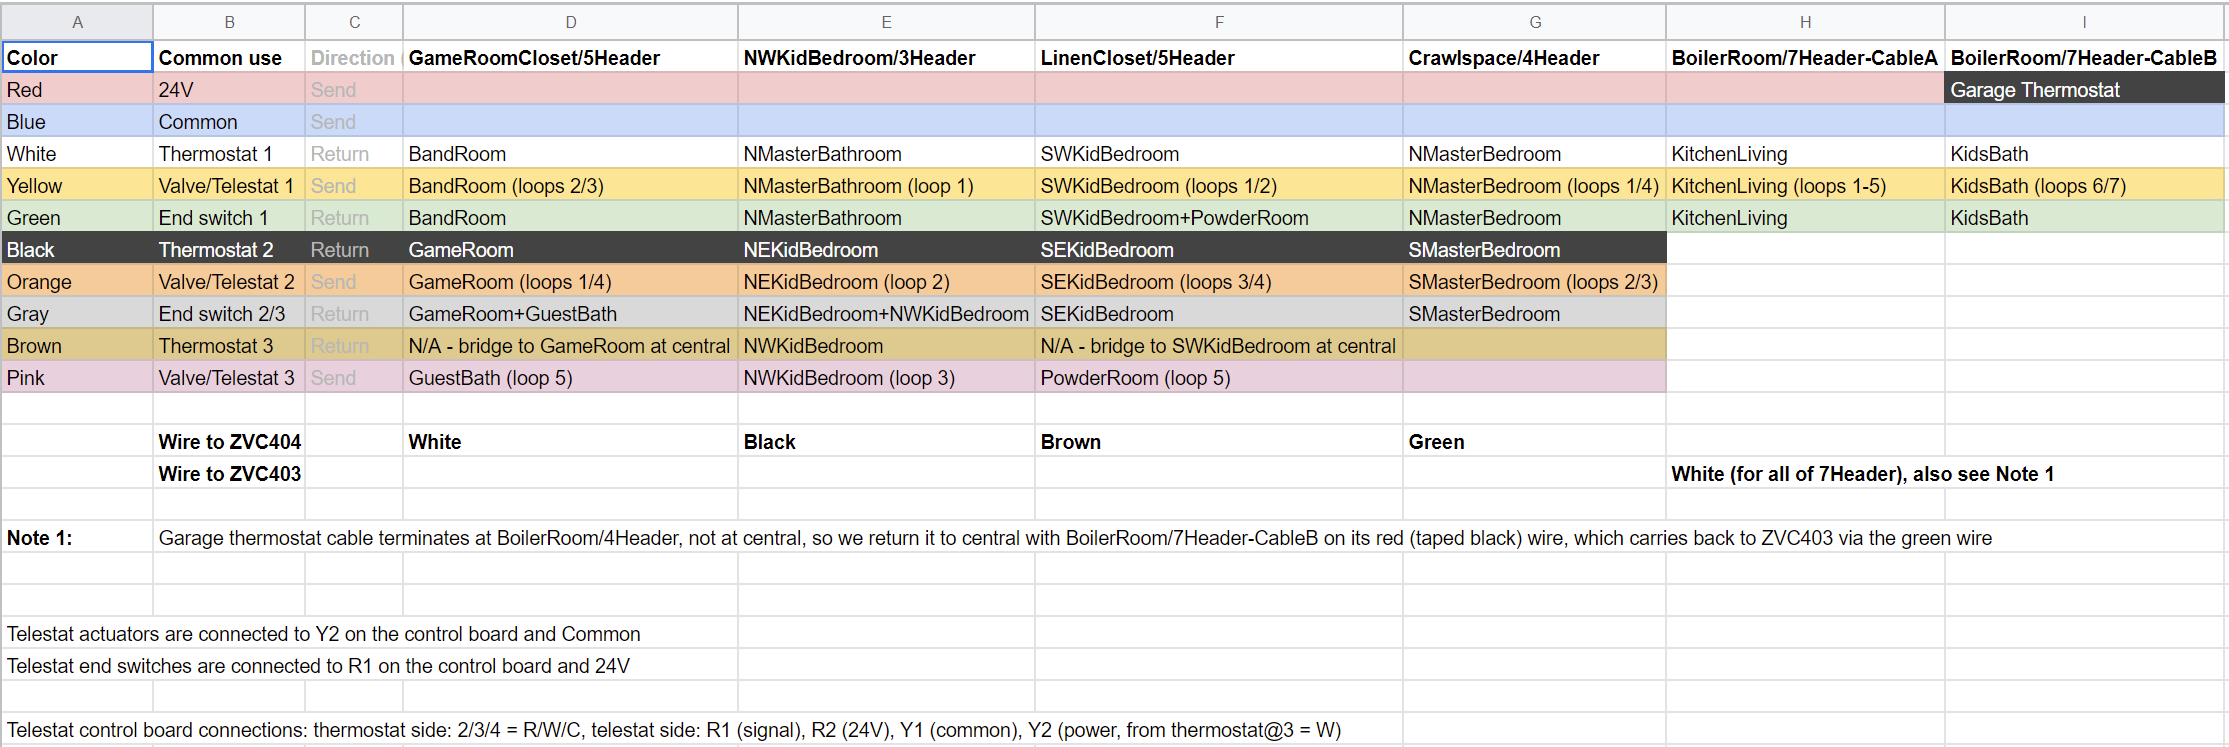
- I could dramatically cut down on the wires running back and forth after reverse-engineering the circuit board layouts of the local and central control modules and figuring out which lines were just repeats of Ground and 24Vac.
I carefully constructed a wiring spreadsheet:

Then I took a few warm-ish days in early November to tear the system apart and rebuild it.


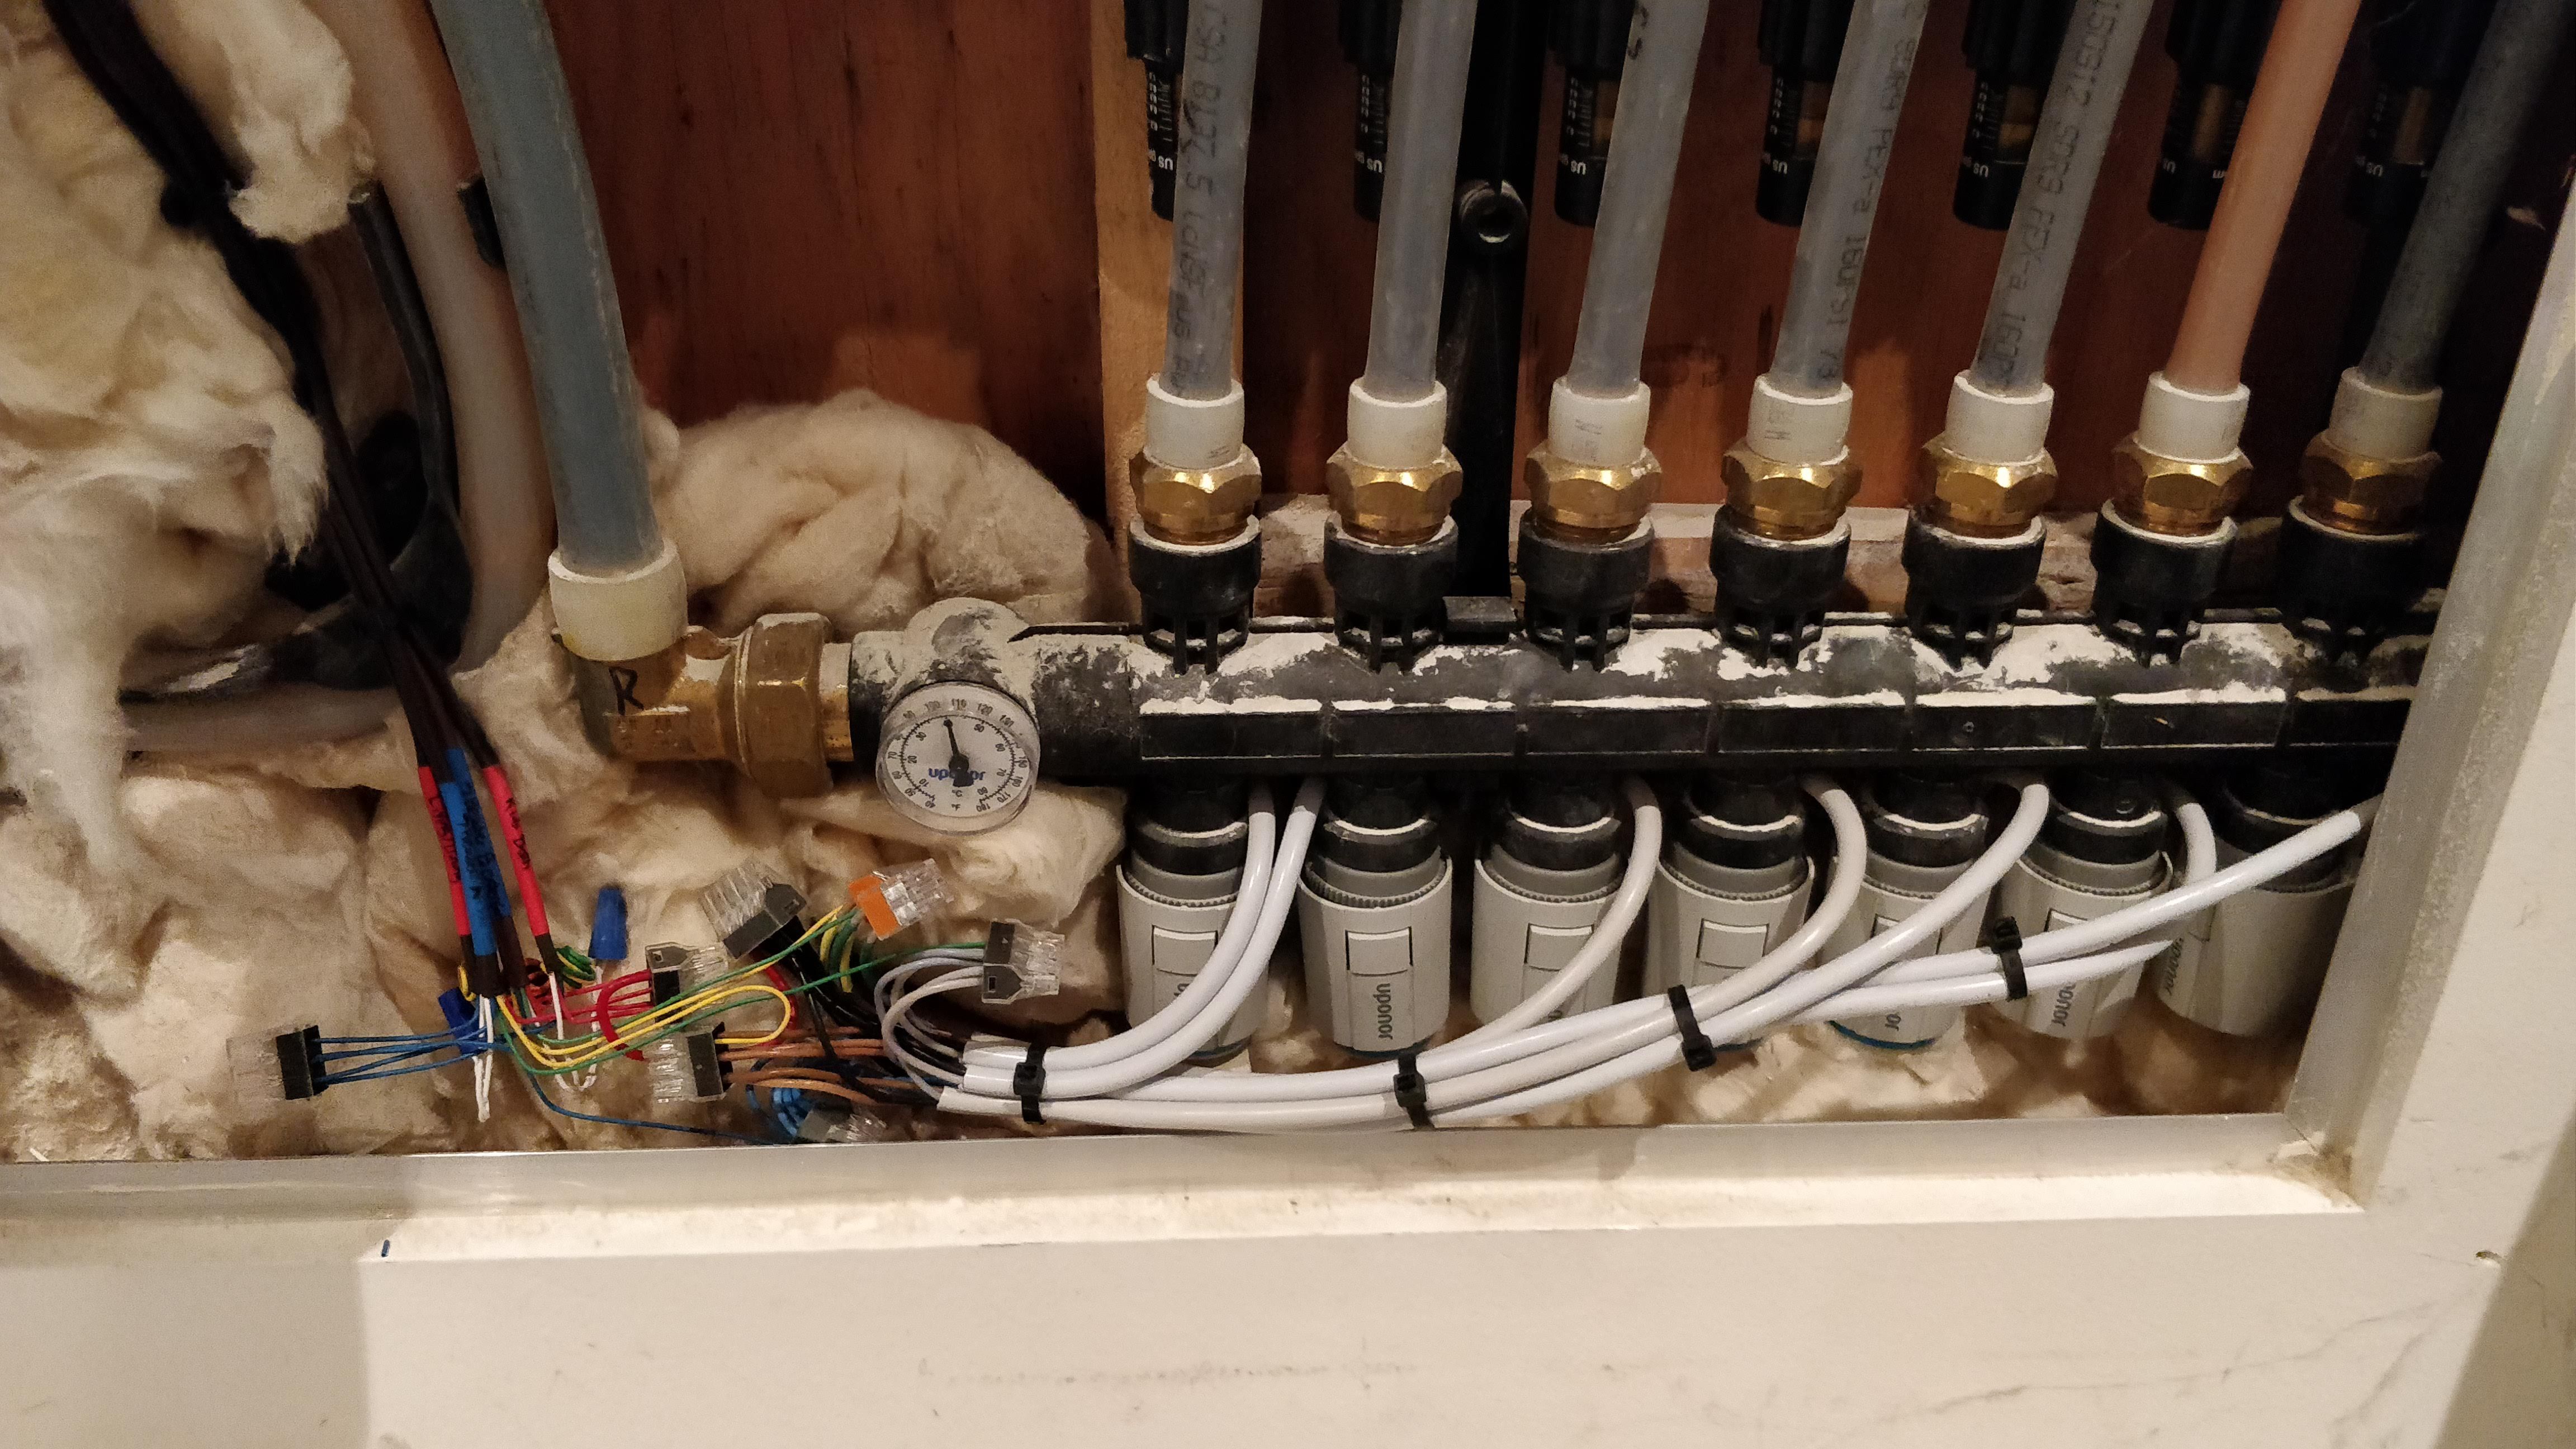
Here's what one of the local manifolds looks like:

I also dealt with a number of sins of the past, including finally realizing that the reason the garage thermostat had never gotten hooked up was that our contractors burnt out the corresponding channel on the central control board so it didn't work. Rather than debugging and replacing that they just disconnected it and said "fuck it".
The distant future / the year 2000
My aspiration with the Particle-based IoT-ified thermostats is not only to allow for more oversight and reign in any small fry fuckery, but also to integrate the system with our security system which should know when any room's windows are open. That crossing the streams flow of information is really my nirvana of environmental conscientiousness, resource conservation, and just all-around extreme "turn off your lights!" dad mode. Someday.
Equipment
For the record, here's the equipment the system is using, in case it'd ever be helpful to anyone:
- Honeywell TH2110DV1008 thermostats
- Uponor EP (engineered polymer) local manifolds
- Uponor A3023522 telestats
- Uponor A3031004 local zone control modules
- Taco ZVC403 and ZVC404 central control modules
- Honeywell V8043E5061 zone valves
- Taco Viridian VT2218-HY1-FC1A01 circulator
- TriangleTube ACV Prestige boiler
Lessons learned
- Reverse-engineering circuit boards is really fun and easy to do by using macro mode on my phone's camera to help resolve tiny details like chip labels and small traces.
- 10 wire (18/10, technically) thermostat wire is hard to come by. I found it by the foot at a hardware store in Ballard of all places - yay again for small mom-and-pop shops.
- The Honeywell valves are enragingly crap.
- They're finicky to install or replace on a valve base.
- (On the other hand it's nice that the control heads are replaceable at all.)
- Their 'hold open permanently' lever needs to be used carefully, gently, and ideally never - it's a thin piece of sheet metal that warps easily and then the entire thing stops working.
- Their part numbers are hatefully obtuse.
- Recall these are
V8043E5061valves. - There's a replacement head for
V8043Evalves (SKU40003916-026). - But does it fit the
V8043E5061valves? Of course not. - The real replacement head is for
V8043E 5000 Seriesvalves, because of course those are different fromV8043Eseries valves. - The real replacement head is SKU
40003916-526rather than SKU40003916-026because fuck you. - Why would anyone in their right mind do this? Why?!
- Recall these are
- They're finicky to install or replace on a valve base.
End notes
[^1]: Where valves control flow using a motor that moves a ball or pressure cap, telestats heat a bubble of oil to move a spring-loaded pressure cap. This means they're slow but also silent, gentle, and tiny.
[^2]: Our local zone control modules have enough intelligence to also pack in a timer that says "fuck it" after two minutes of waiting for the telestat and then just propagates the call for heat upstream anyway.
| « Insulation | Drywall » |